How to Manage Otodata Data with the new Job Sheet App
How to Manage Otodata Data with the new Job Sheet App
This guide provides detailed instructions on managing Otodata "Data" within the Job Sheet App. Make sure you are logged into Zoho, then navigate to "Creator". Here is where all the data comes together and feeds the dashboards automatically. We have it set to sync every 3hrs currently.
Go to creator.zoho.com
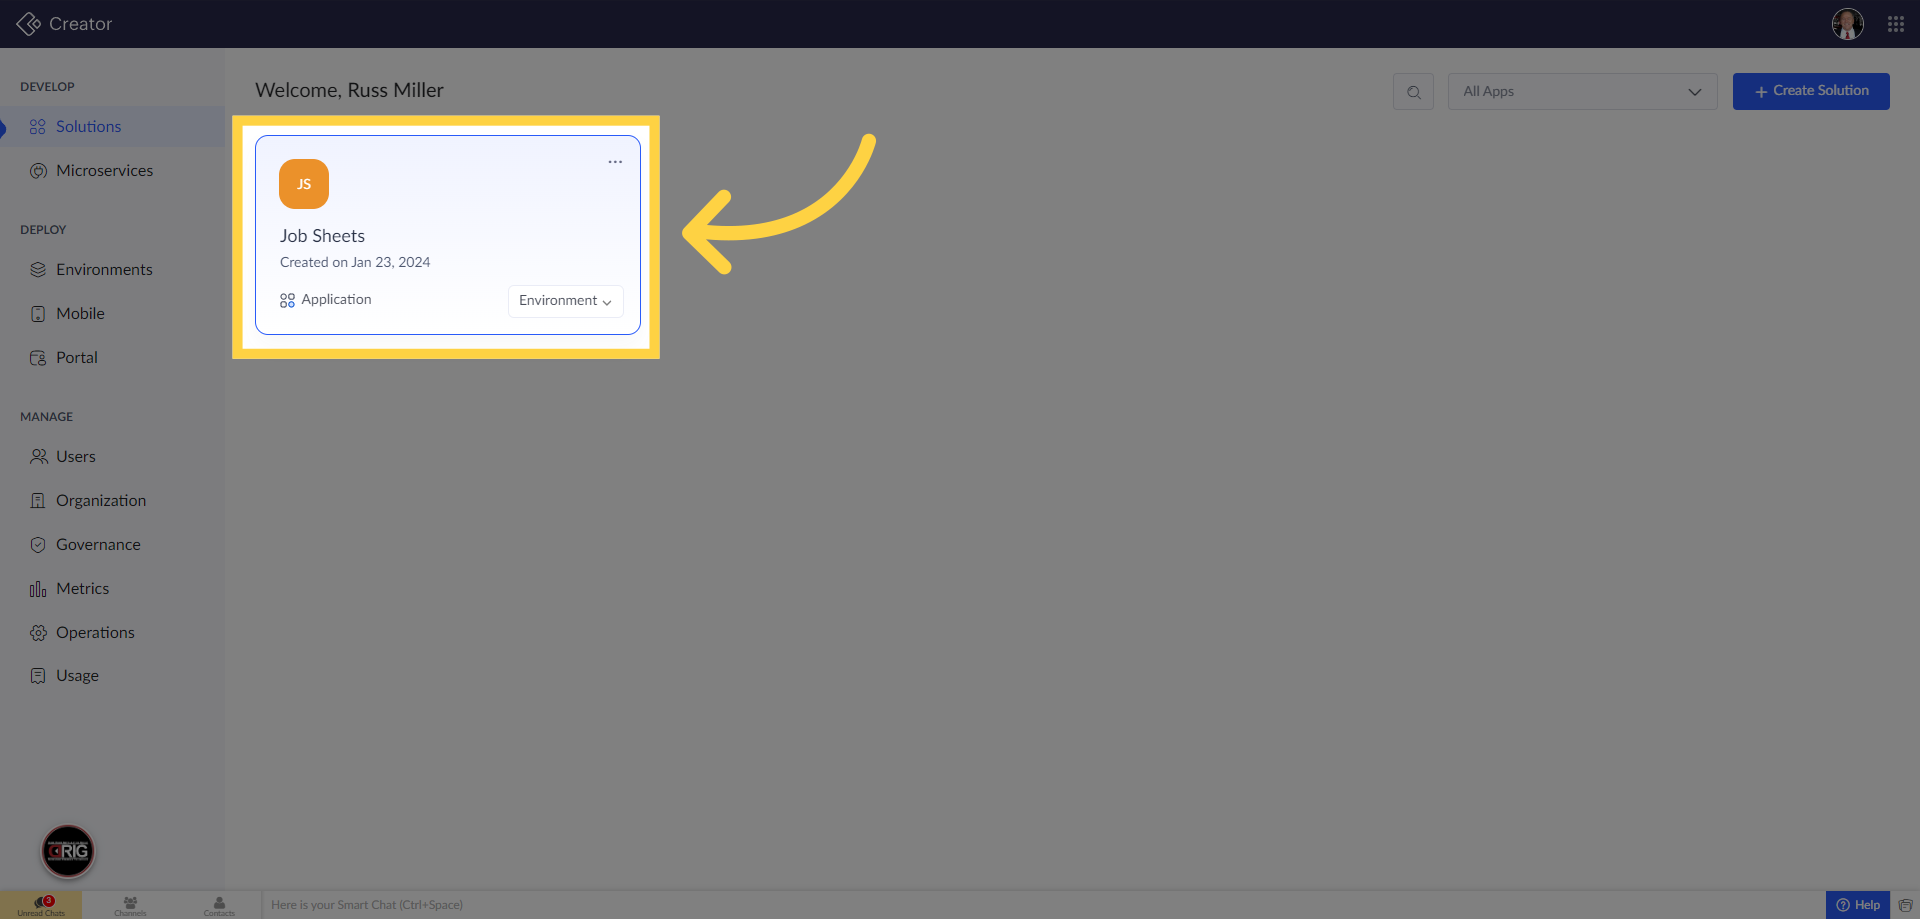
1. Click "Job Sheets"
Once in Creator, click on the "Job Sheets" app.
2. This is the Job Sheet form. Ignore.
This is the Job Sheet form built into the app. Ignore this until we replace Job Sheet 2.0. You can use this to add 1 entry if you would like.
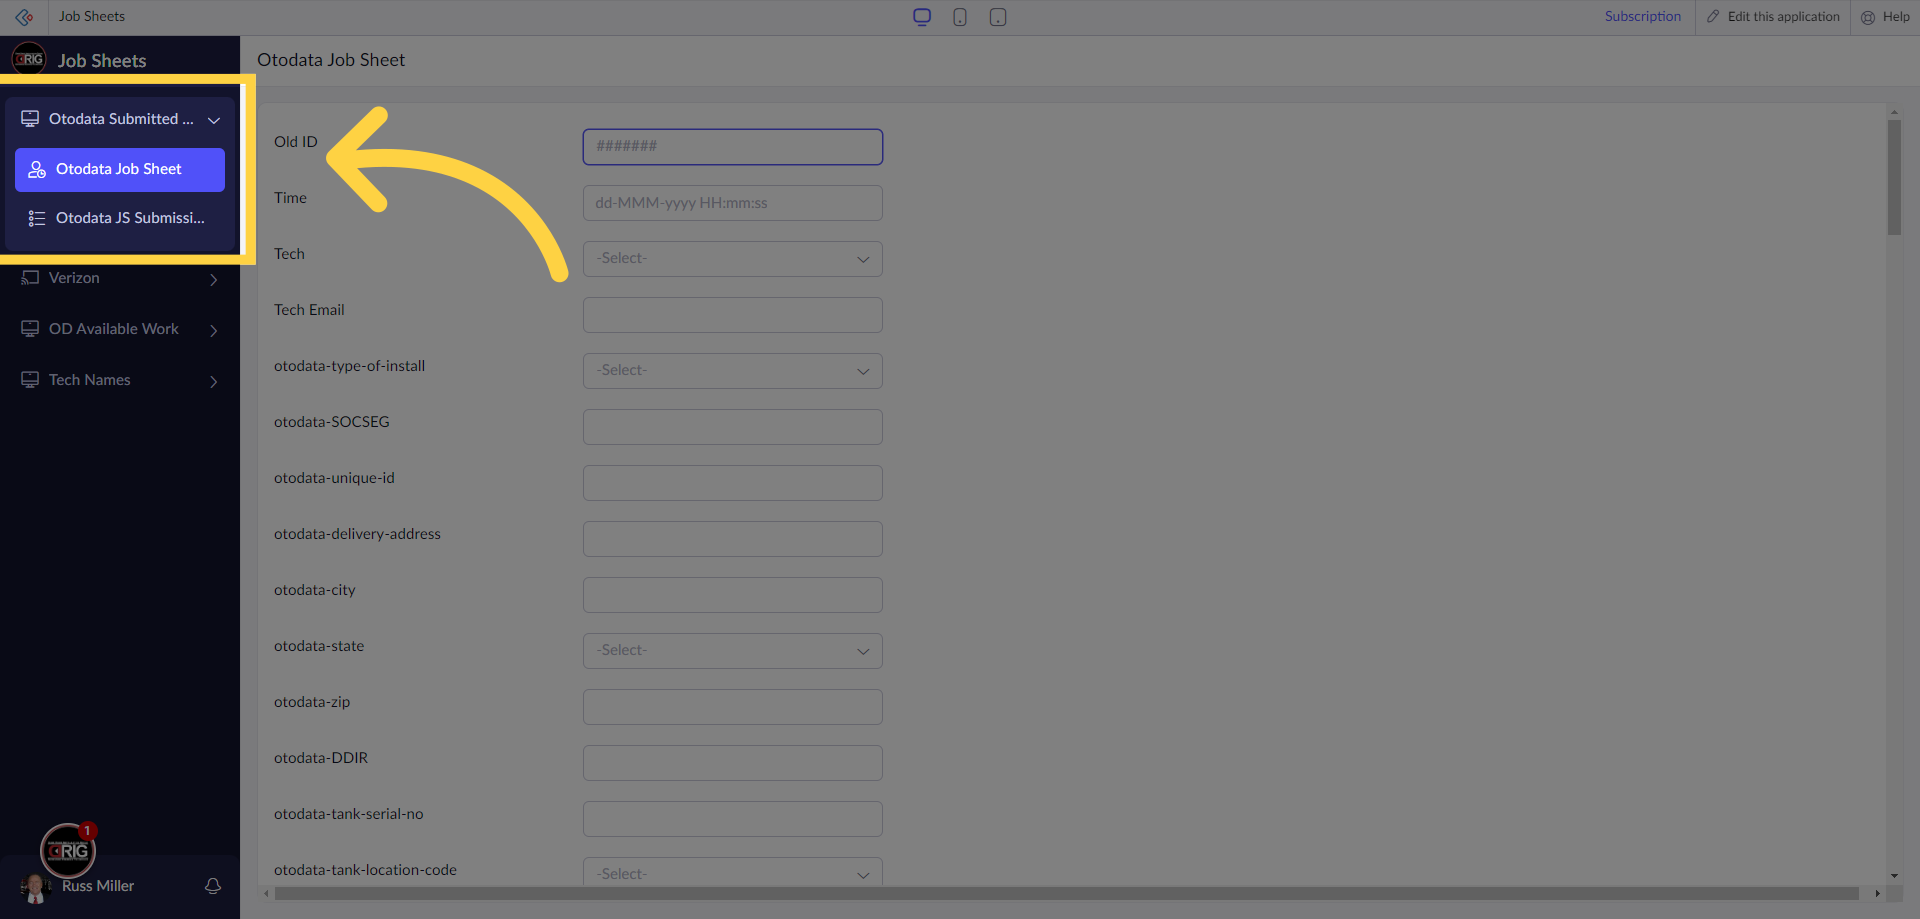
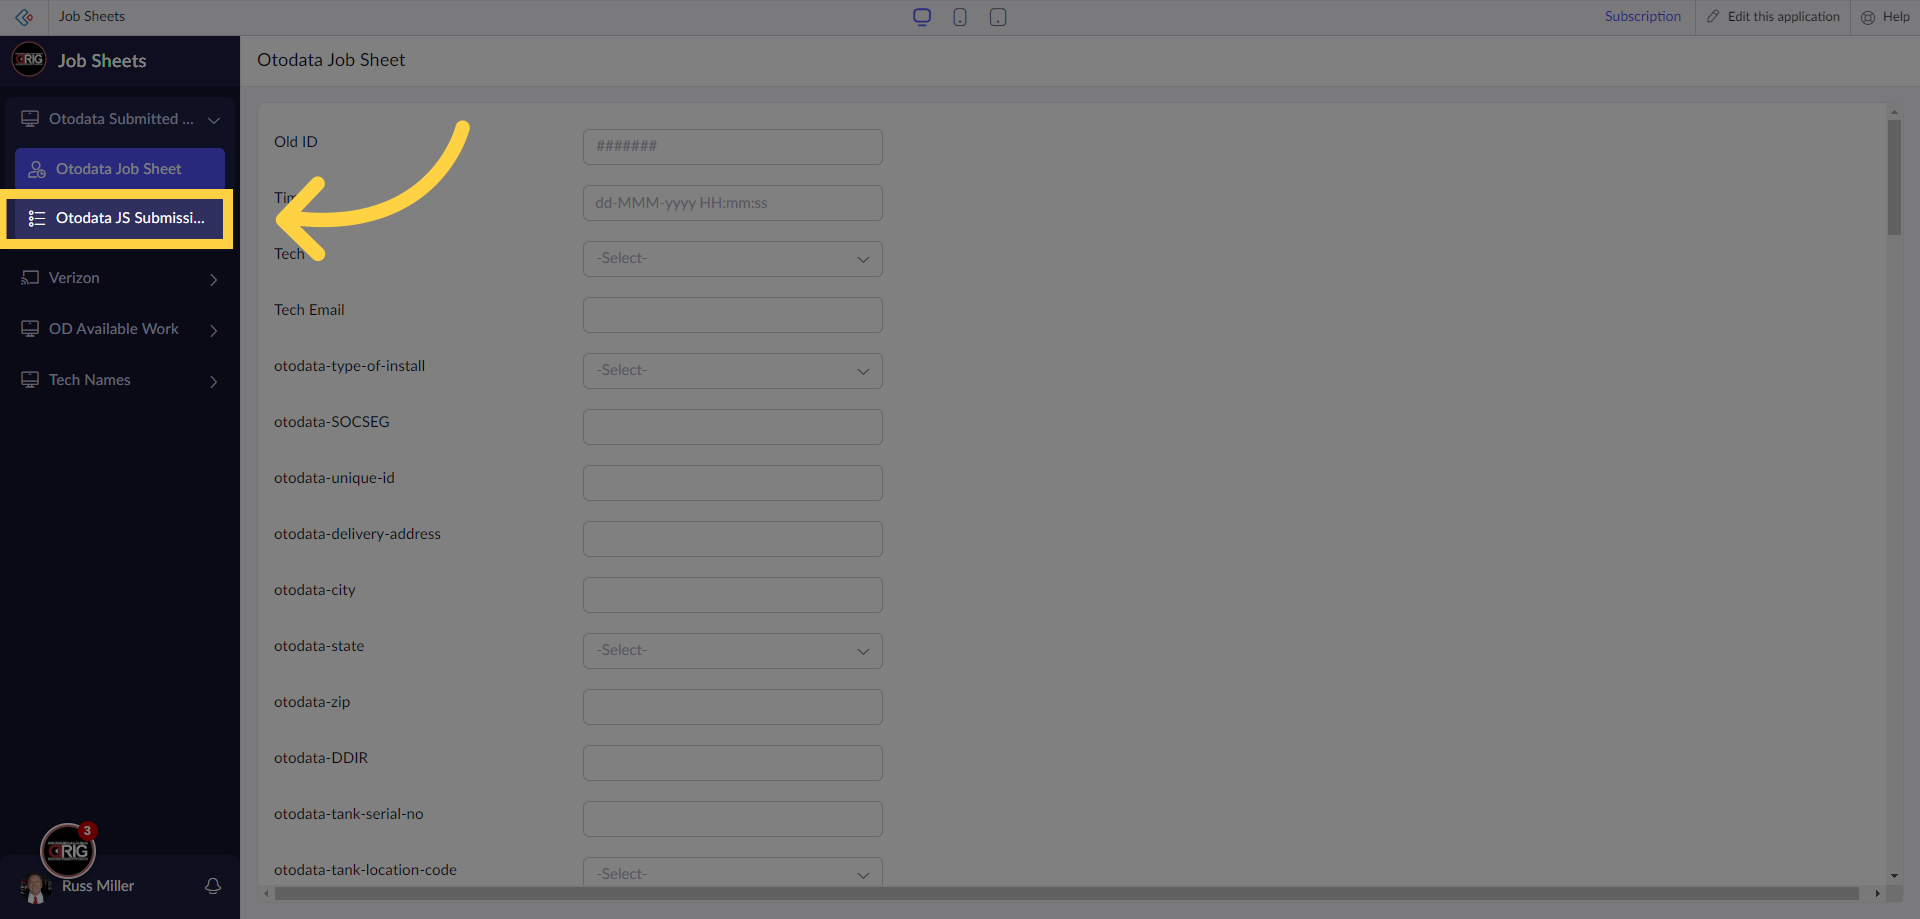
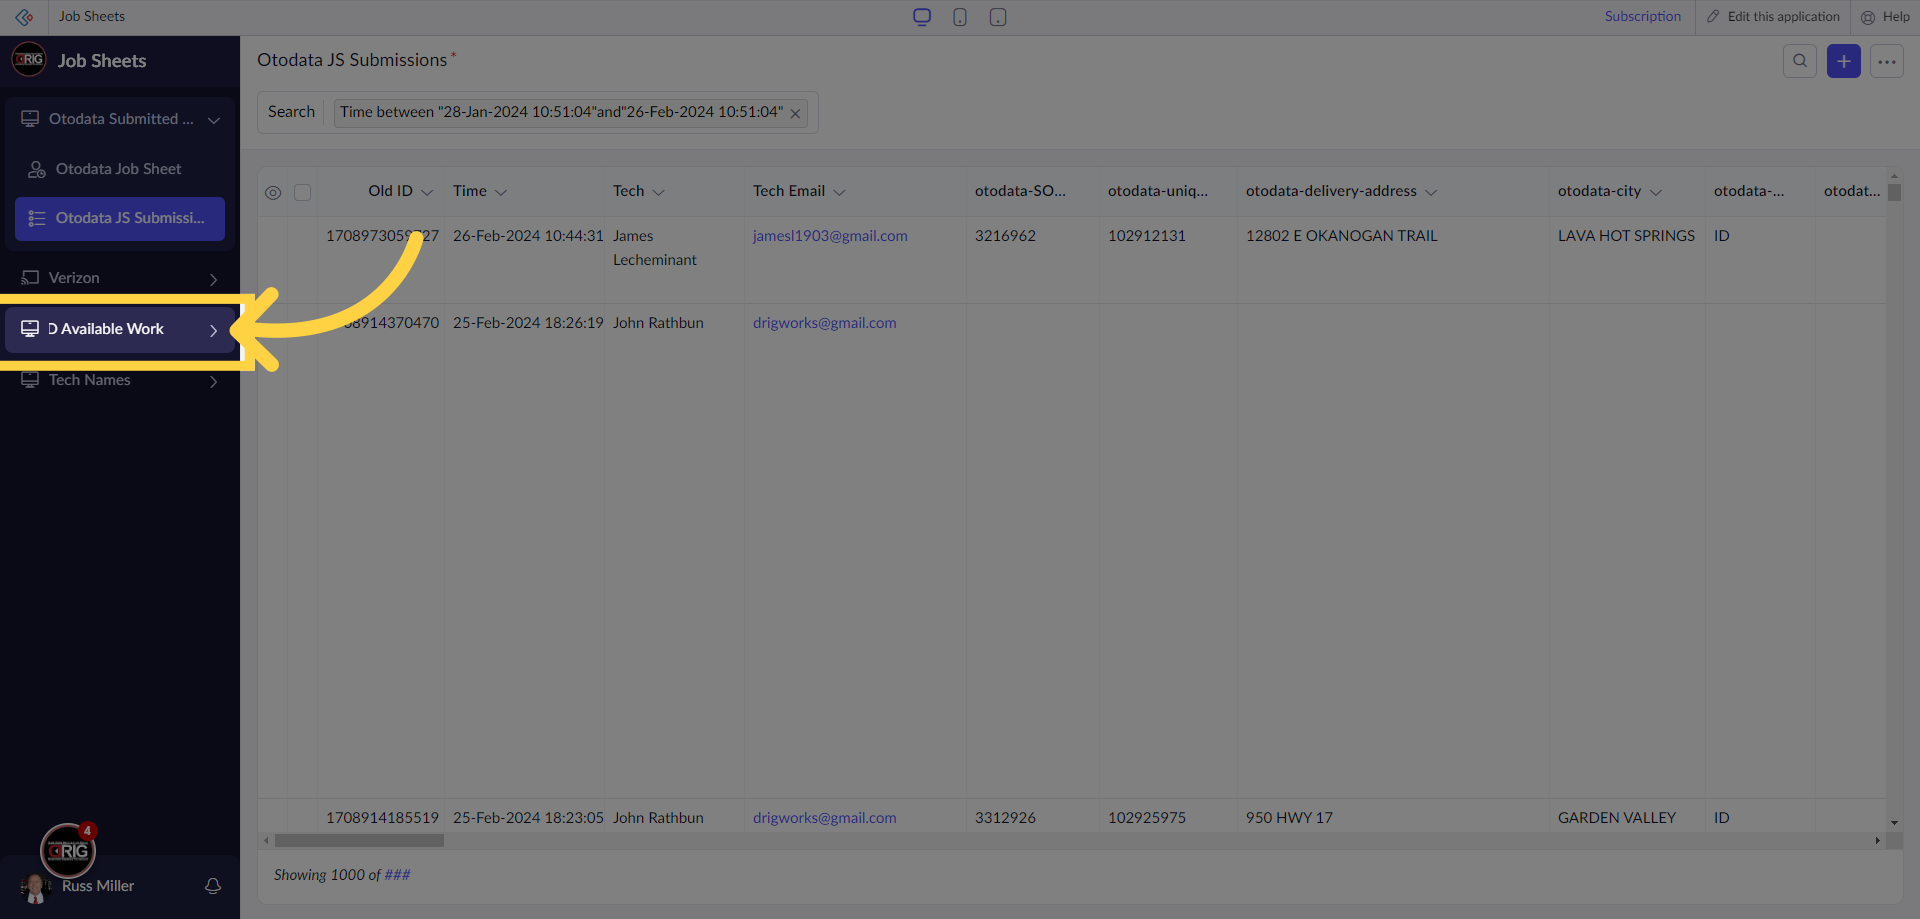
3. "Otodata Job Sheet Submissions"
Here is where all job submissions go when they are submitted from Job Sheet 2.0. This feeds the dashboards.
4. Click "Available Work"
Click on "Available Work" to see and work with the available work data. In here you can change info, delete it, and import.
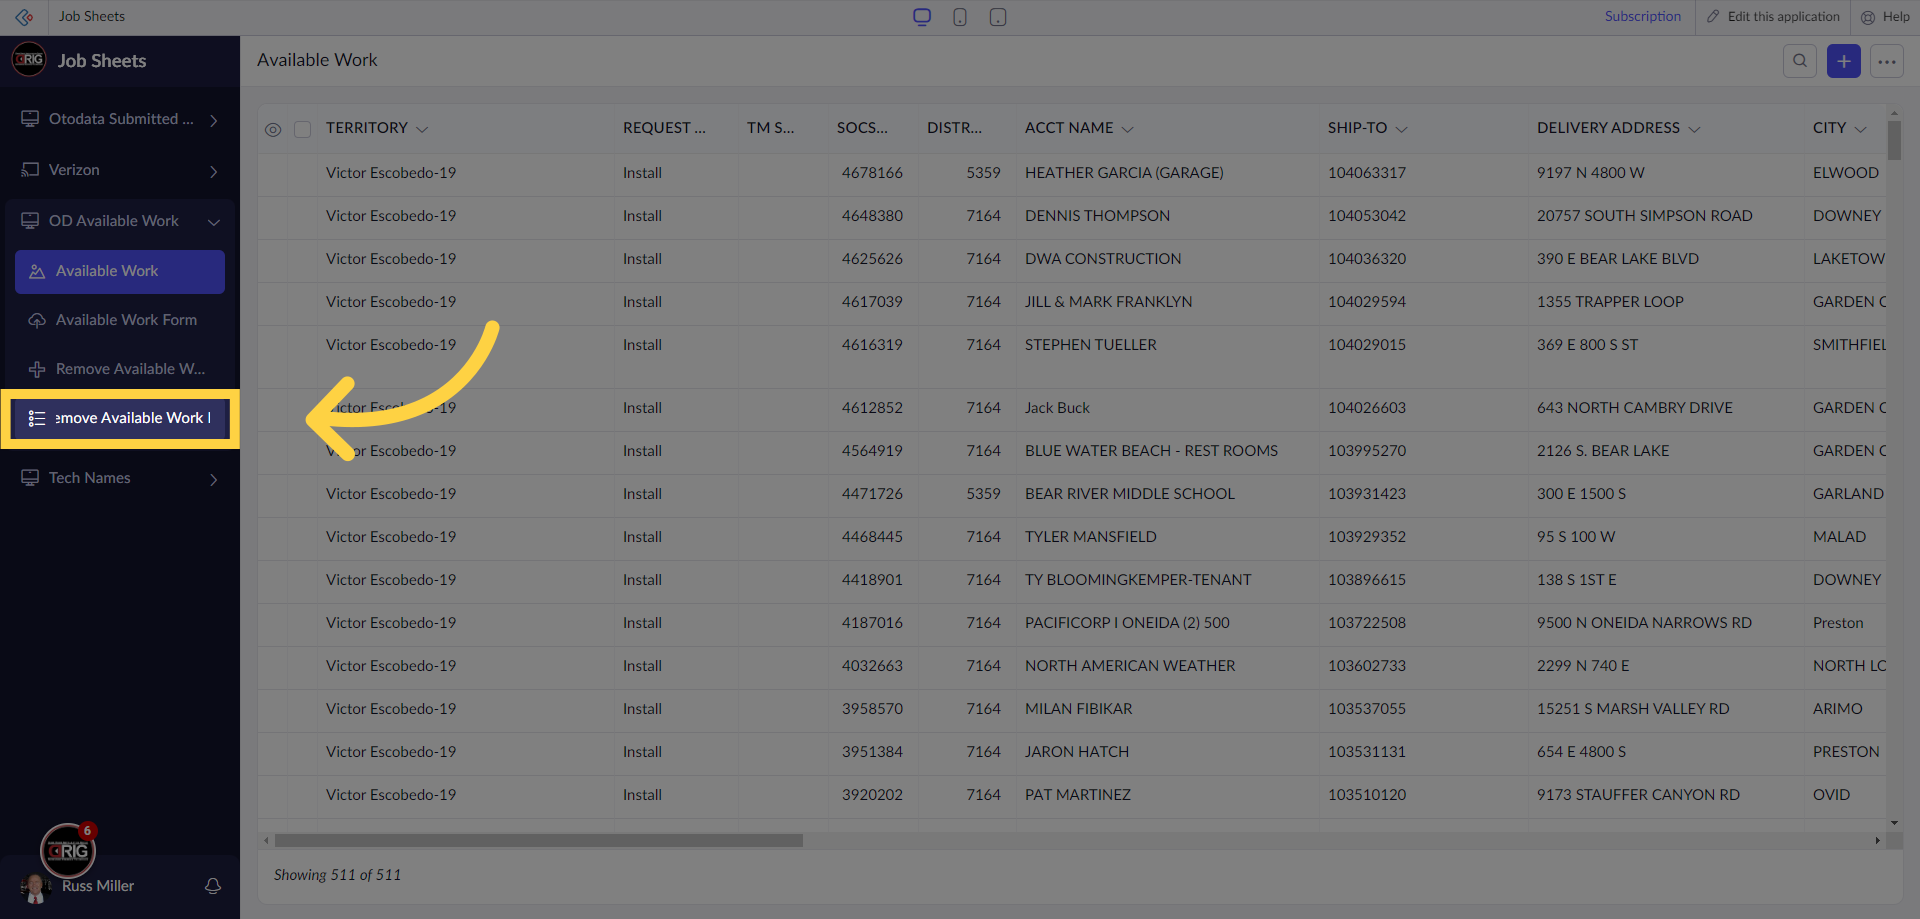
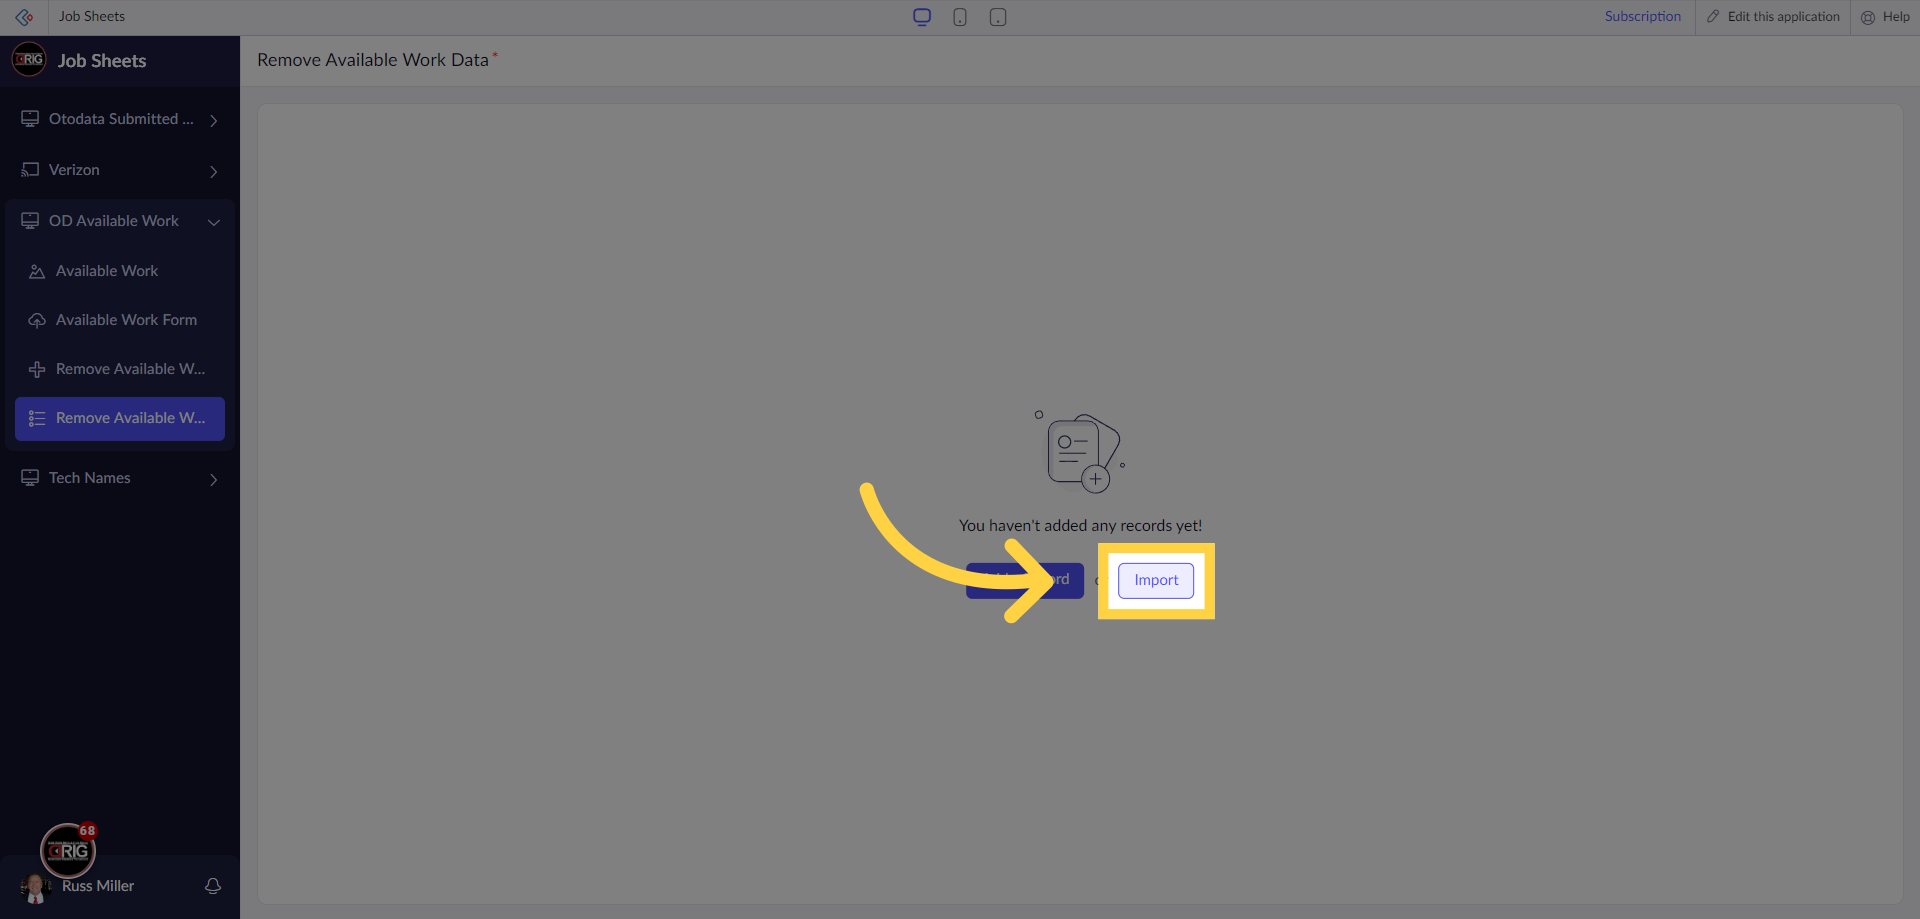
5. Click "Remove Available Work Data"
In "Remove Available Work Data" you can import data to have it automatically remove entries within "Available Work", in bulk.
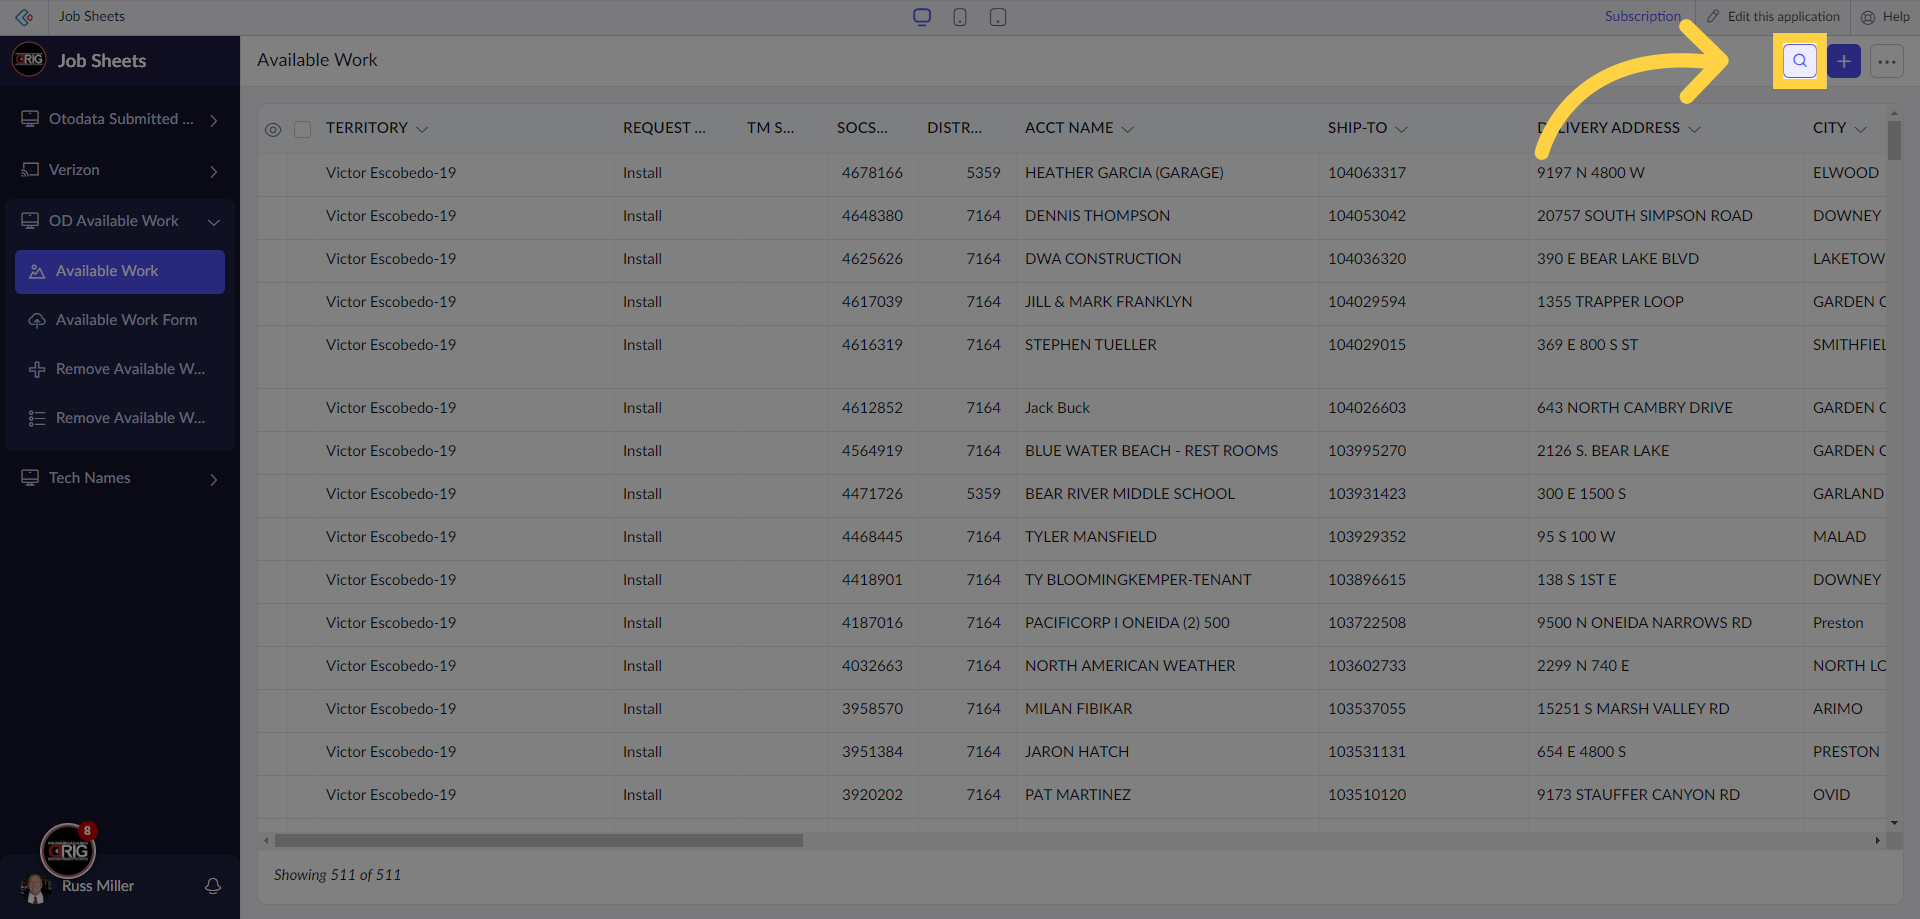
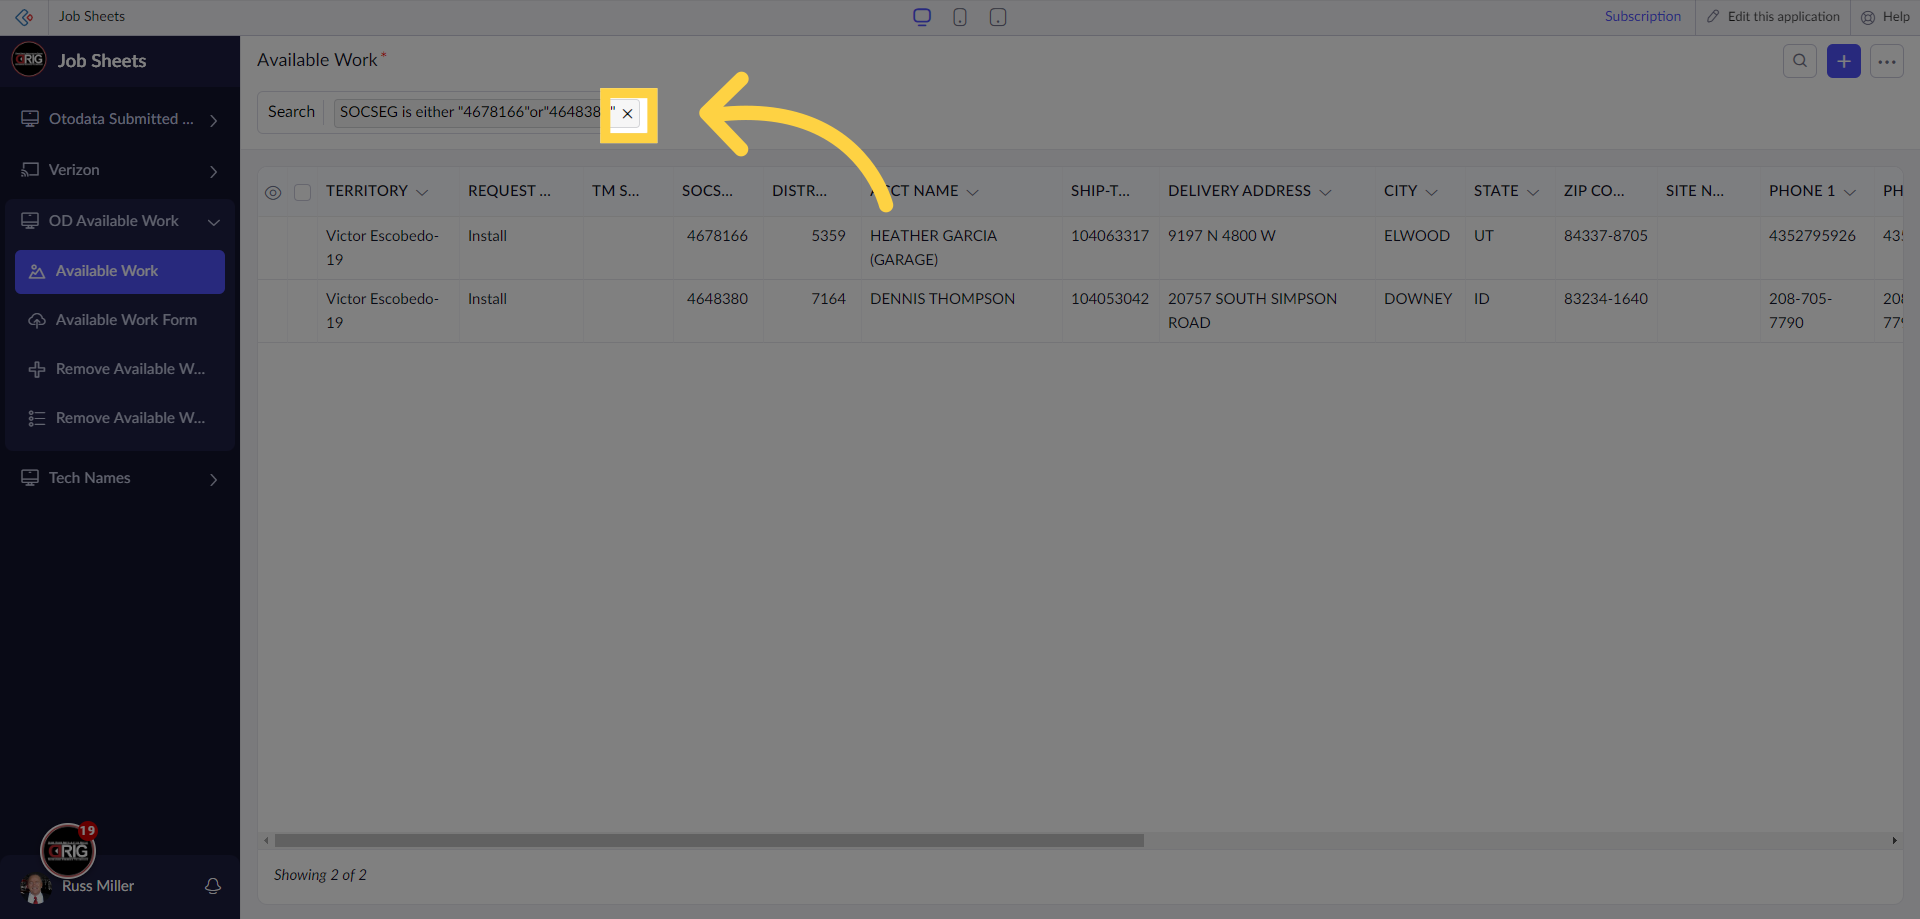
6. Click the "Search" Icon
Let's navigate back to the Available Work section. We will first explore the robust search feature.
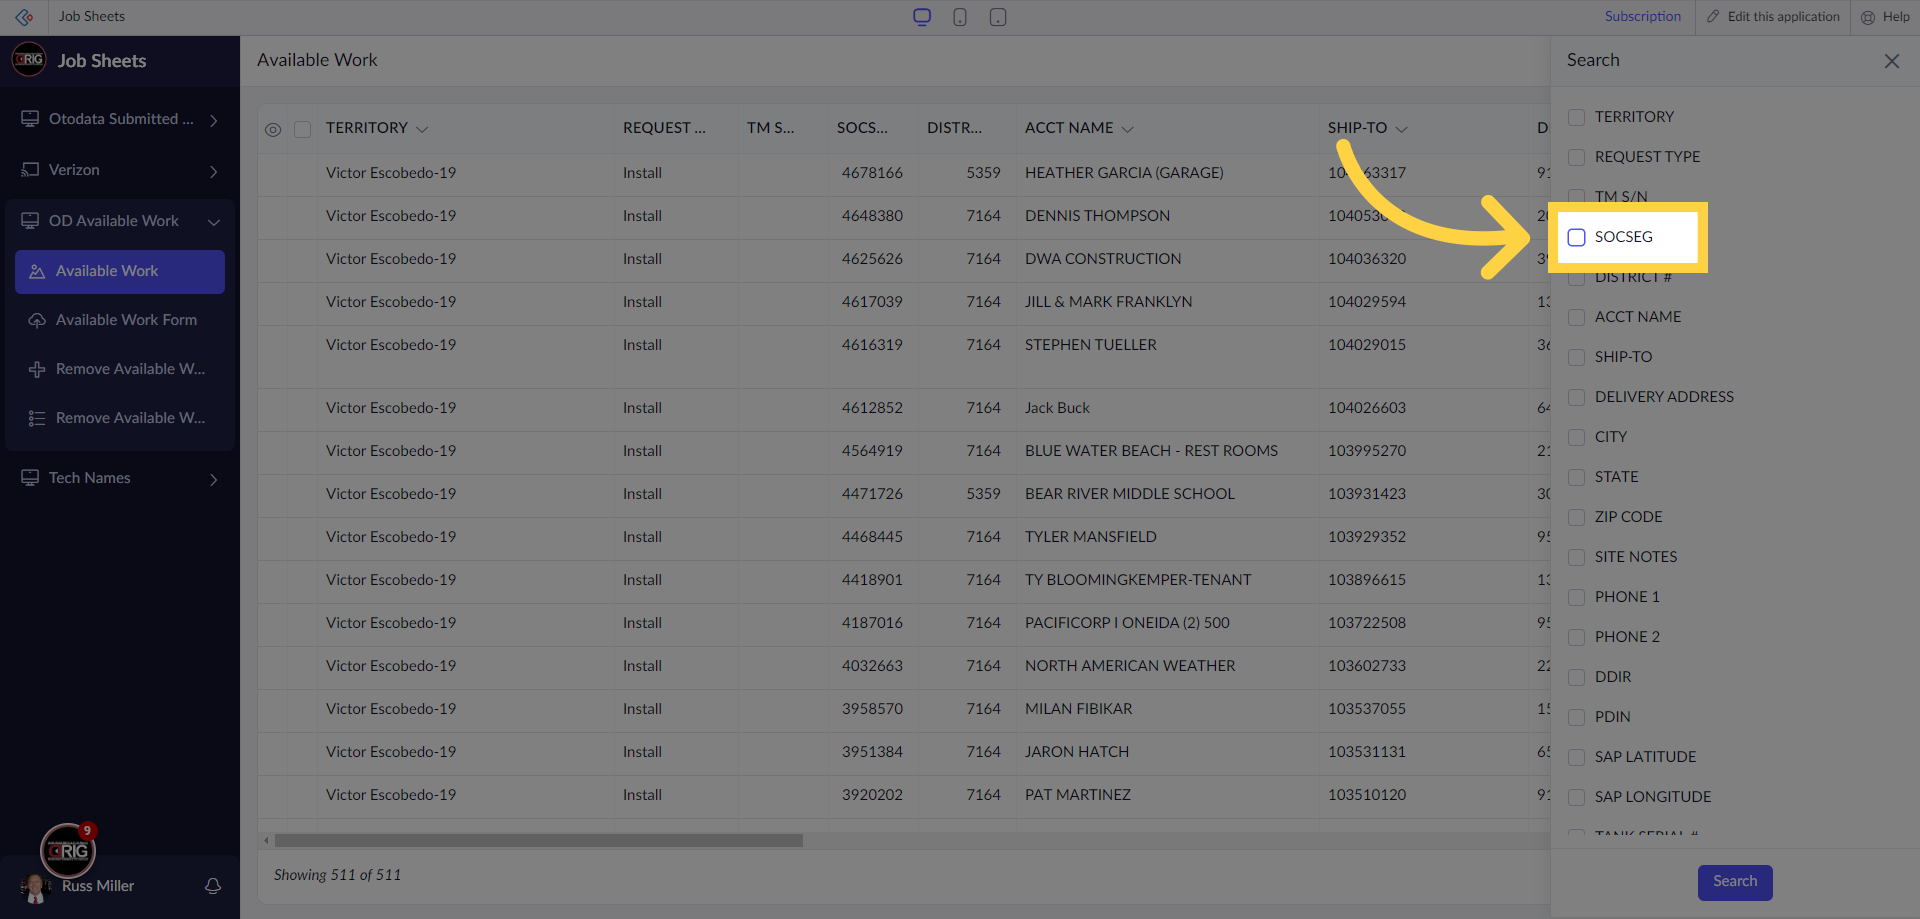
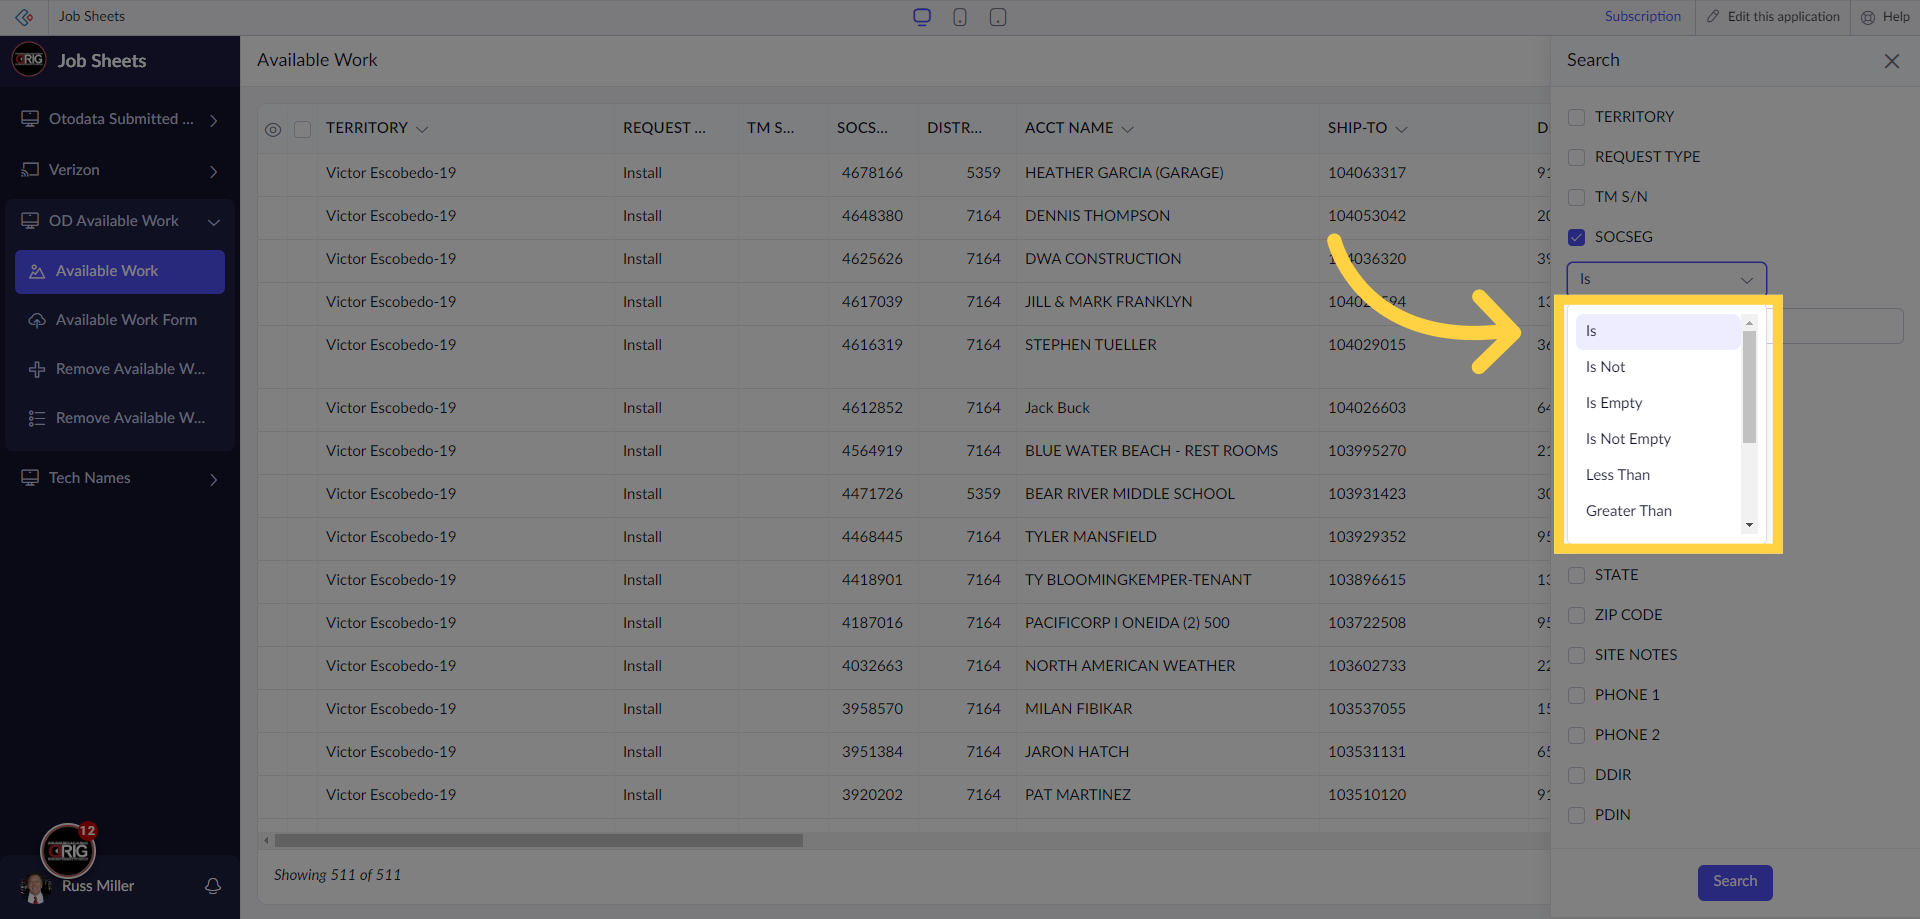
7. Click "SOCSEG"
In the search panel, you will see all the fields you are used to with Otodata. In this example, click on "SOCSEG".
8. Click on the drop down
To filter the data, click on the drop down to define how you want to drill down.
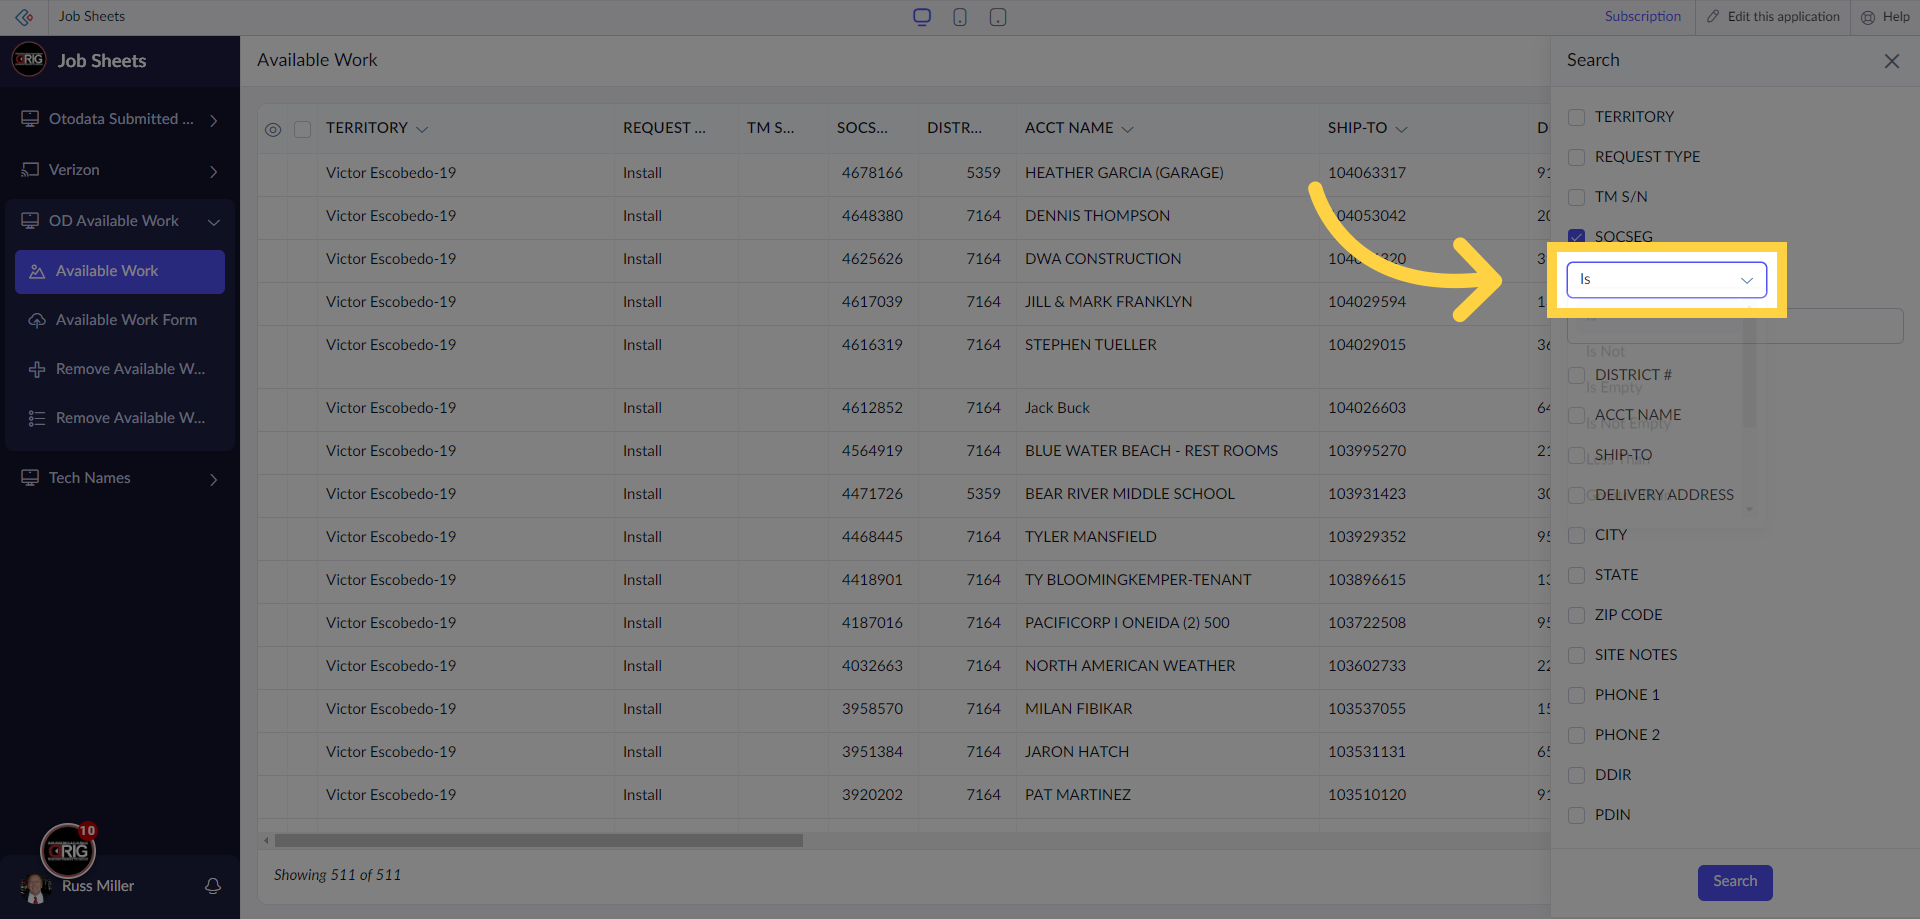
9. Choose the option that fits best for your need
These are self explanatory, the most common choice being, "Is", which is equal to what you type into the search field.
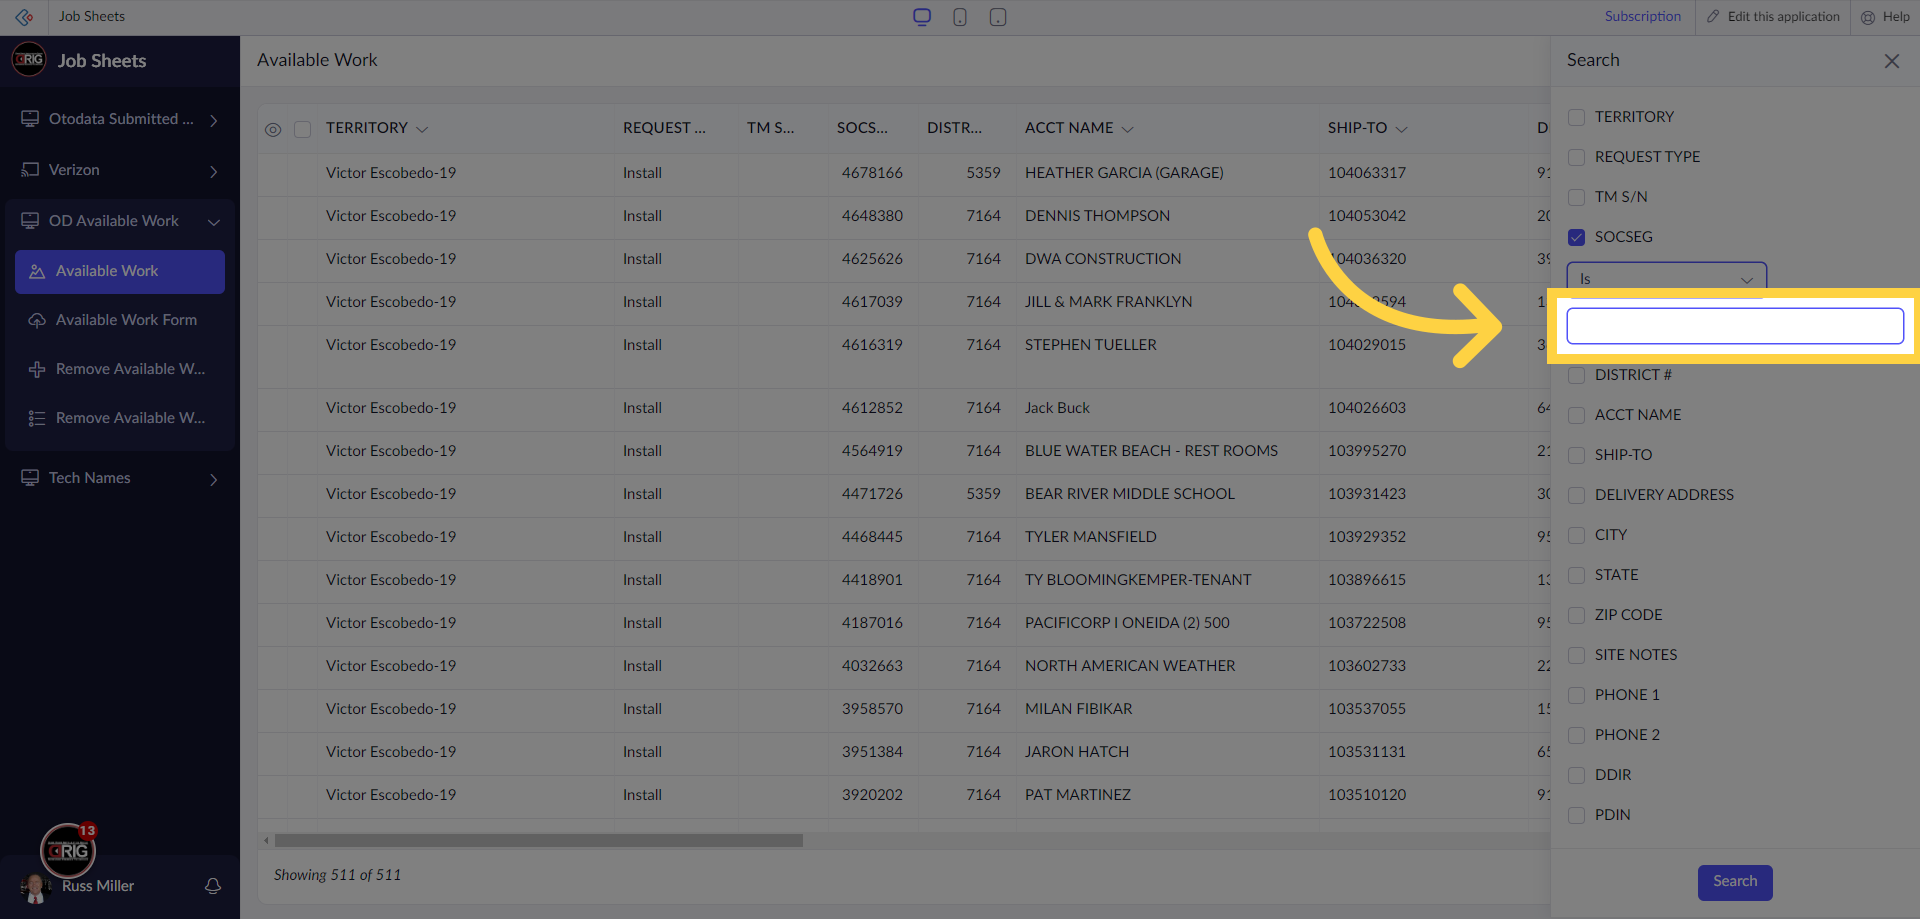
10. Type in your SOCSEG #
Type in your SOCSEG number.
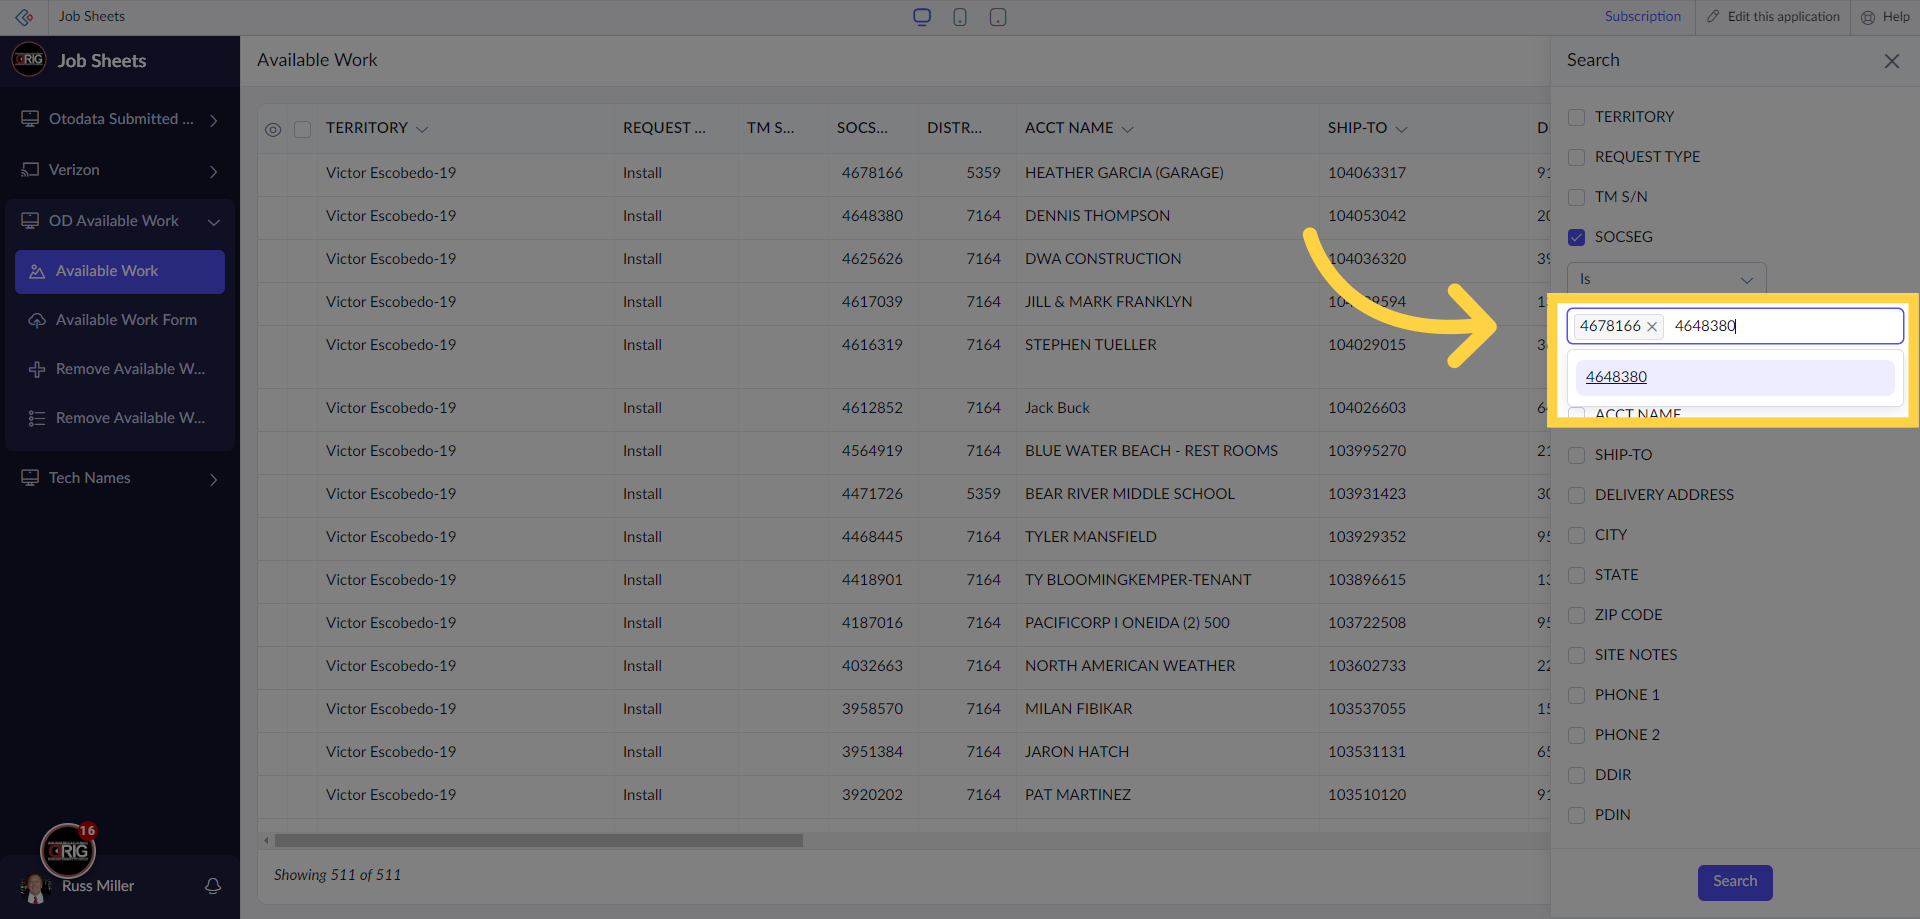
11. Fill "4678166"
Once you type in the number, hit "enter", this allows you to add multiple.

12. Enter Multiple Values
You can add multiple numbers. You can also copy and paste comma separated values.
13. Click "Search"
Initiate a search for the entered data.
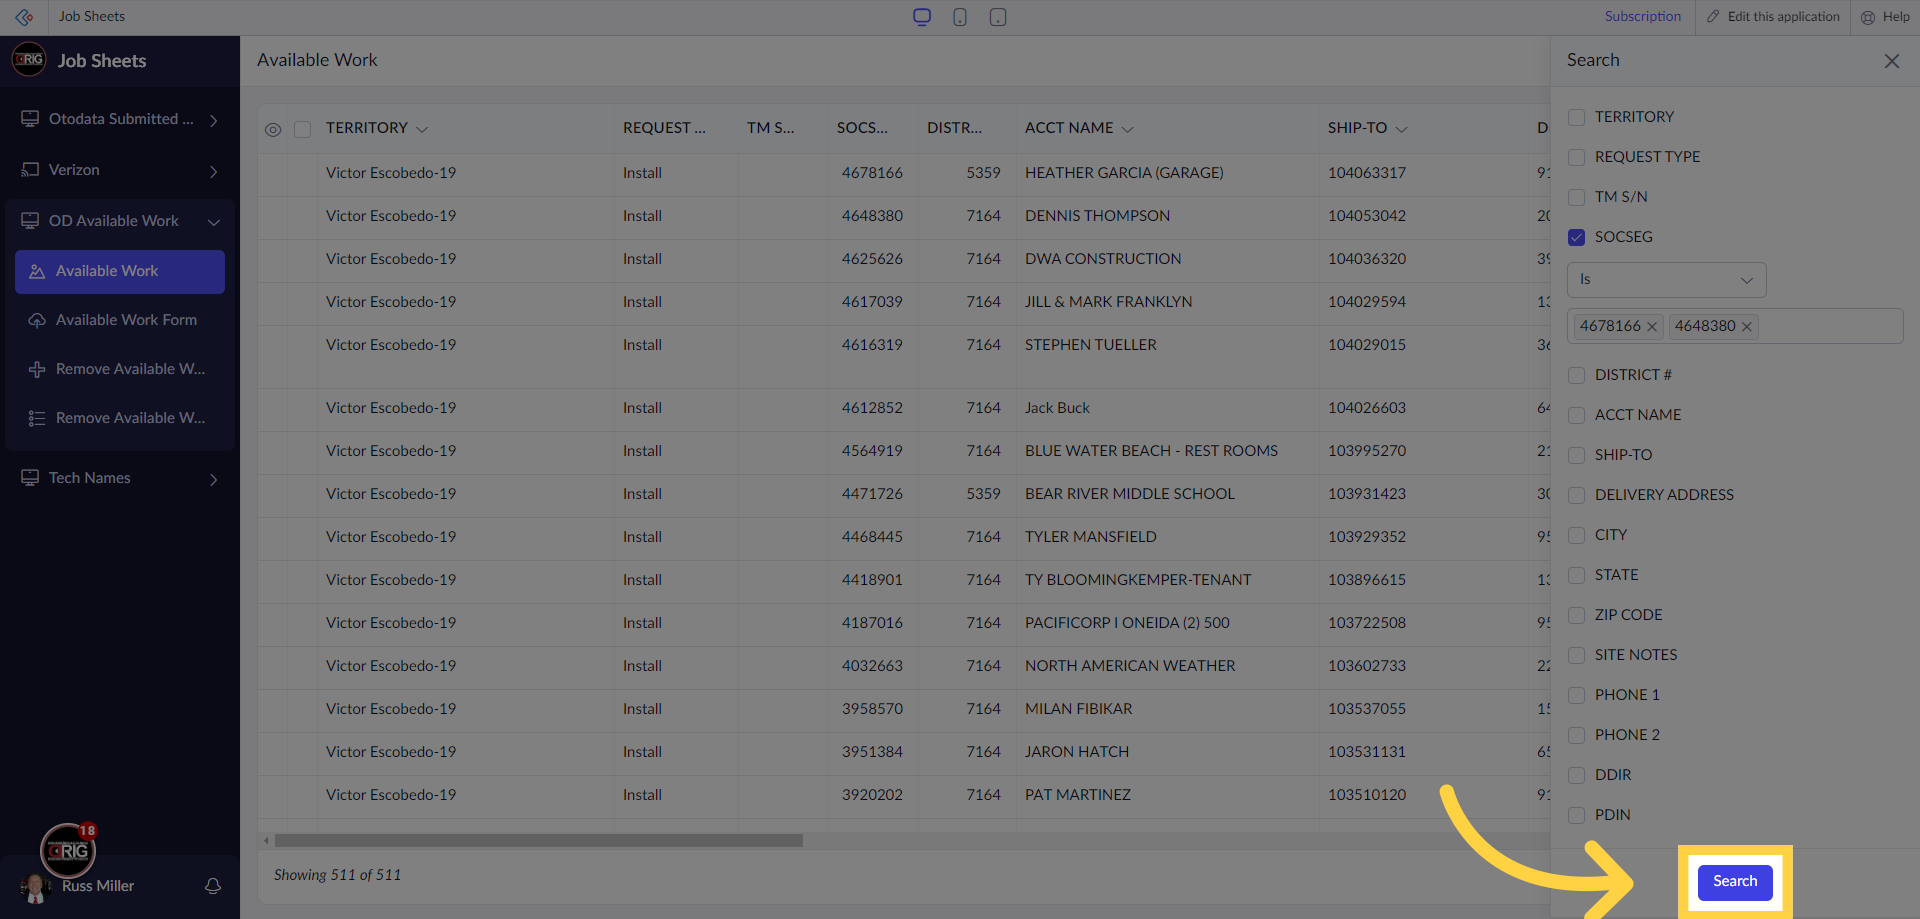
14. Click here to cancel the search.
When you are done, simply click "x" on the search and you will be taken back to all the data. You should also know, you can stack search values to dial in further.
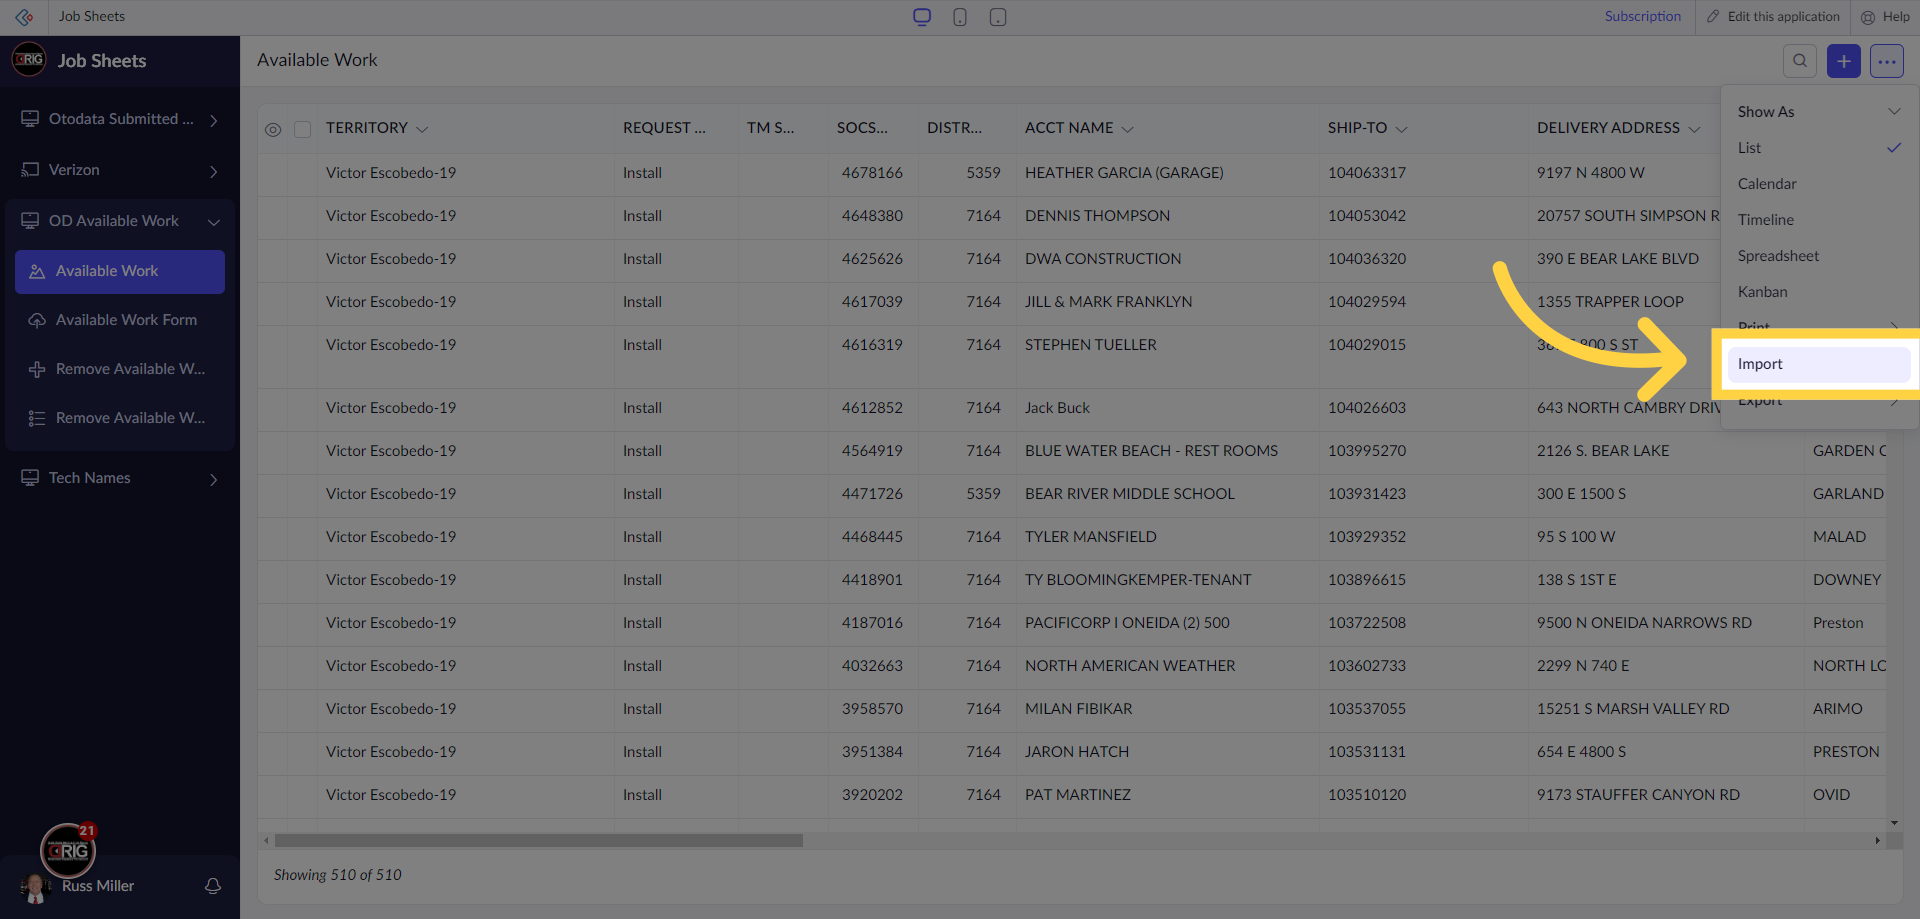
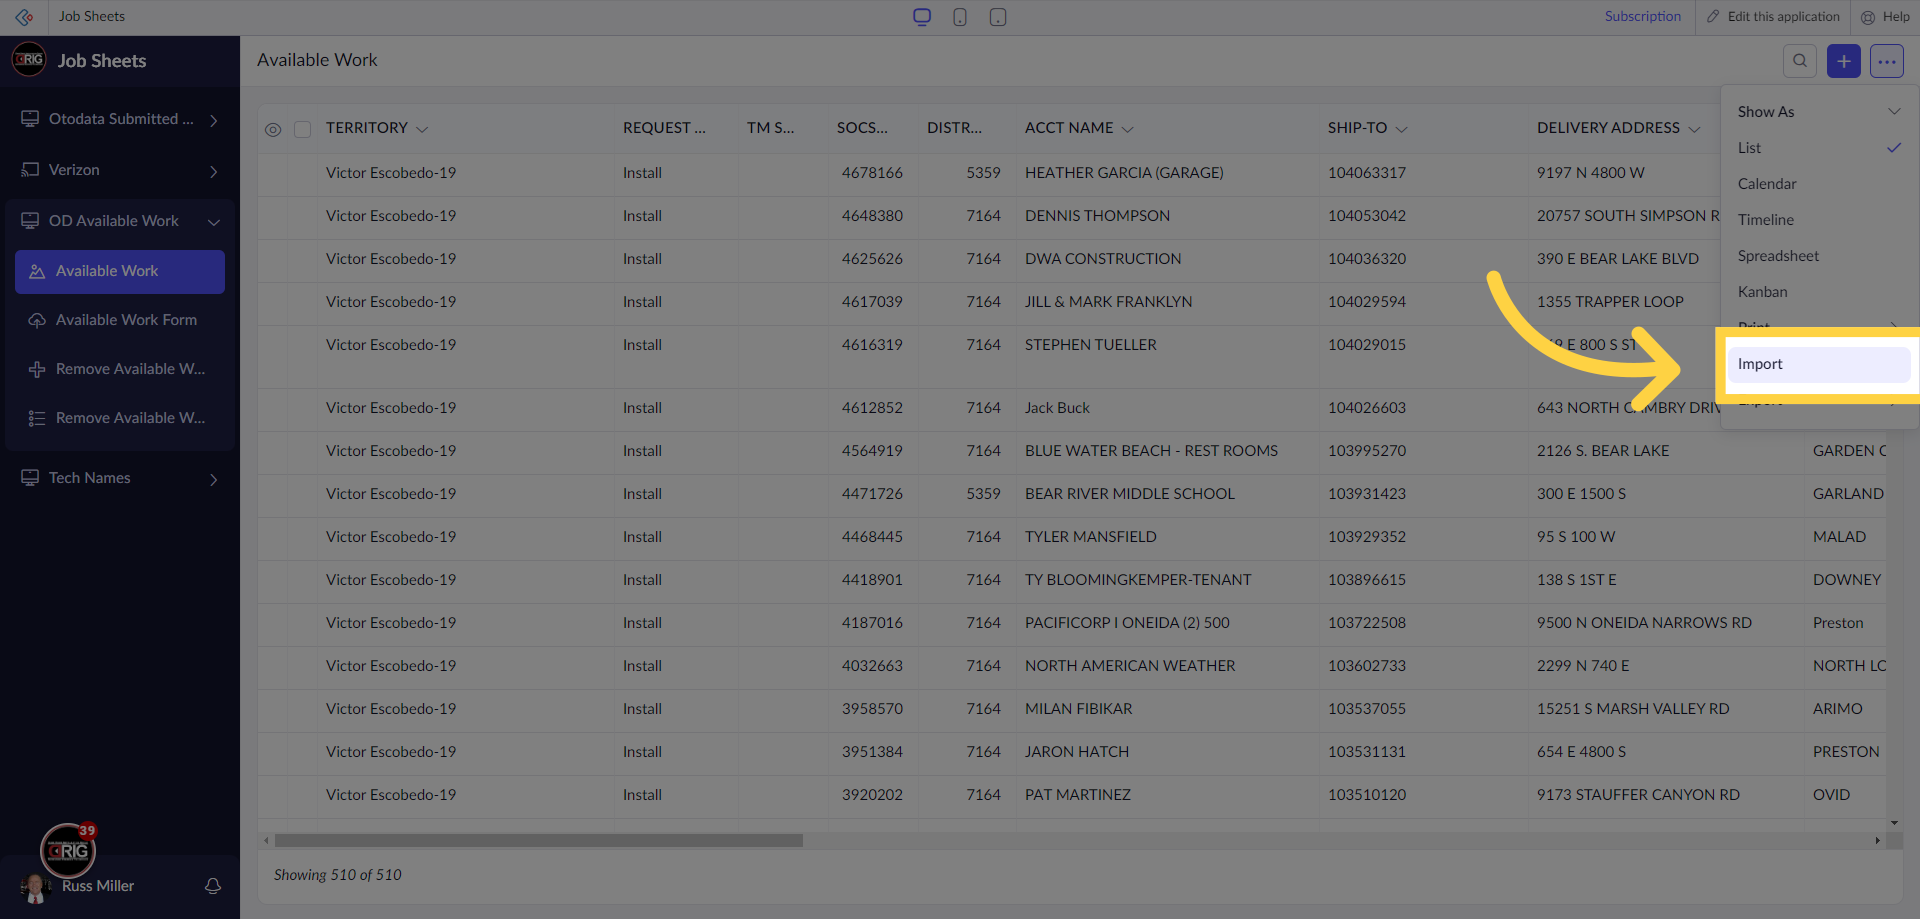
15. Click on the Kebab
Let's dive in deeper. Next, click on the Kebab.

16. Click "Import"
From here, click on "Import"
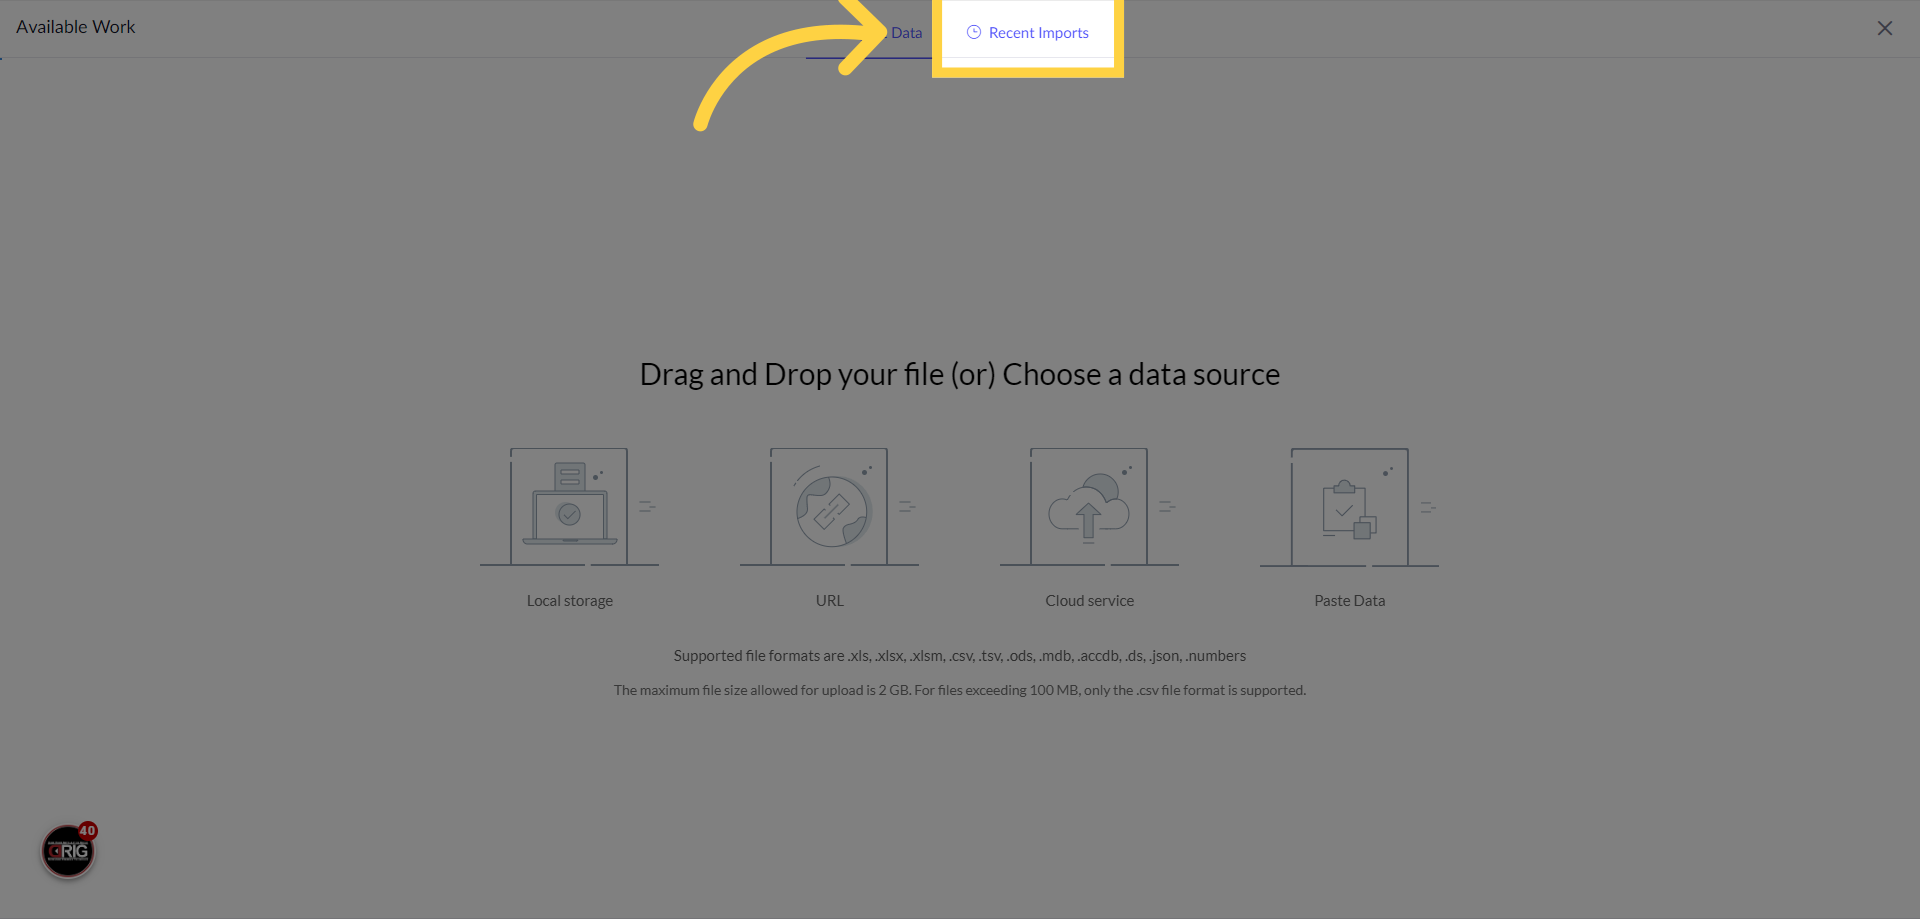
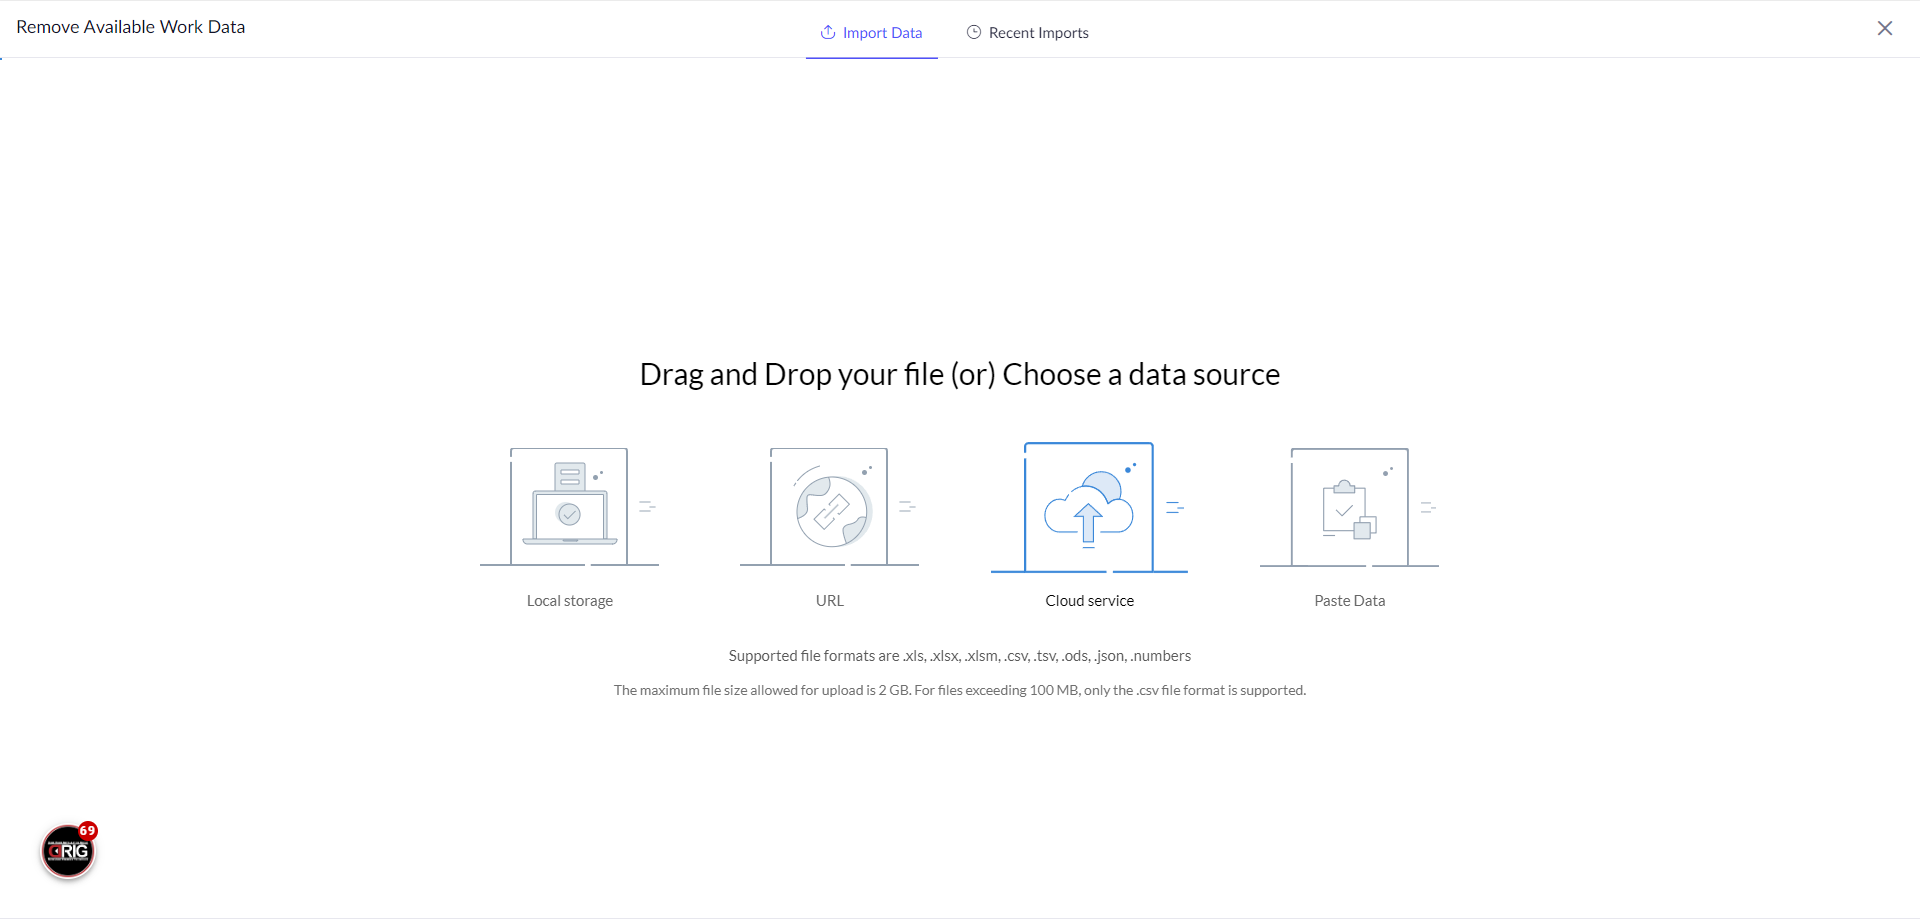
17. Switch to "sheet2appimport.zoho.com"
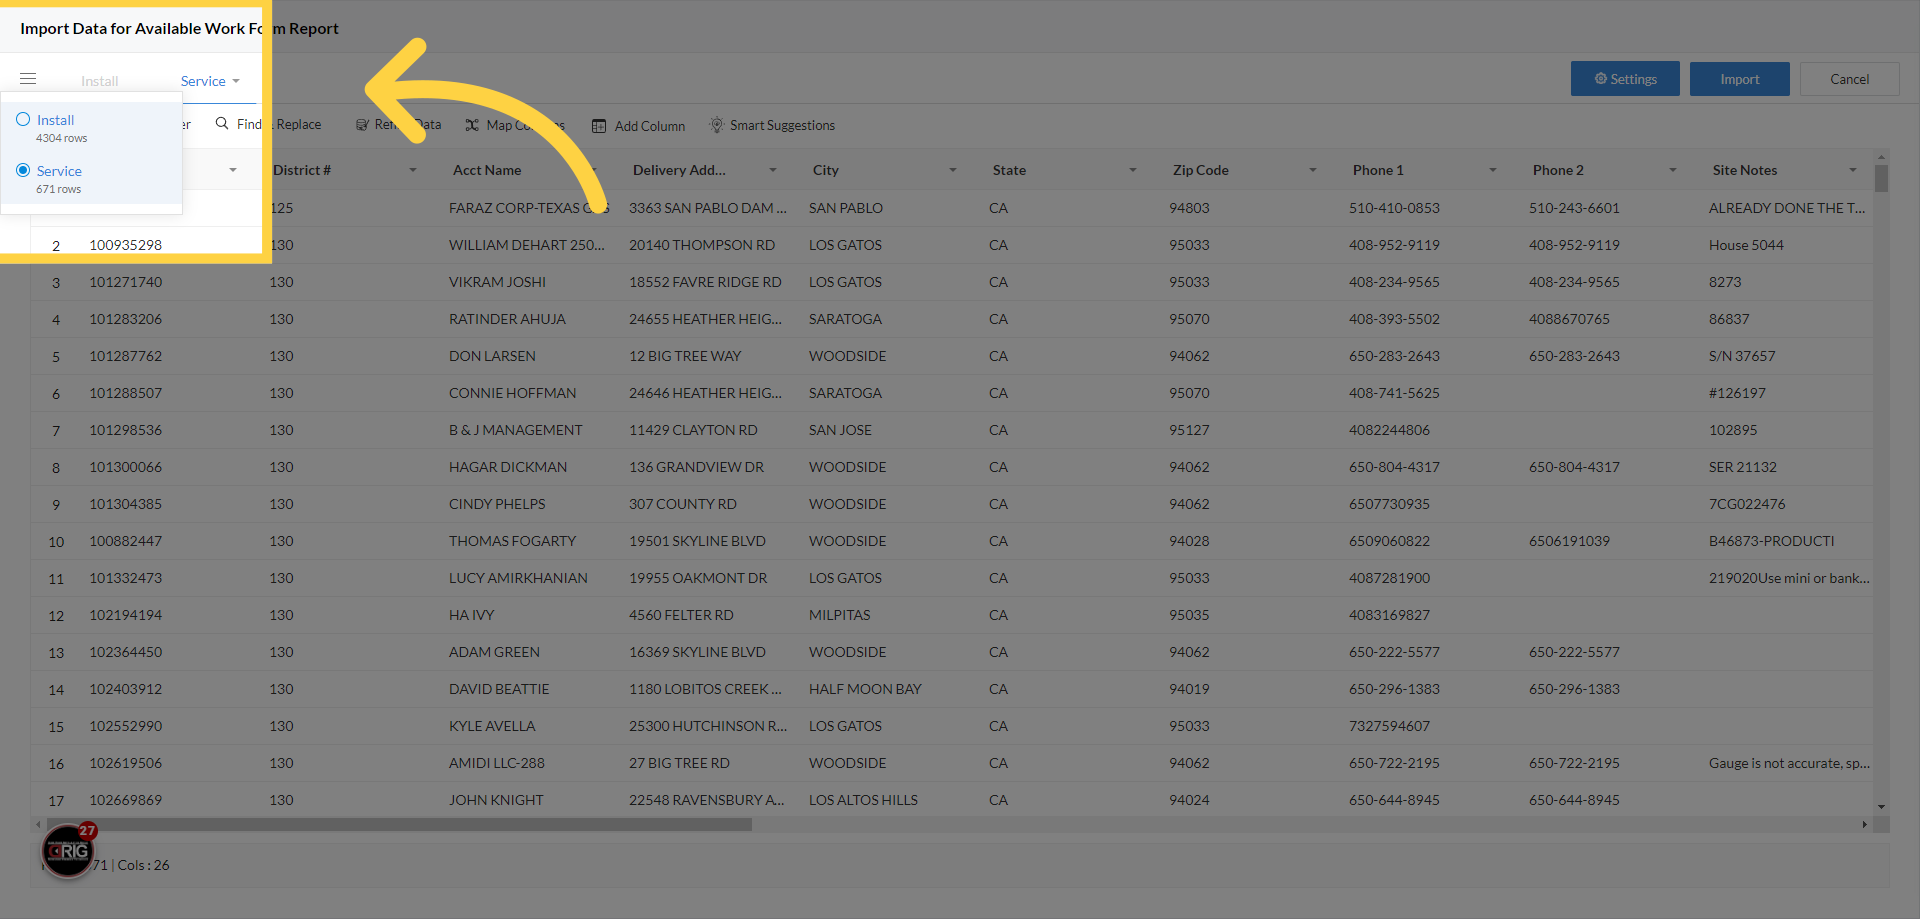
Here, you have four different ways to import data. Typically you would use "Local Storage" or "Cloud Service".
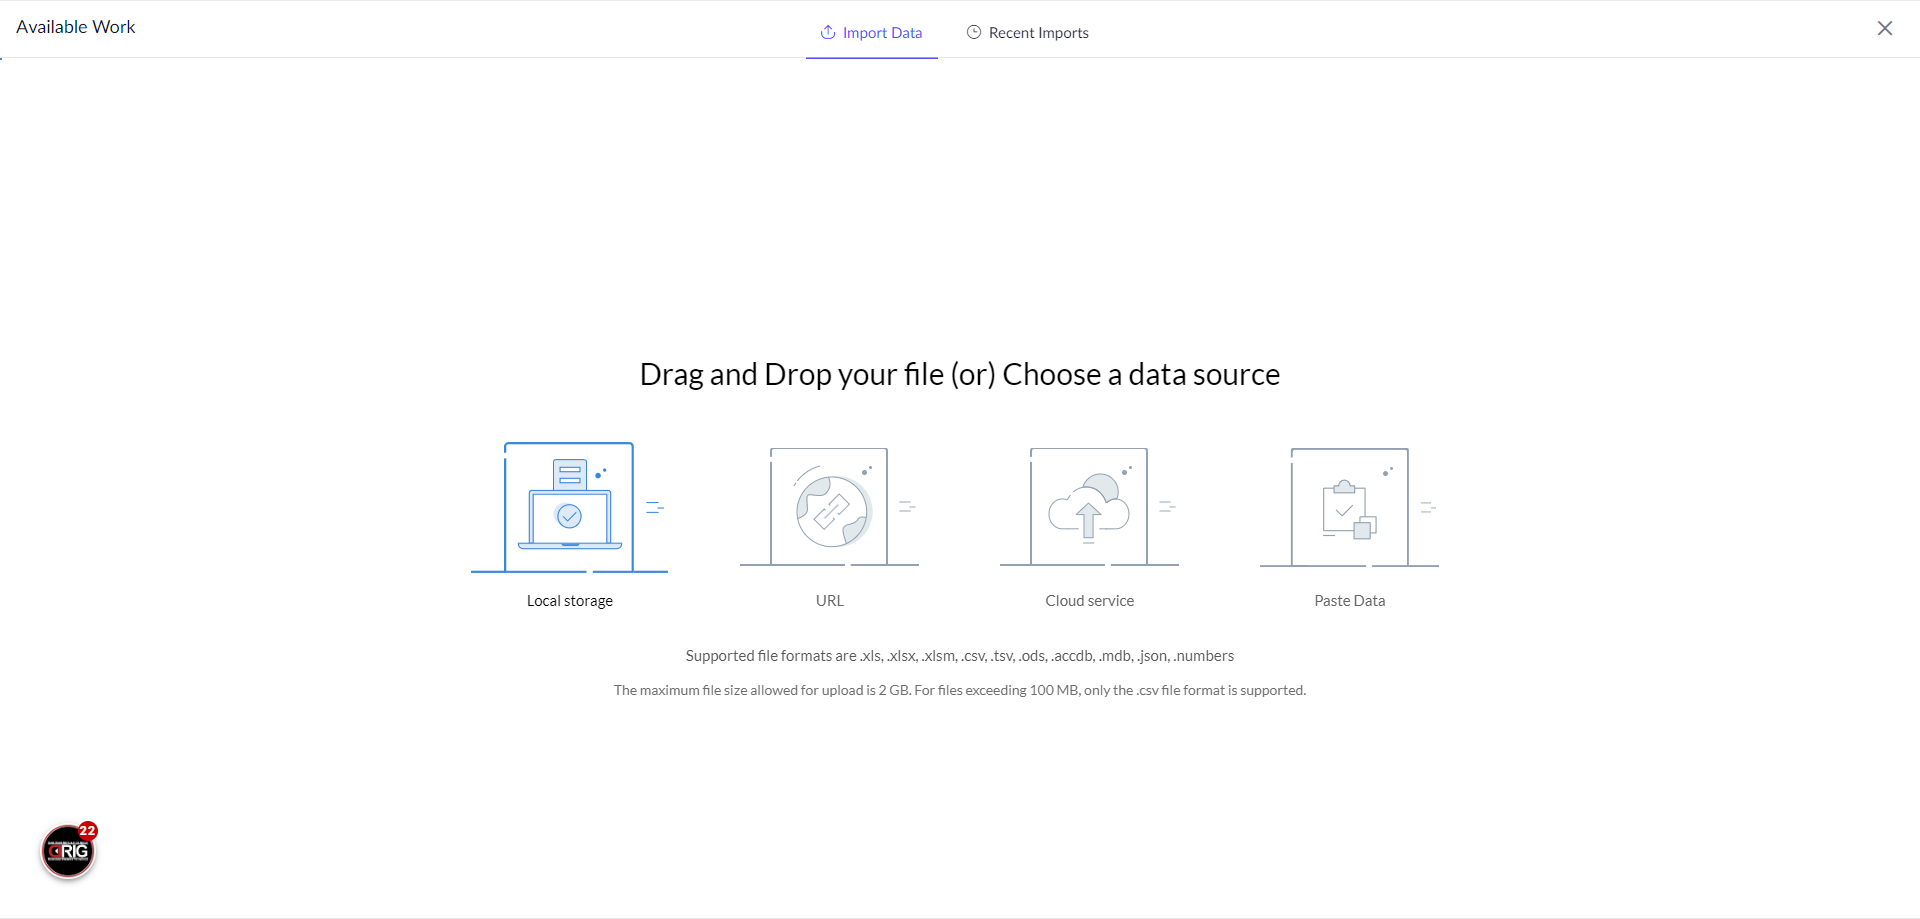
18. Click "×"
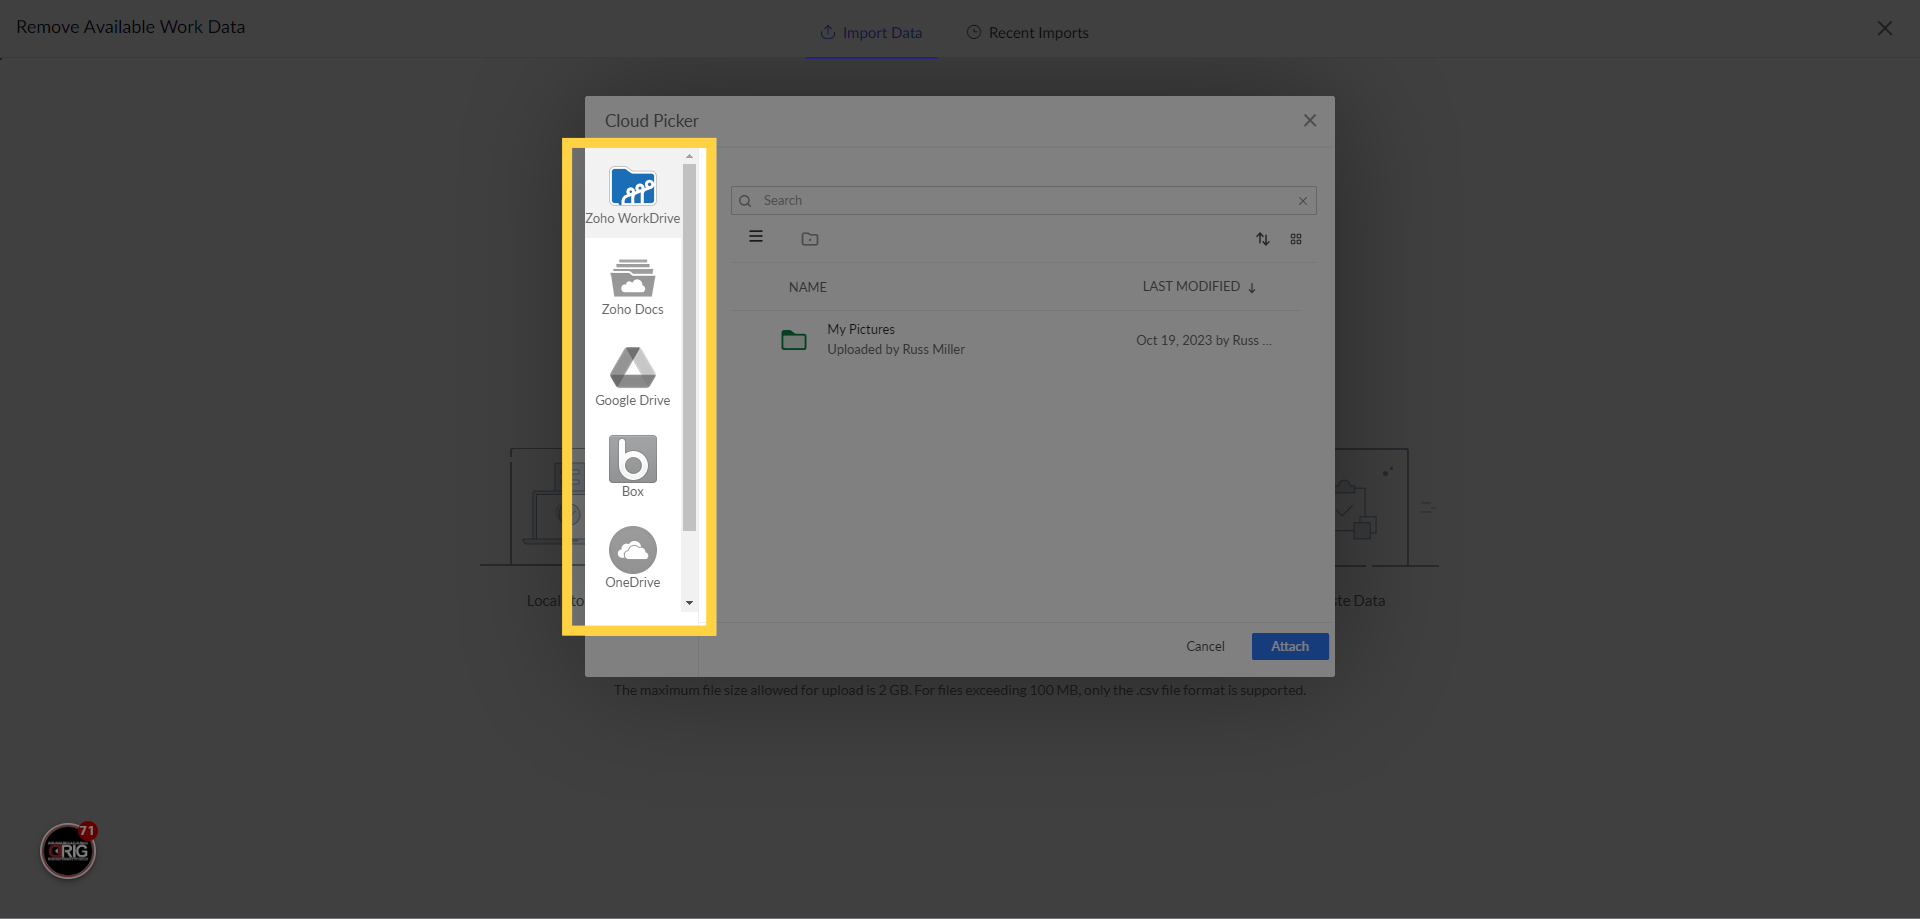
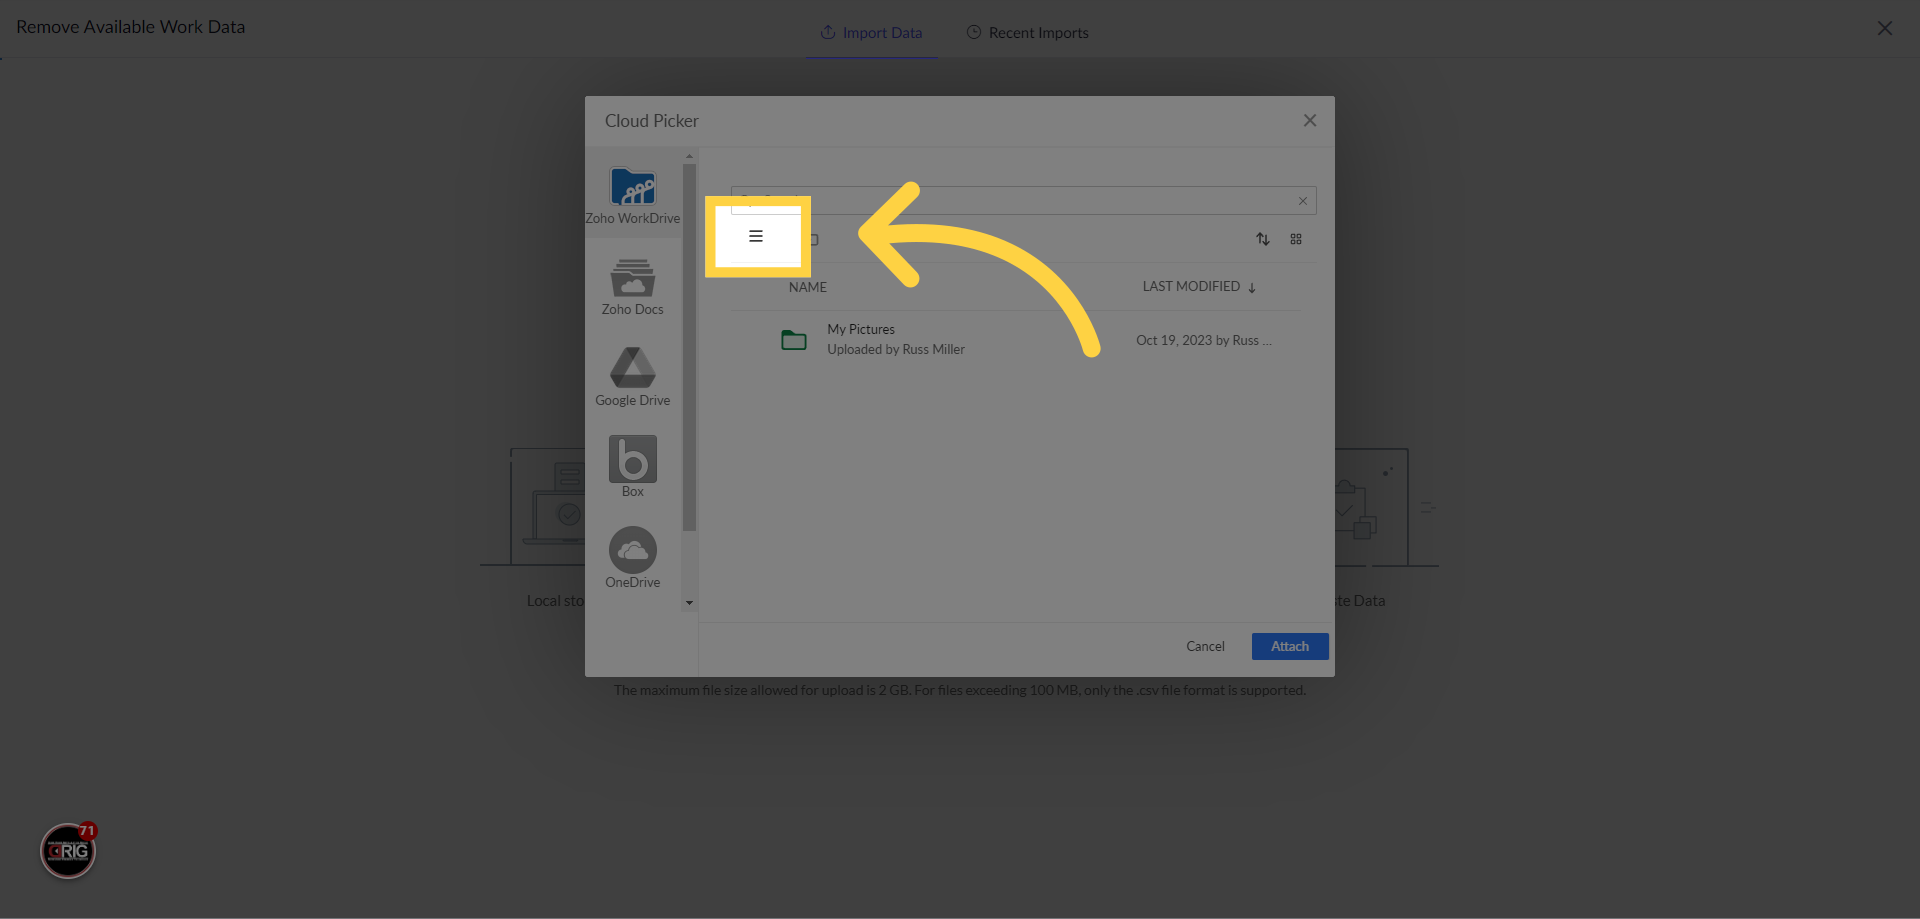
In this example, I used "Cloud Service", selected "Workdrive", located the file and here is the pre-import screen.
19. Click "×"
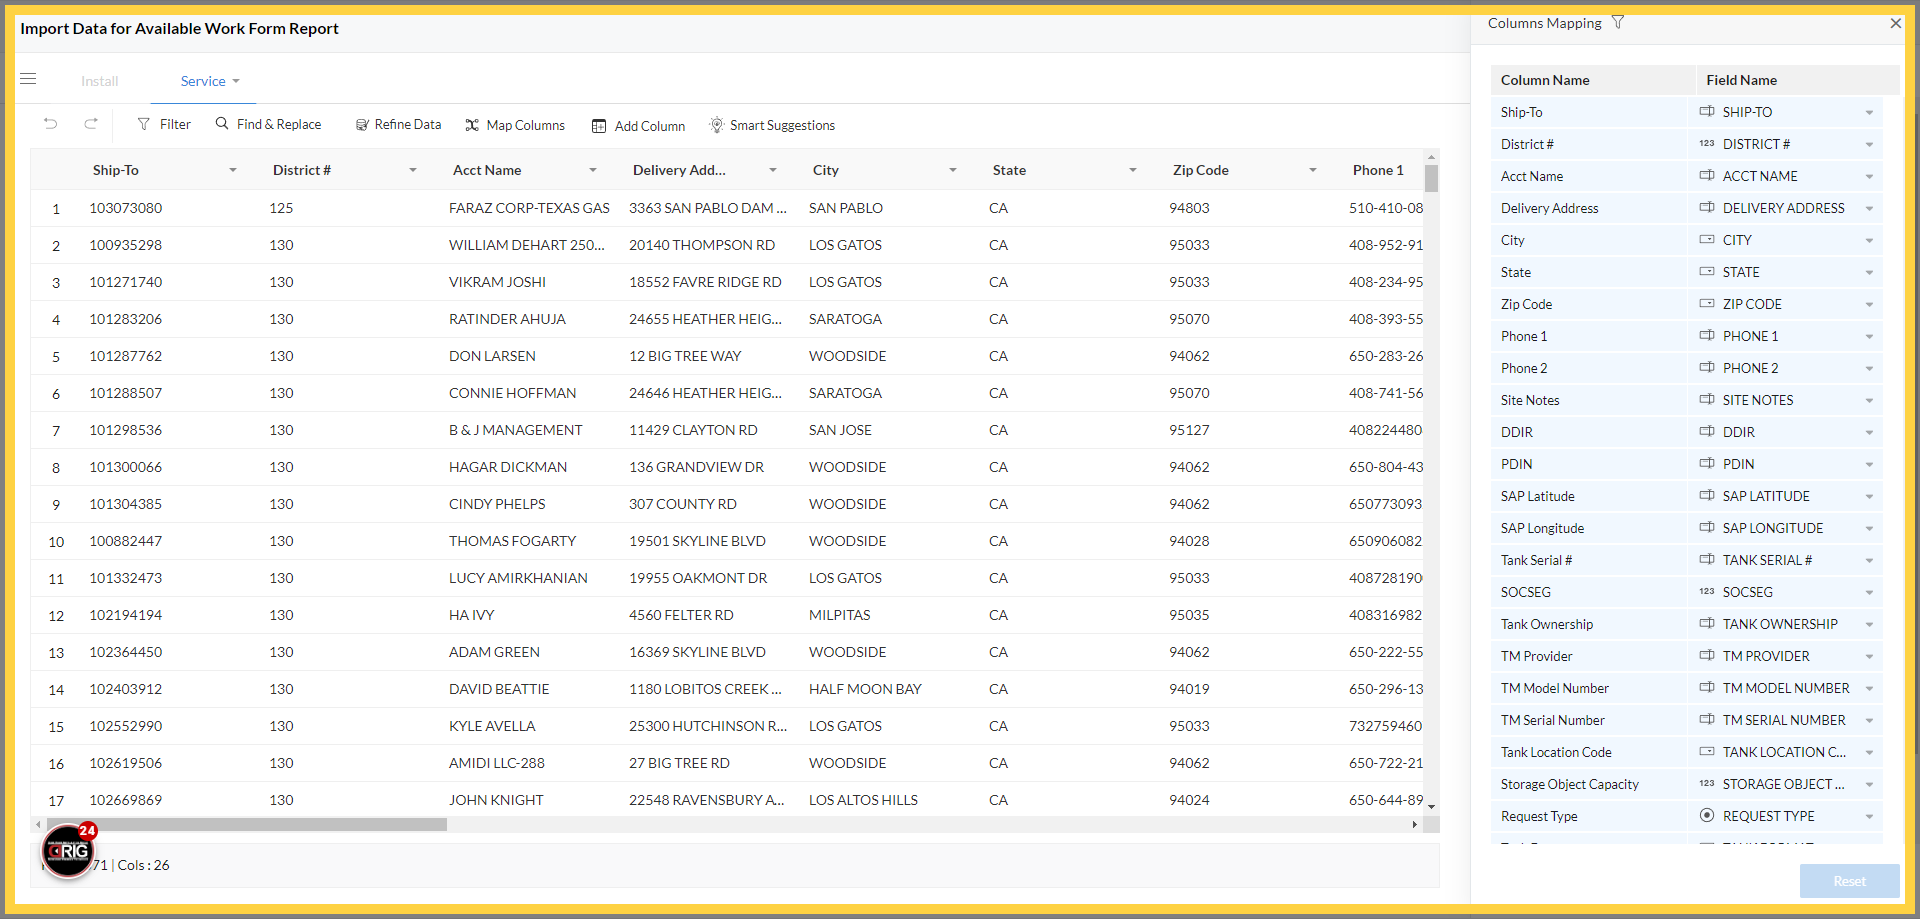
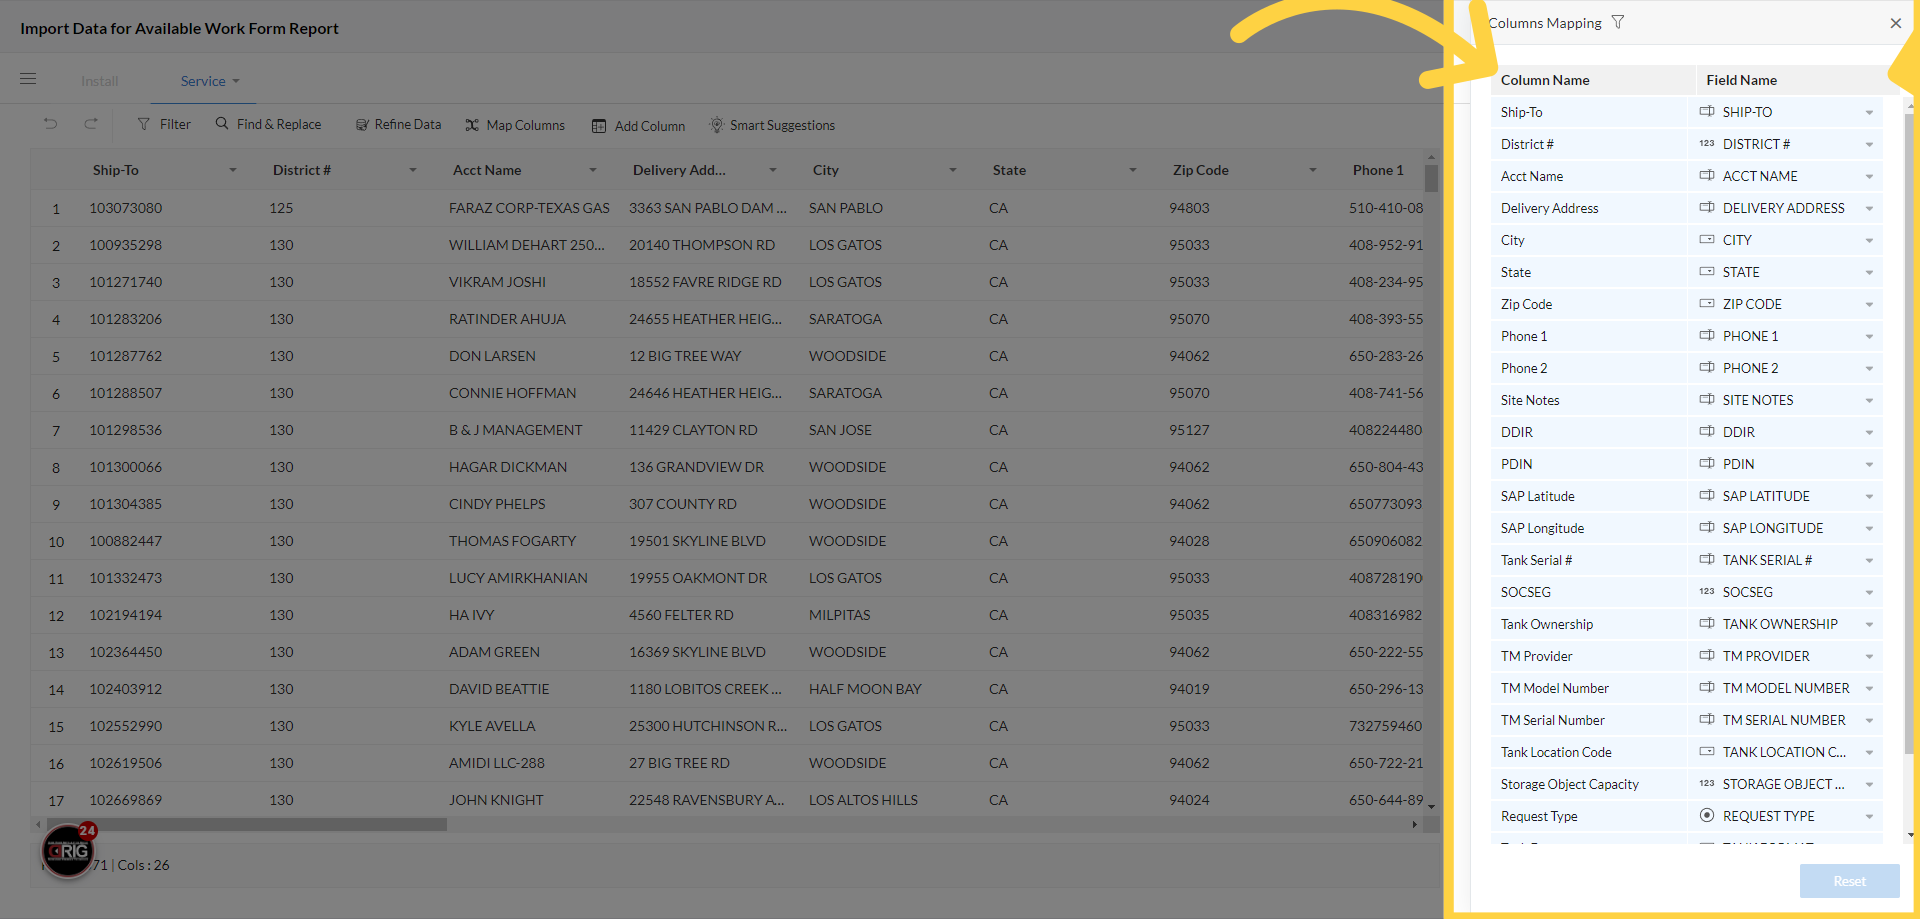
Make sure all the fields from your file are mapped to the fields in the app. If you get an orange triangle, click on it and follow the steps to resolve it. At times, you might not want to resolve it and can ignore it. If the field does not exist in the app, contact the development team to add it. Column Name is from the file you are importing. Field Name is from the app.
20. Click the hamburger menu to switch sheets
If your file contains multiple sheets, click on the hamburger menu to switch. You can only import 1 sheet at a time.
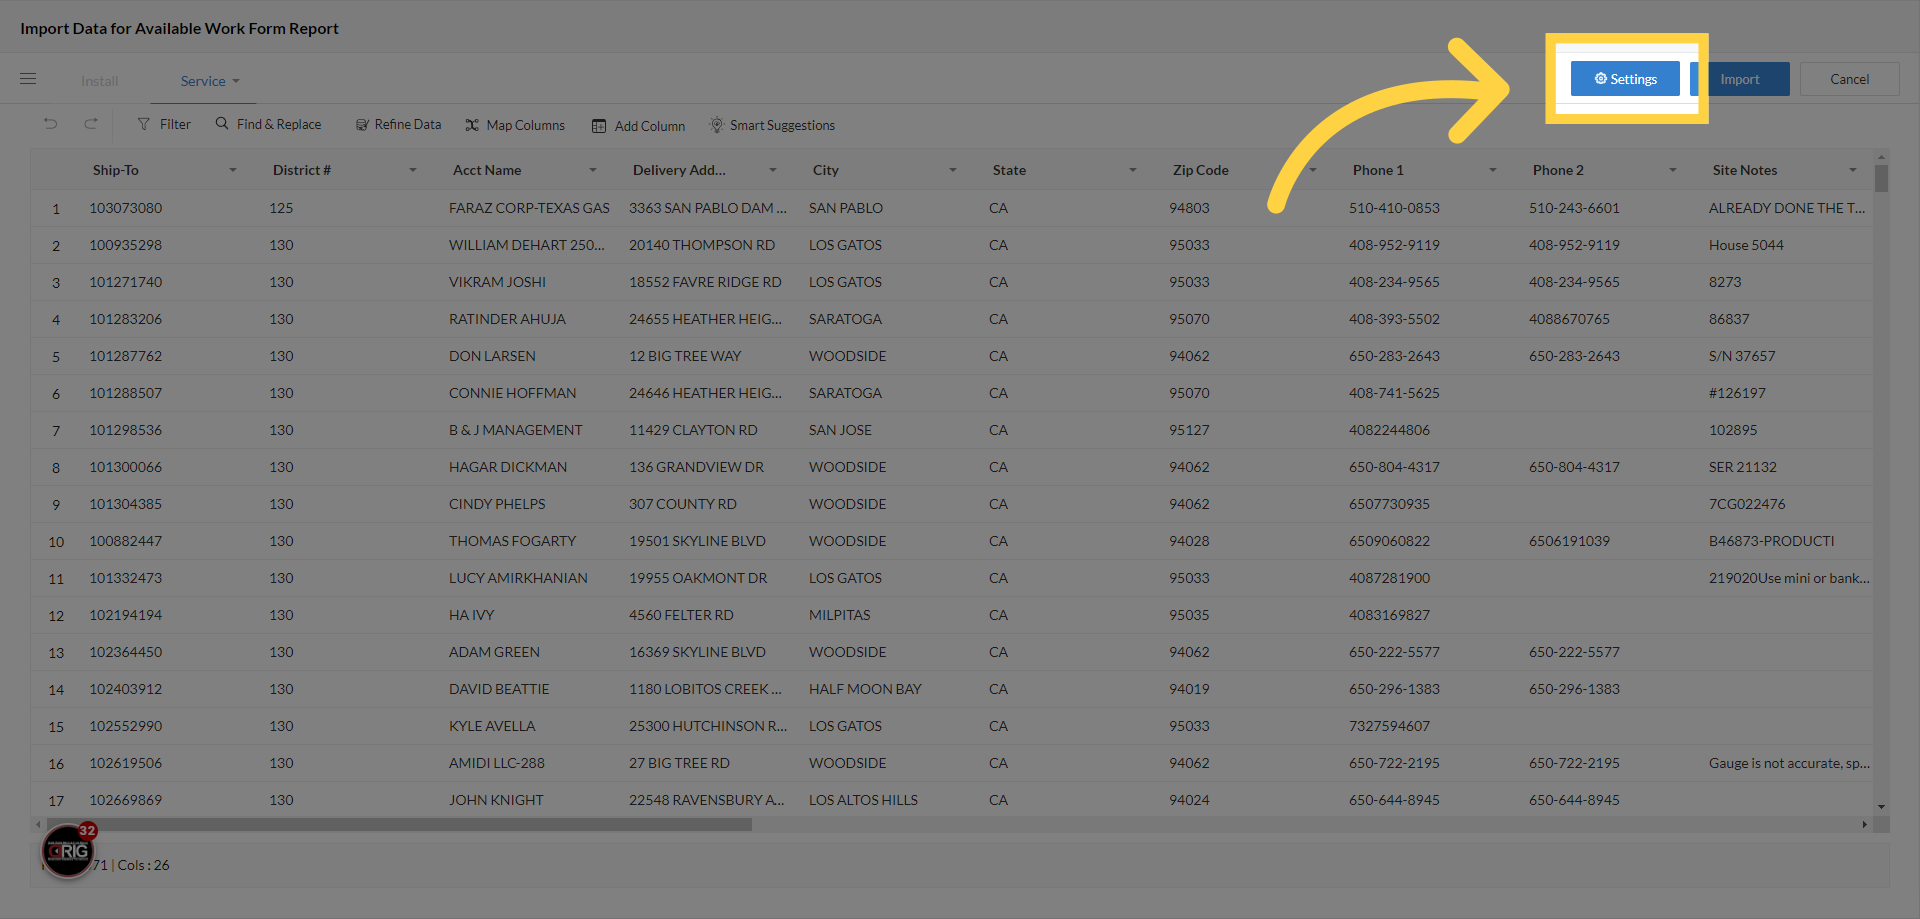
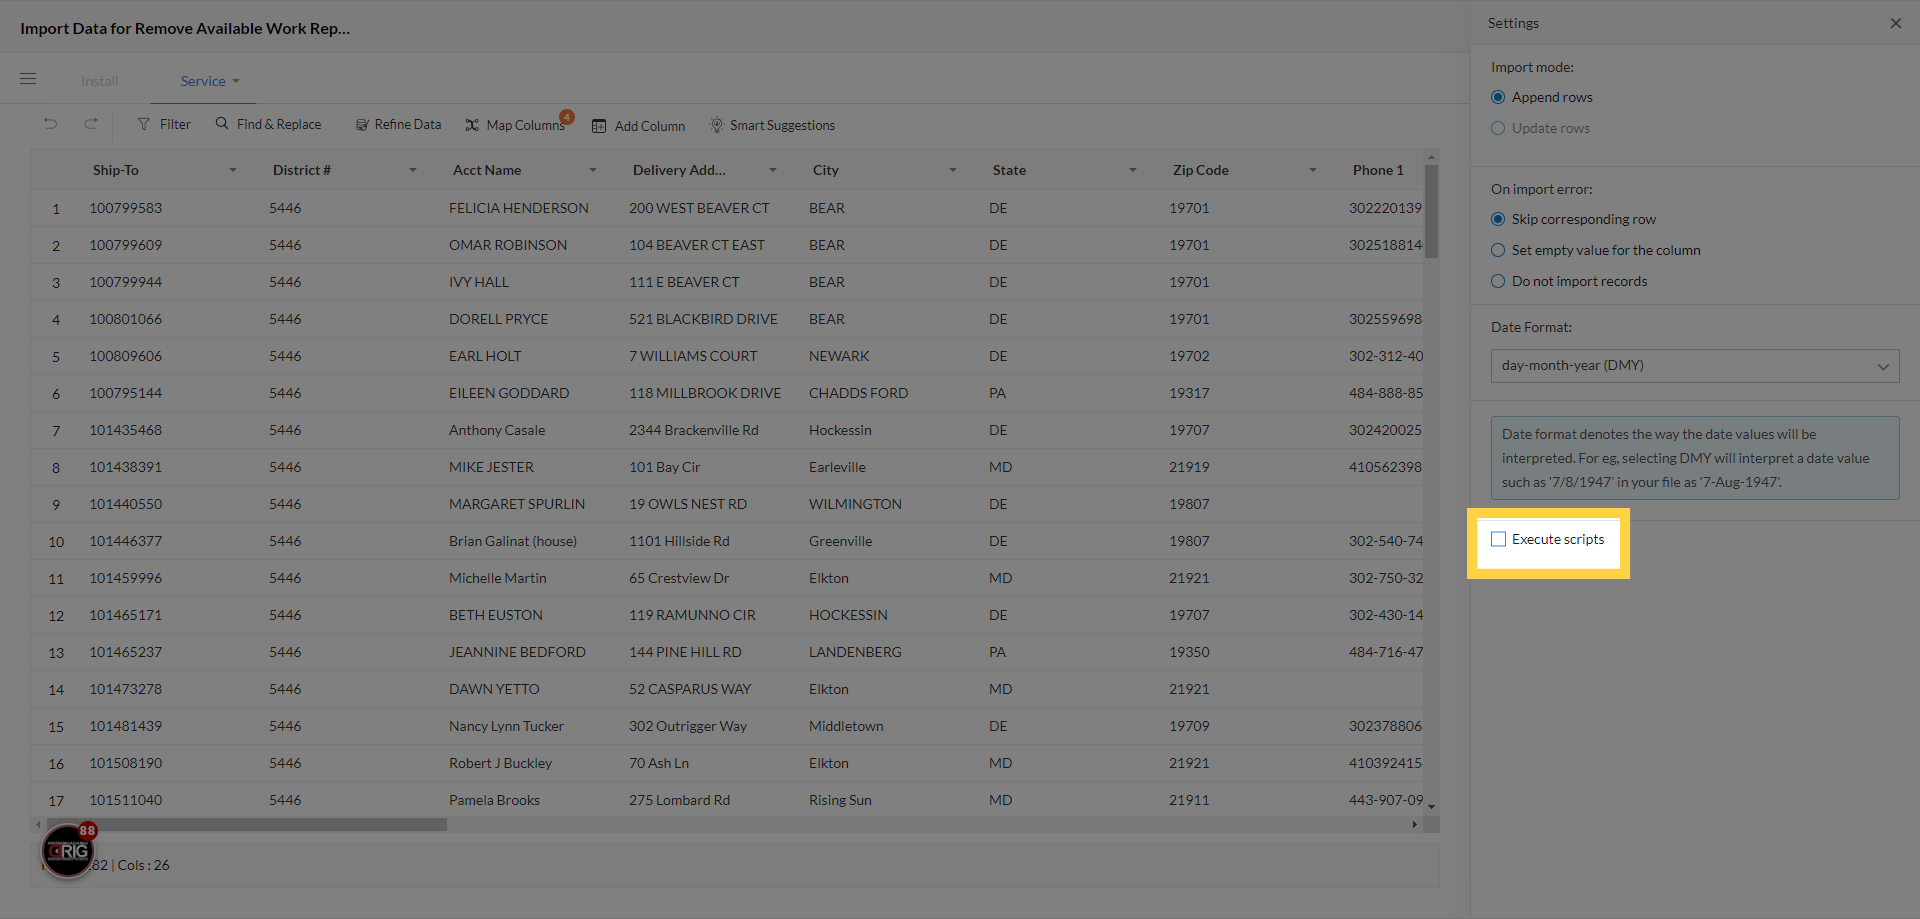
21. Click "Settings"
Access the settings for additional configuration.
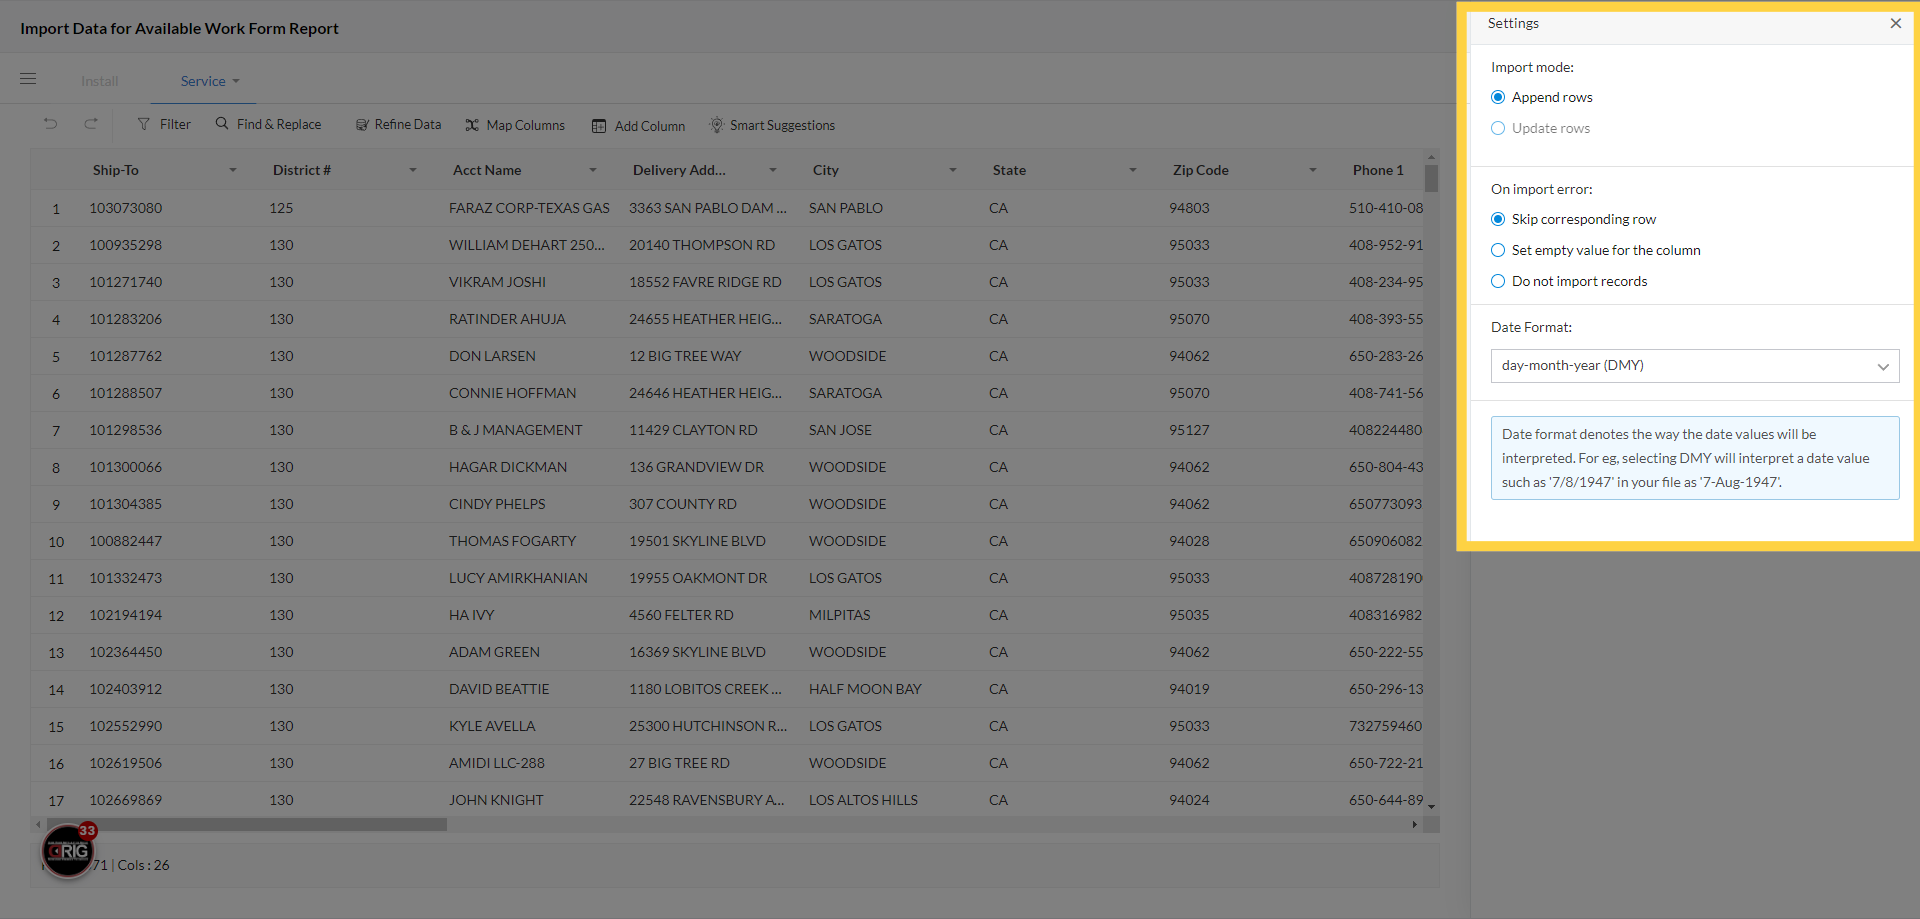
22. Click "Update rows"
In the settings you can only "Update Rows" if you had added the data prior. Choose what to do in the event of an error. Do not change the date format. In most cases, you will not need to change the setting, EXCEPT, when you are importing in "Remove Available Work", you MUST select "run script". We will cover that later on.
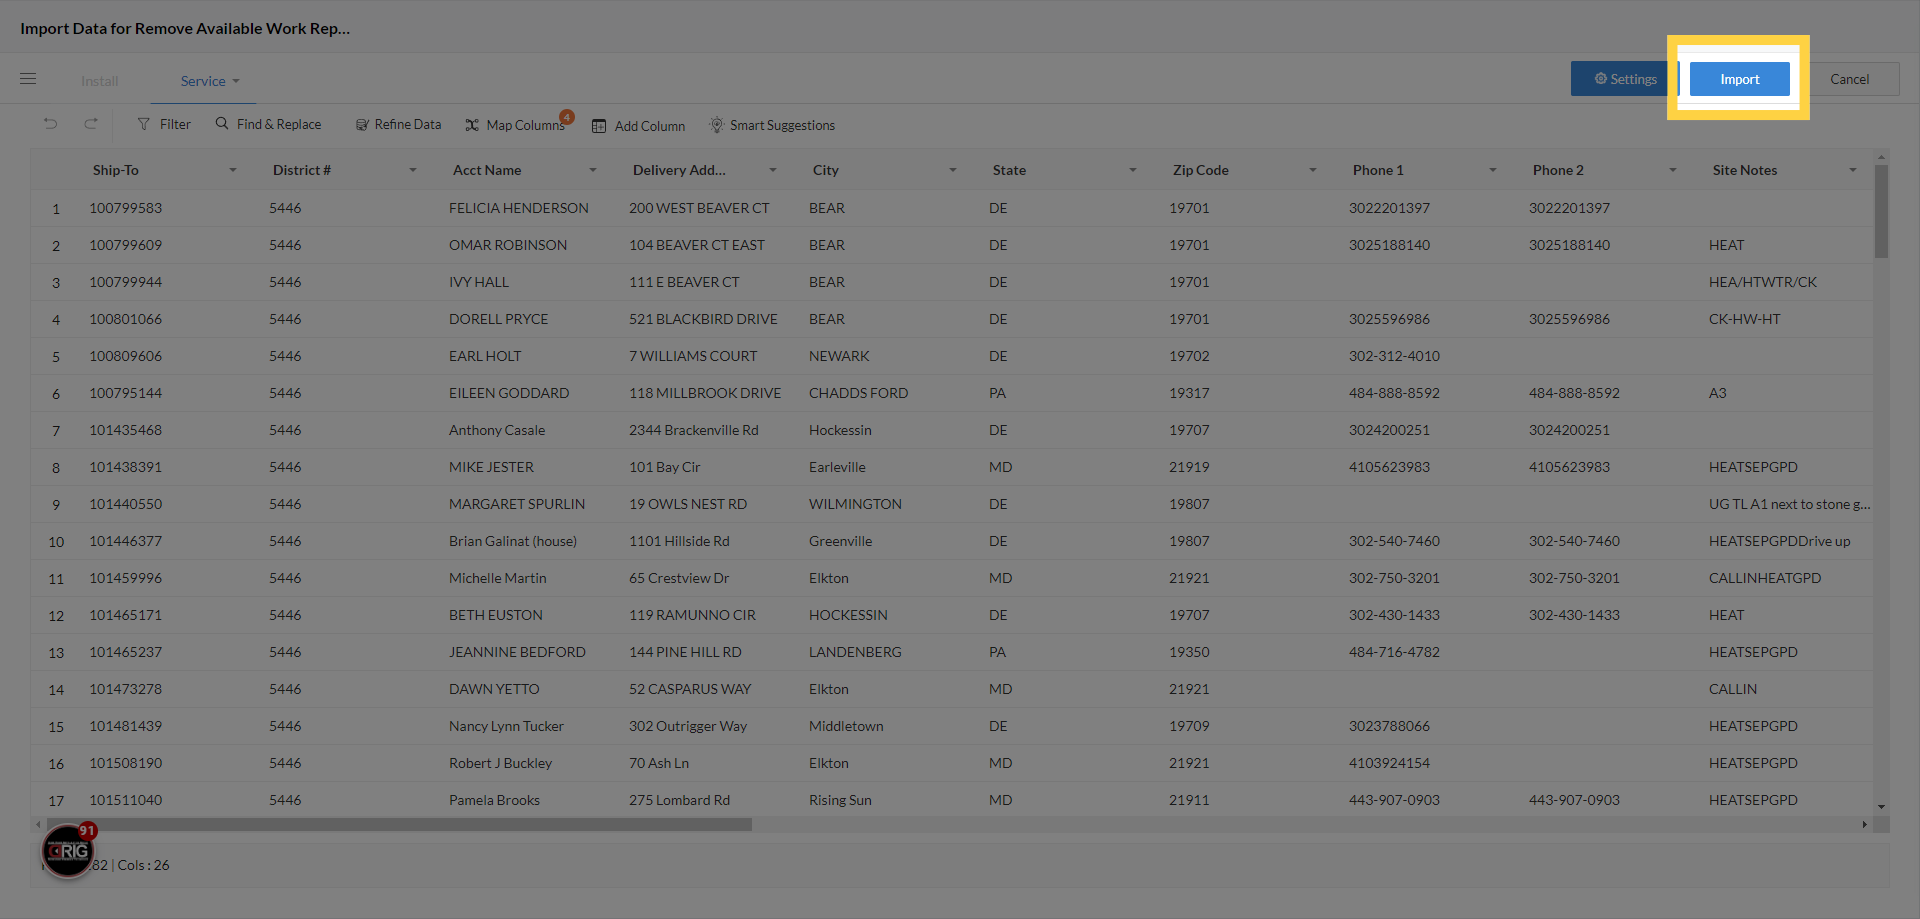
23. Click "Import"
When you feel satisfied and are ready to import, simply click "Import". 1,000 rows takes about 5 seconds to import.

24. Click "Import"
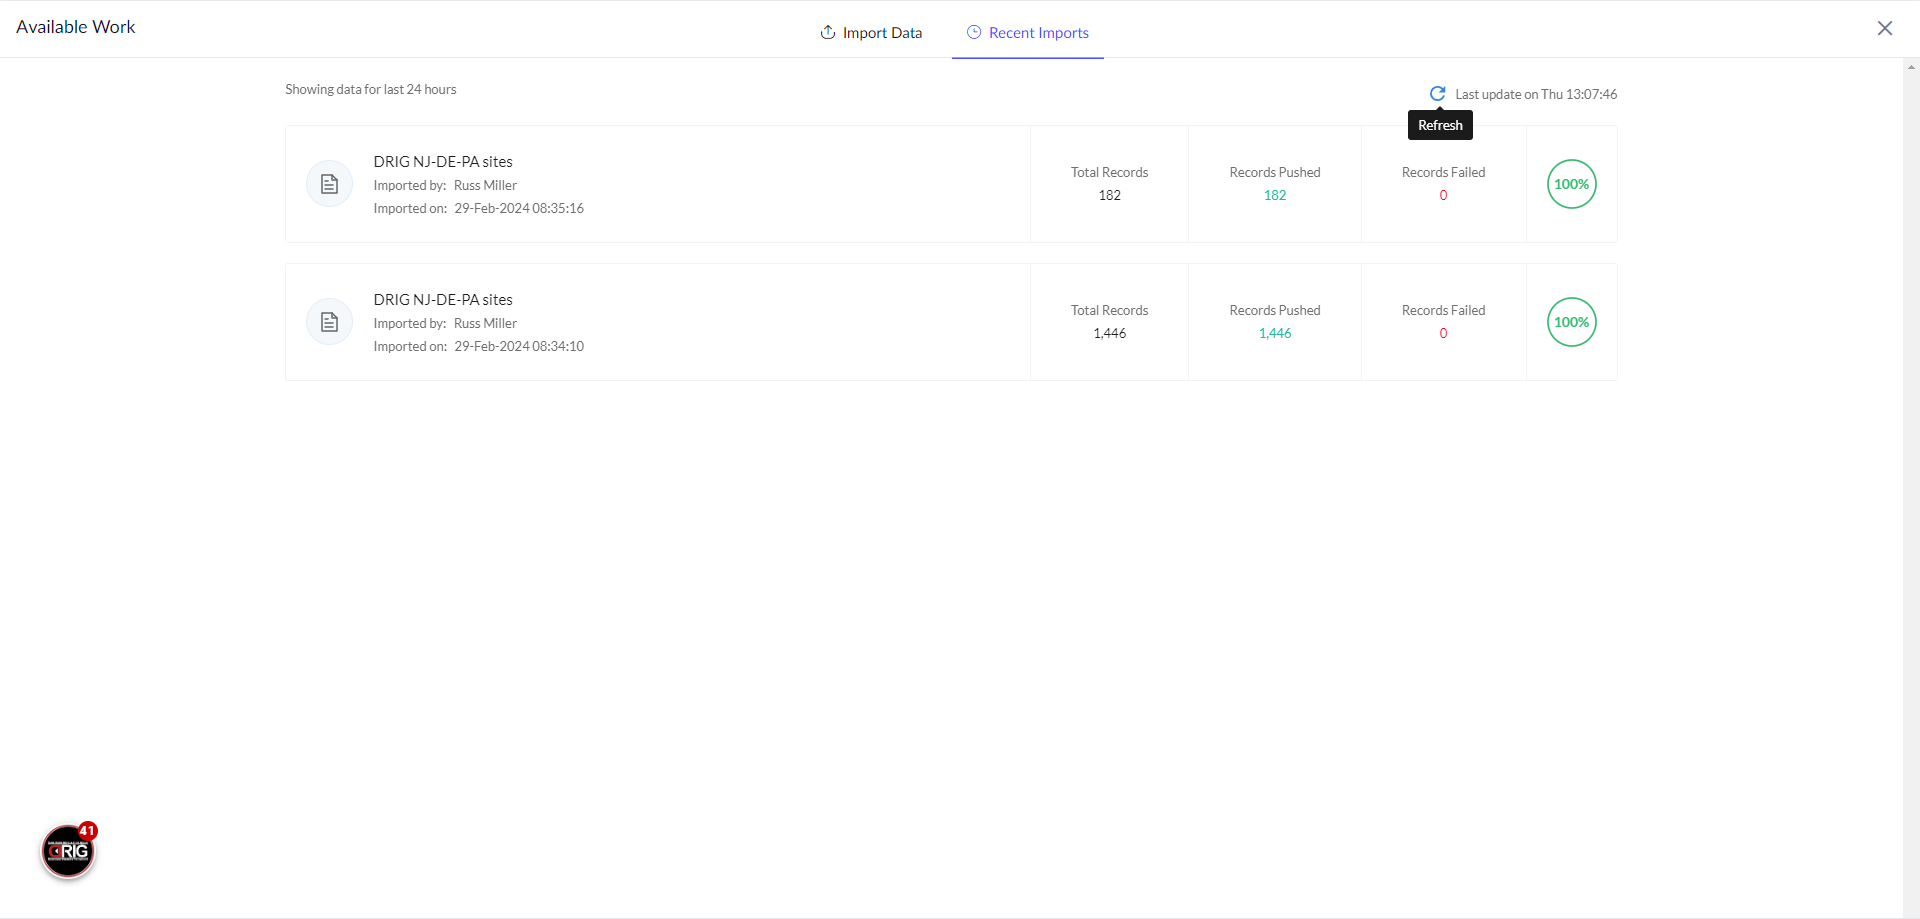
Need to see the import history, errors or where a current import is? Click on "Import" again.
25. Click "Recent Imports"
Then click on "Recent Imports"
26. Switch to "sheet2appimport.zoho.com"
If you have an import in progress at the moment, you can click "Refresh" every few seconds to update the status.
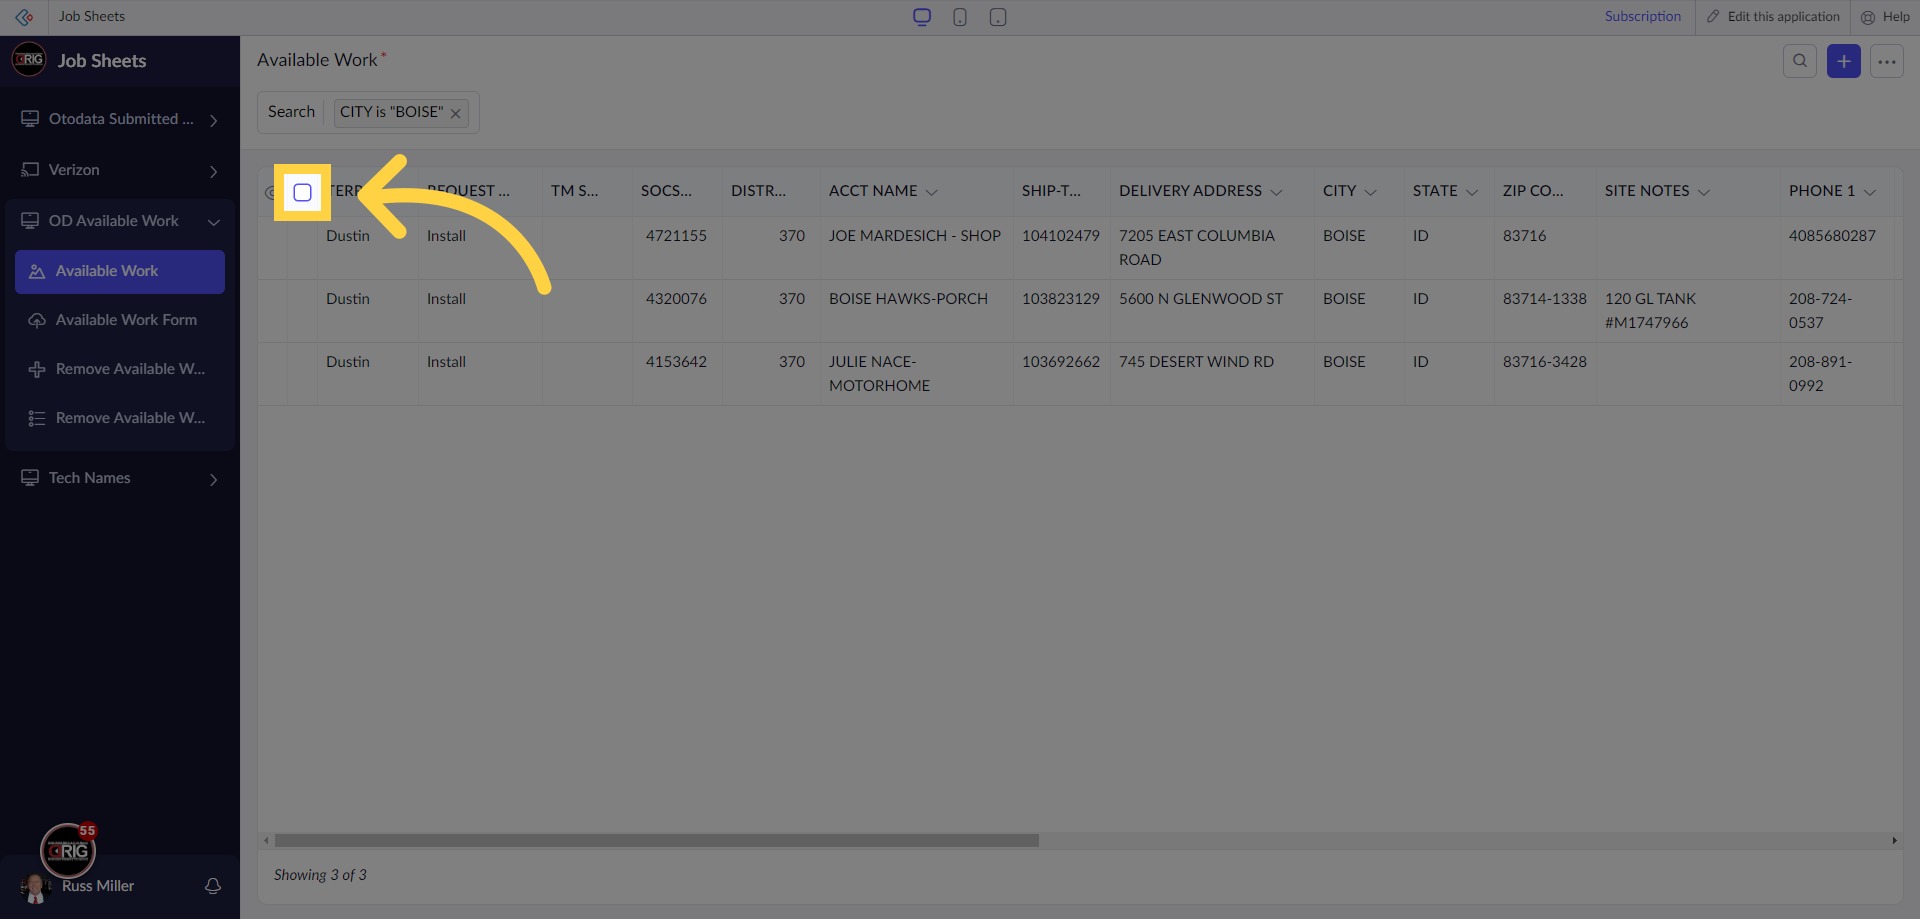
27. Click the checkbox
Let's talk about how to easily update multiple records. After you search in your chosen field, through the function we covered, you can click this check box to select all the records you dialed in on.
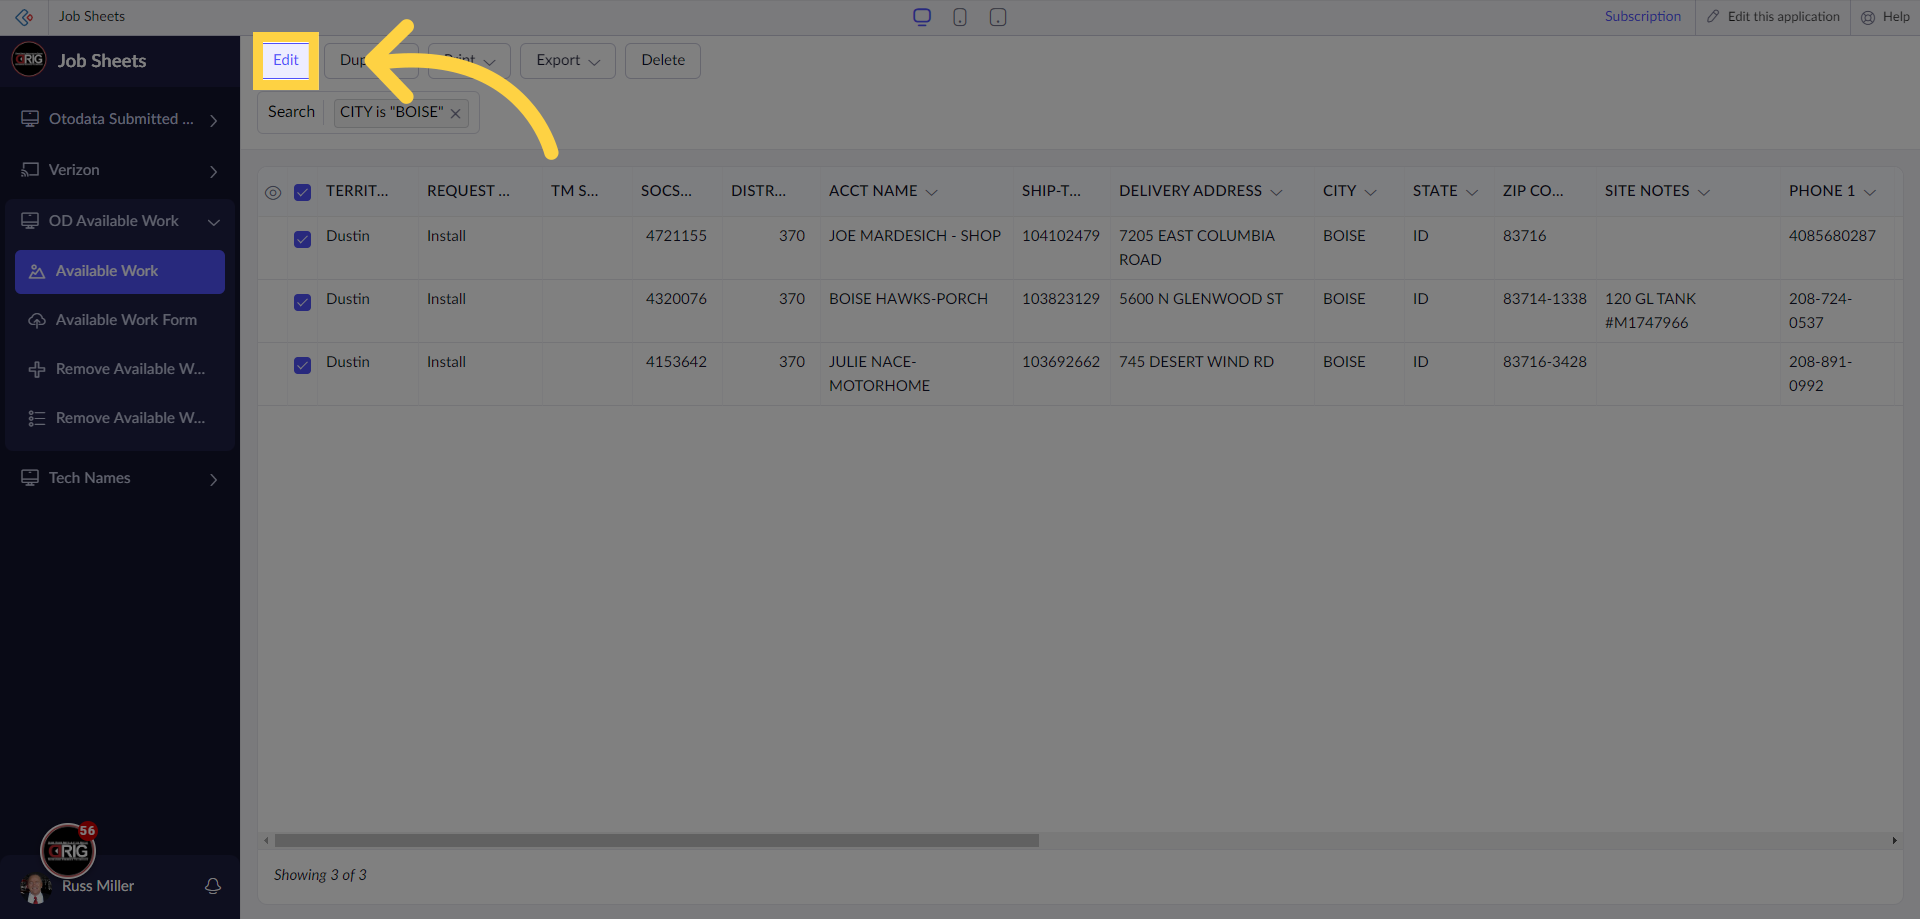
28. Click "Edit"
Next, click on the "Edit" button.
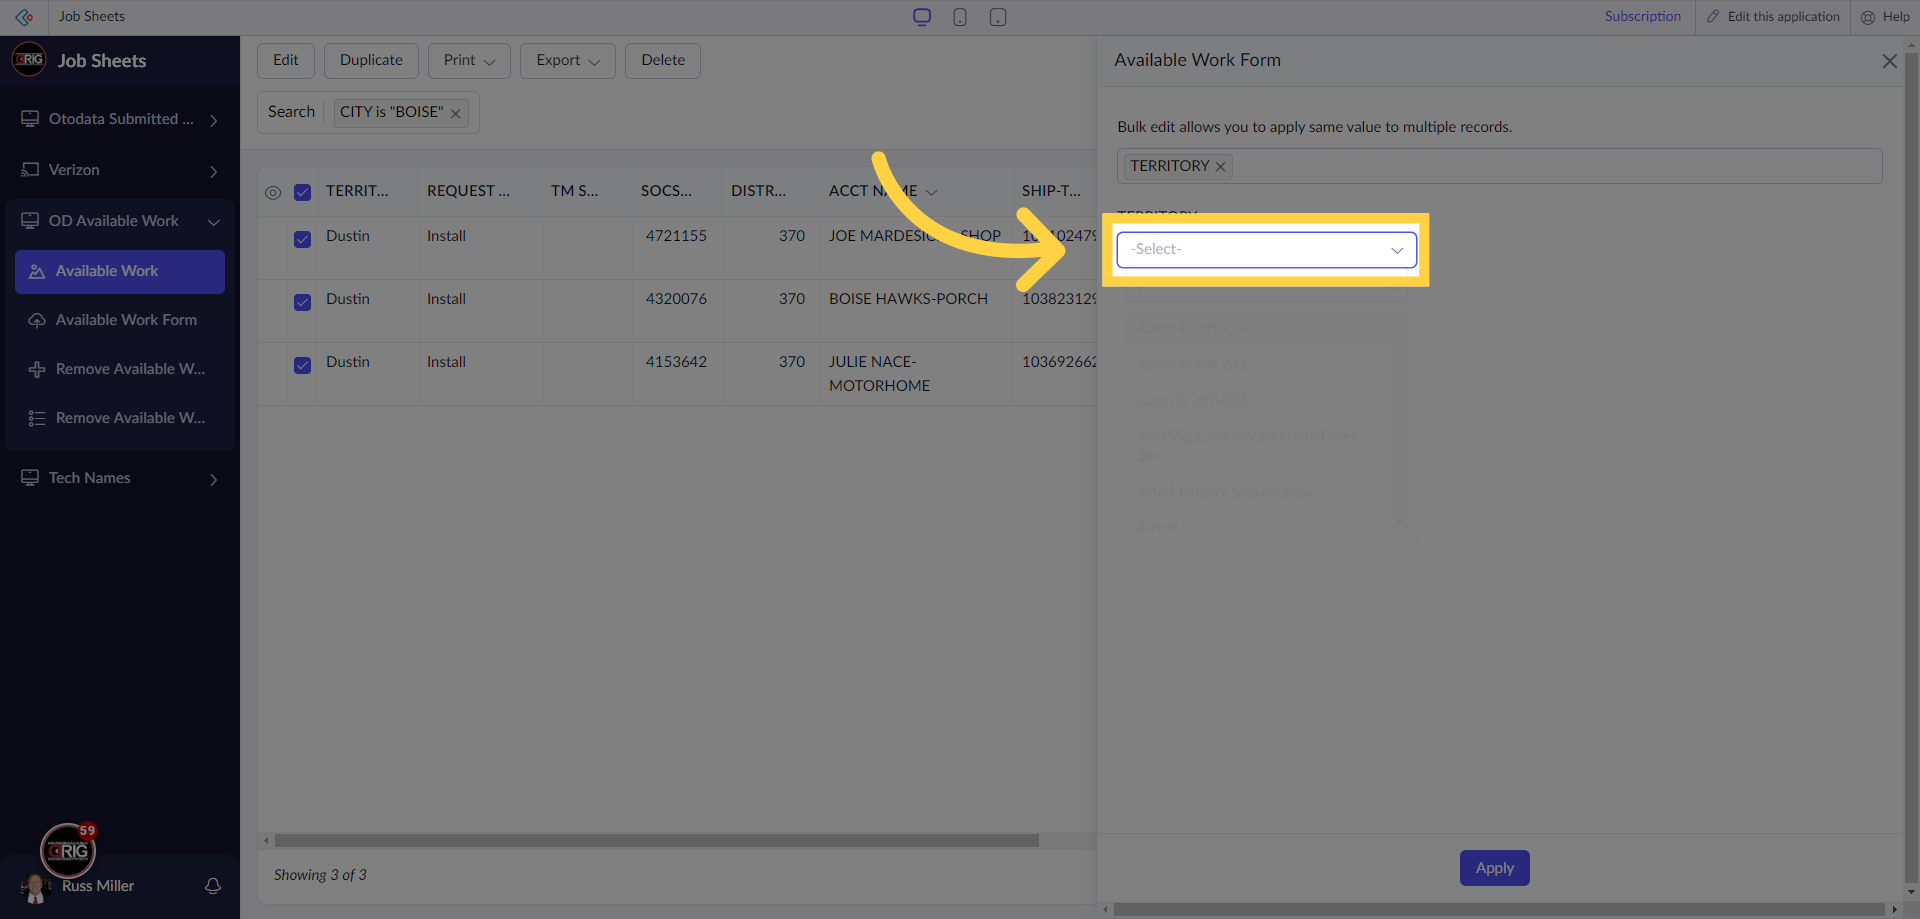
29. Choose the field you need to update
Now, select the field you want to do a bulk update in.

30. Type in the updated value
In here, type your new value or select it from the drop down.
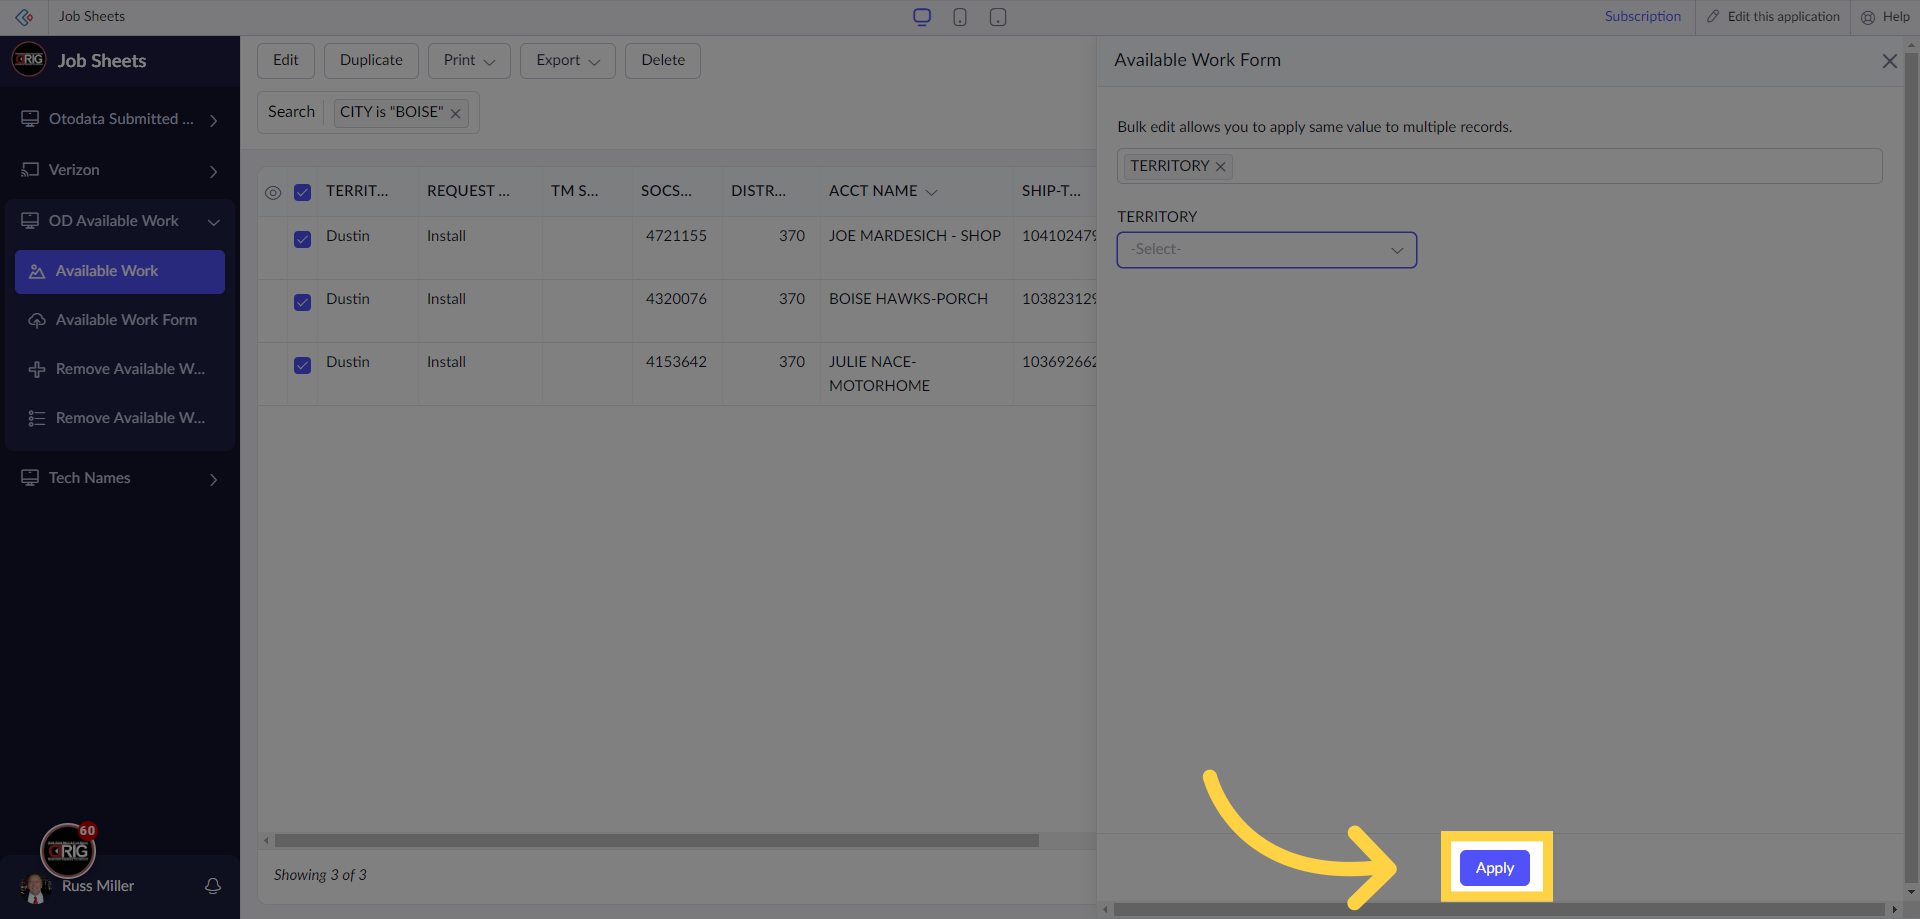
31. Click "Apply"
To update all the rows you selected, click "Apply"
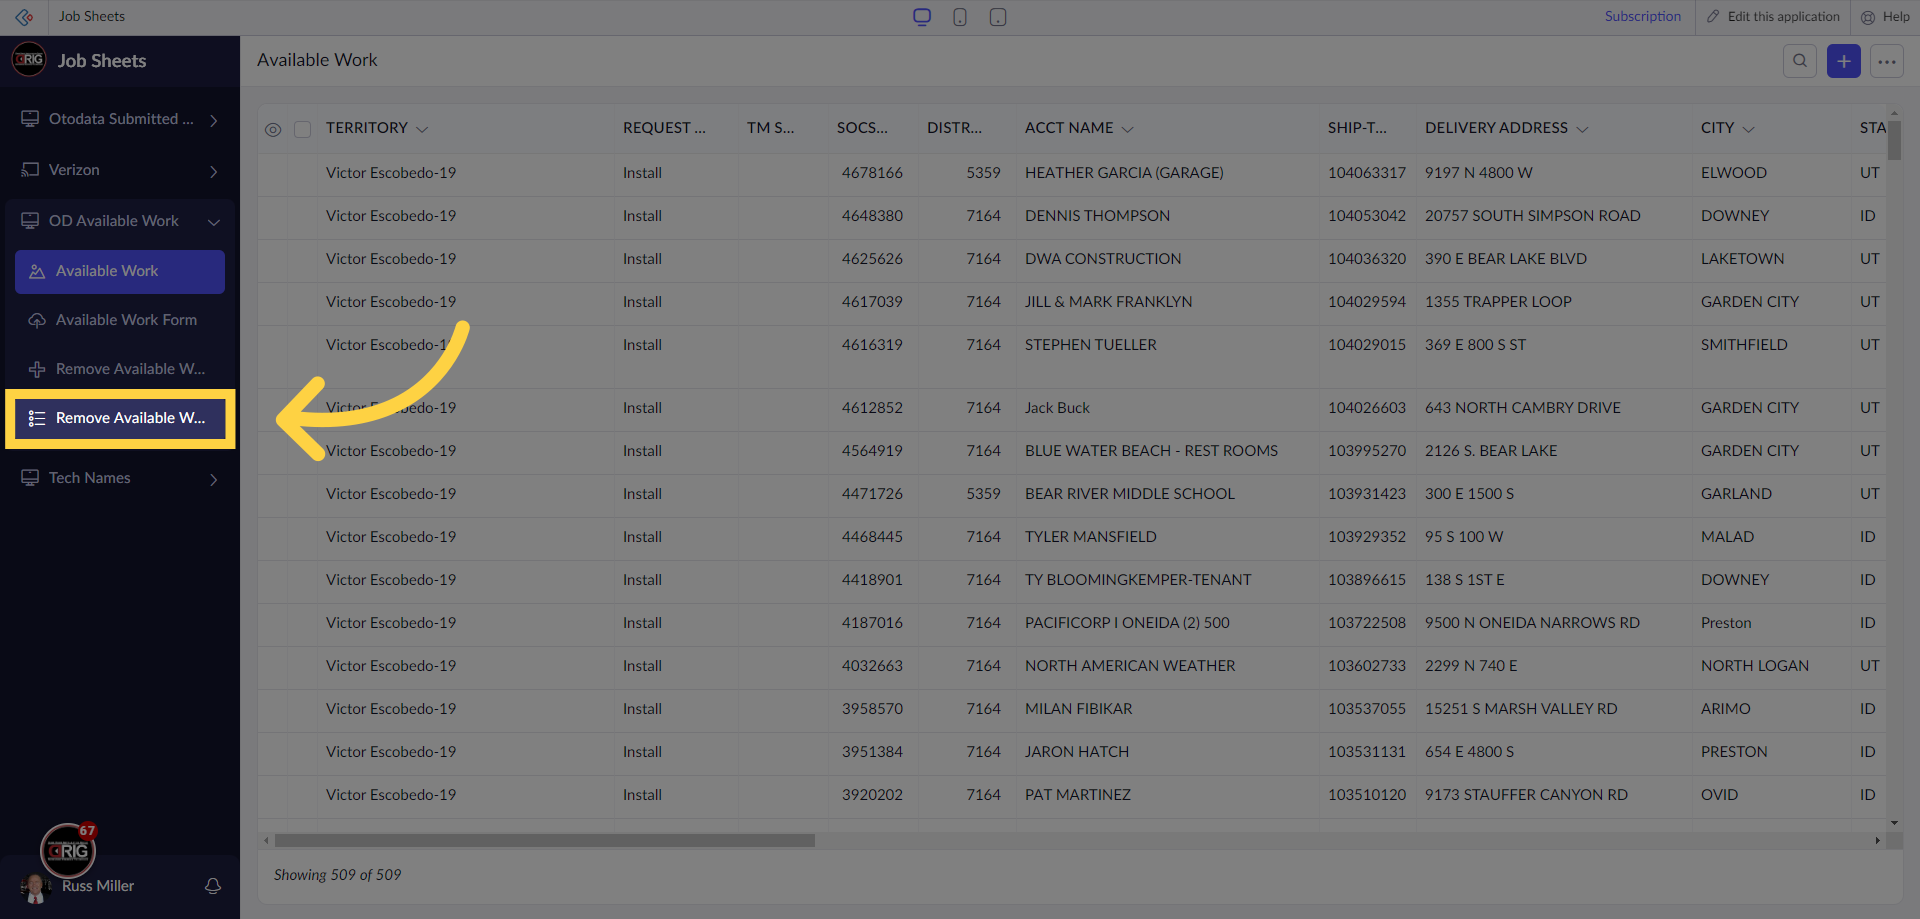
32. Click "Remove Available Work Data"
Do you have work you need to remove from Available Work? Click on "Remove Available Work Data"
33. Click "Import"
Initiate the import process.
34. Switch to "sheet2appimport.zoho.com"
Select your import method, in this example we are going to use "Cloud Service"
35. Switch to "gadgets.zoho.com"
In the left panel, select Workdrive. It will be best practice to familiarize yourself with Zoho.
36. Click on the hamburger menu
Click the selected button
37. Click "DRIG Partners"
Access the "DRIG Partners" section for data management.
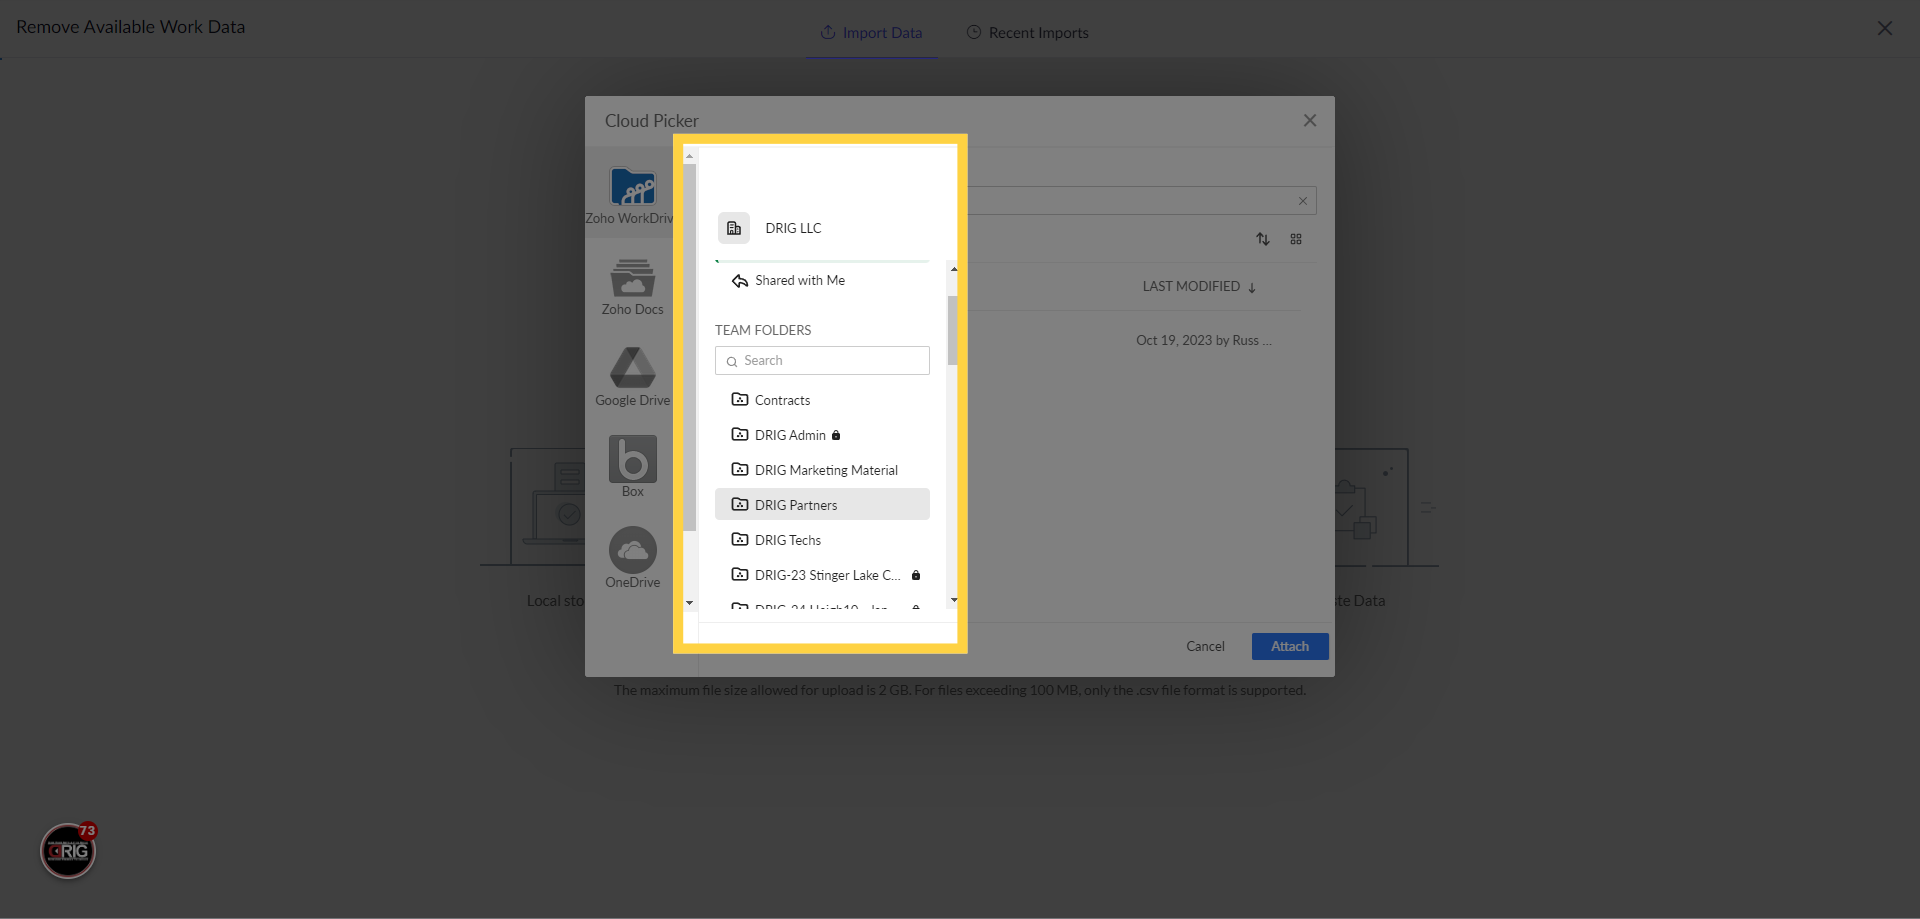
38. Click "Otodata"
Access the "Otodata" feature for specific tasks.
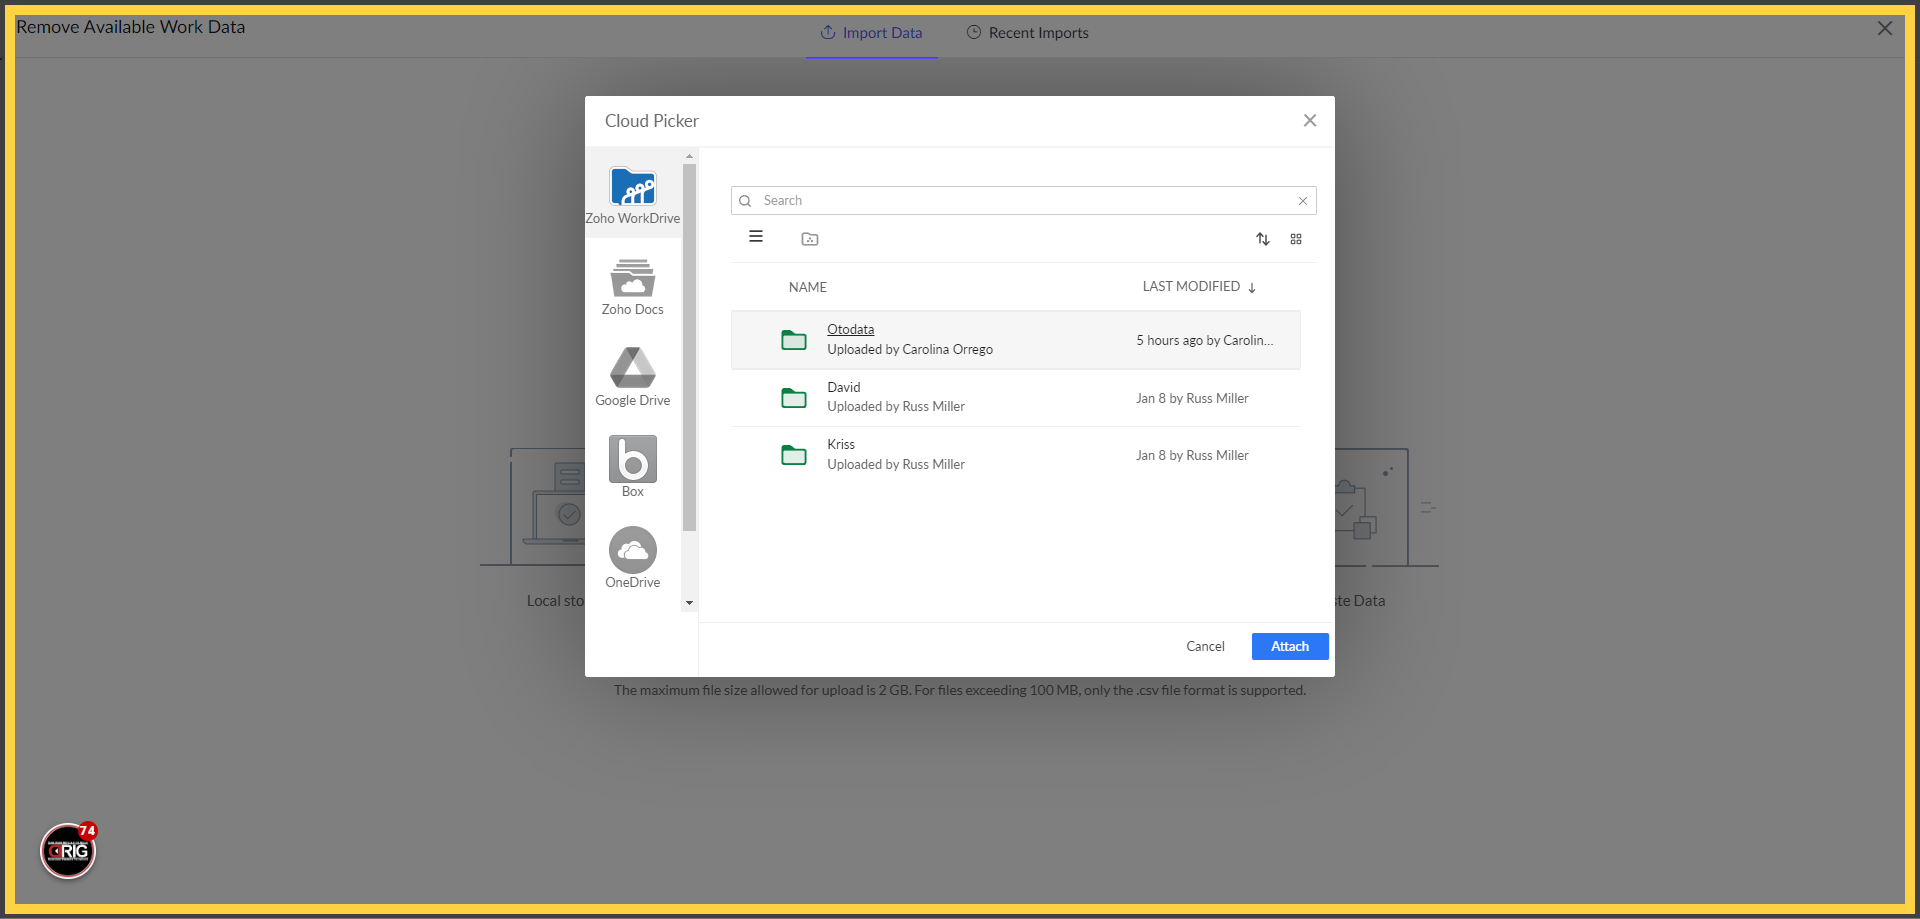
39. Click "Traveling Work"
Access the "Traveling Work" section or "Local Work", depending on what you are working on.
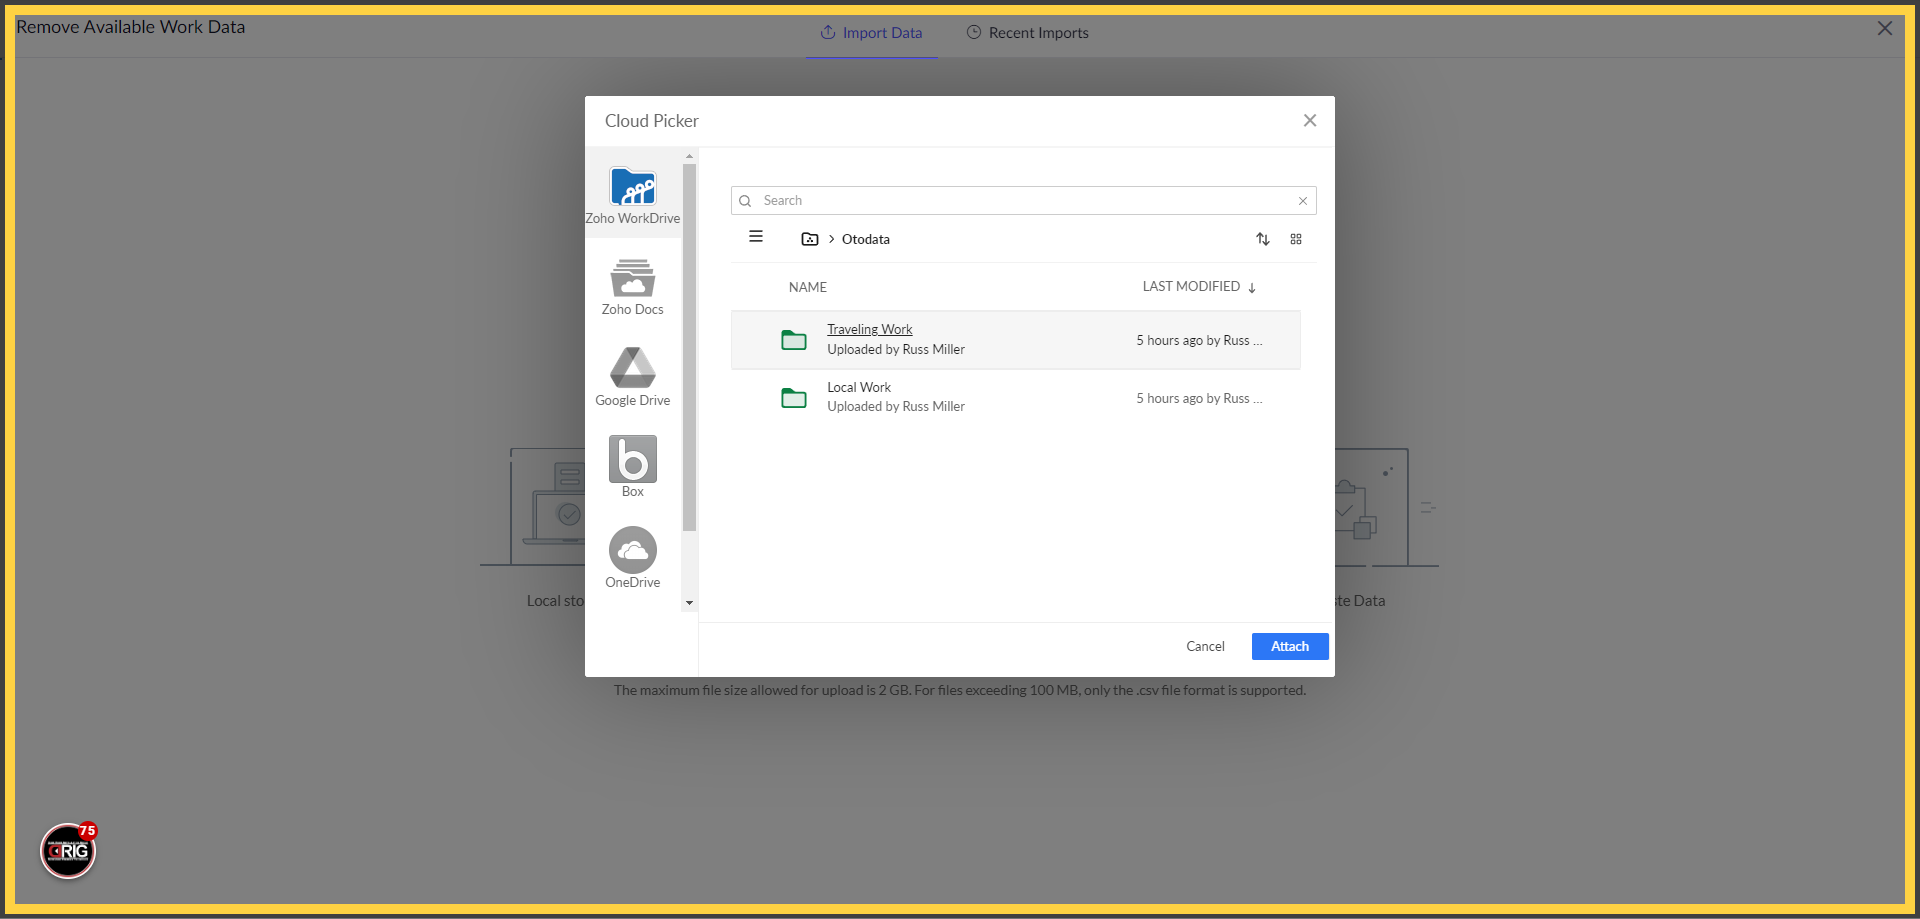
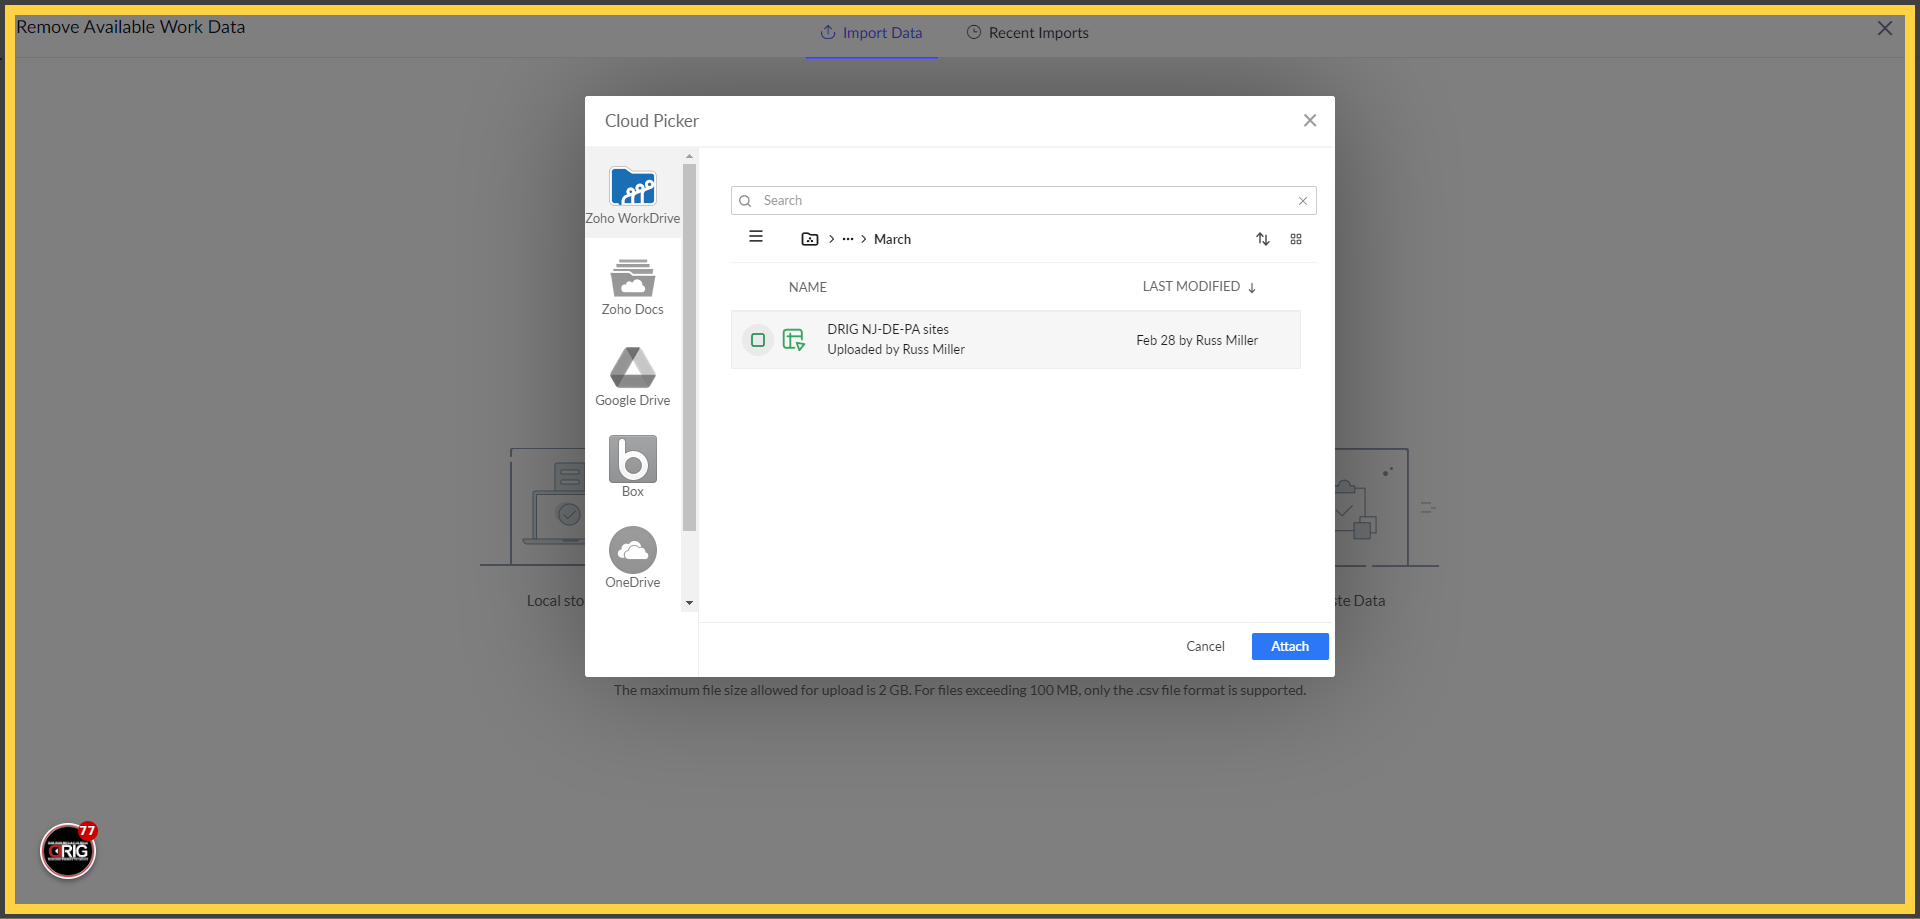
40. Click "March"
Select the month your are in.

41. Click here
Find your file and click the checkmark box next to it and then "Attach"
42. Click "Settings"
This next step is CRUCIAL. Click on "Settings".

43. Click "Execute scripts"
You must click on "Execute Scripts" in order to update the Available Work. Don't fret, if you forget, just repeat these steps and when you run the import again, it will clean everything up. Just remember the second time to select this option.
44. Click "Cancel"
Then click "Import" and you are all set.
The guide covers a range of actions in the Job Sheet App, including accessing job sheets, importing data, executing scripts, and managing Otodata data effectively. By following these instructions, users can streamline their workflow. Remember, this feeds all the dashboards, when you make changes here, it updates in all the dashboards. We have it set to sync every 3 hrs. If you need it to sync quicker, please contact the development team. See you in the next one.
Related Articles
How to submit and manage a ticket in Zoho Desk
How to submit and manage a ticket in Zoho Desk Welcome to the Drig's comprehensive guide on using Zoho Desk – our chosen ticketing system designed to streamline your workflow and enhance customer interactions. In this guide, we'll embark on a journey ...Clock-In & Clock-Out
This guide will walk you through the process of clocking in and out using DRIGs mandatory Clock-In and Clock-Out feature. We utilize Zoho Cliq, which is also used for chatting through-out our organization. Go to one.zoho.com 1. Hover to the left to ...How to Log Missing Time
How to Log Time This guide will walk you through logging missing time. Please pay attention to the small details when adding your time. This is a simple process. Thanks for joining. Go to one.zoho.com 1. Navigate to your app drawer Hover your mouse ...Zoho Mail - Q&A
Have a question and need some answers? Submit a ticket here - Click Here Questions From Kim Berry - Fix Blocked Emails First, the most important issue is that Verizon emails are not forwarding, which I think you already know about. I've tried playing ...Chain of Command for Resolutions or Concerns
Key Principle: Upward Flow Only: Concerns or complaints should always be escalated upward through the proper channels. Avoid addressing them "sideways" to peers or associates who cannot resolve the issue, as this risks creating division or ...