How to submit and manage a ticket in Zoho Desk
How to submit and manage a ticket in Zoho Desk
Welcome to the Drig's comprehensive guide on using Zoho Desk – our chosen ticketing system designed to streamline your workflow and enhance customer interactions. In this guide, we'll embark on a journey through the various features and functionalities of Zoho Desk, tailored specifically to meet our unique operational needs at Drig. Whether you're tackling daily tickets or managing complex incidents, this tool is here to make your job smoother and more efficient.
Go to one.zoho.com
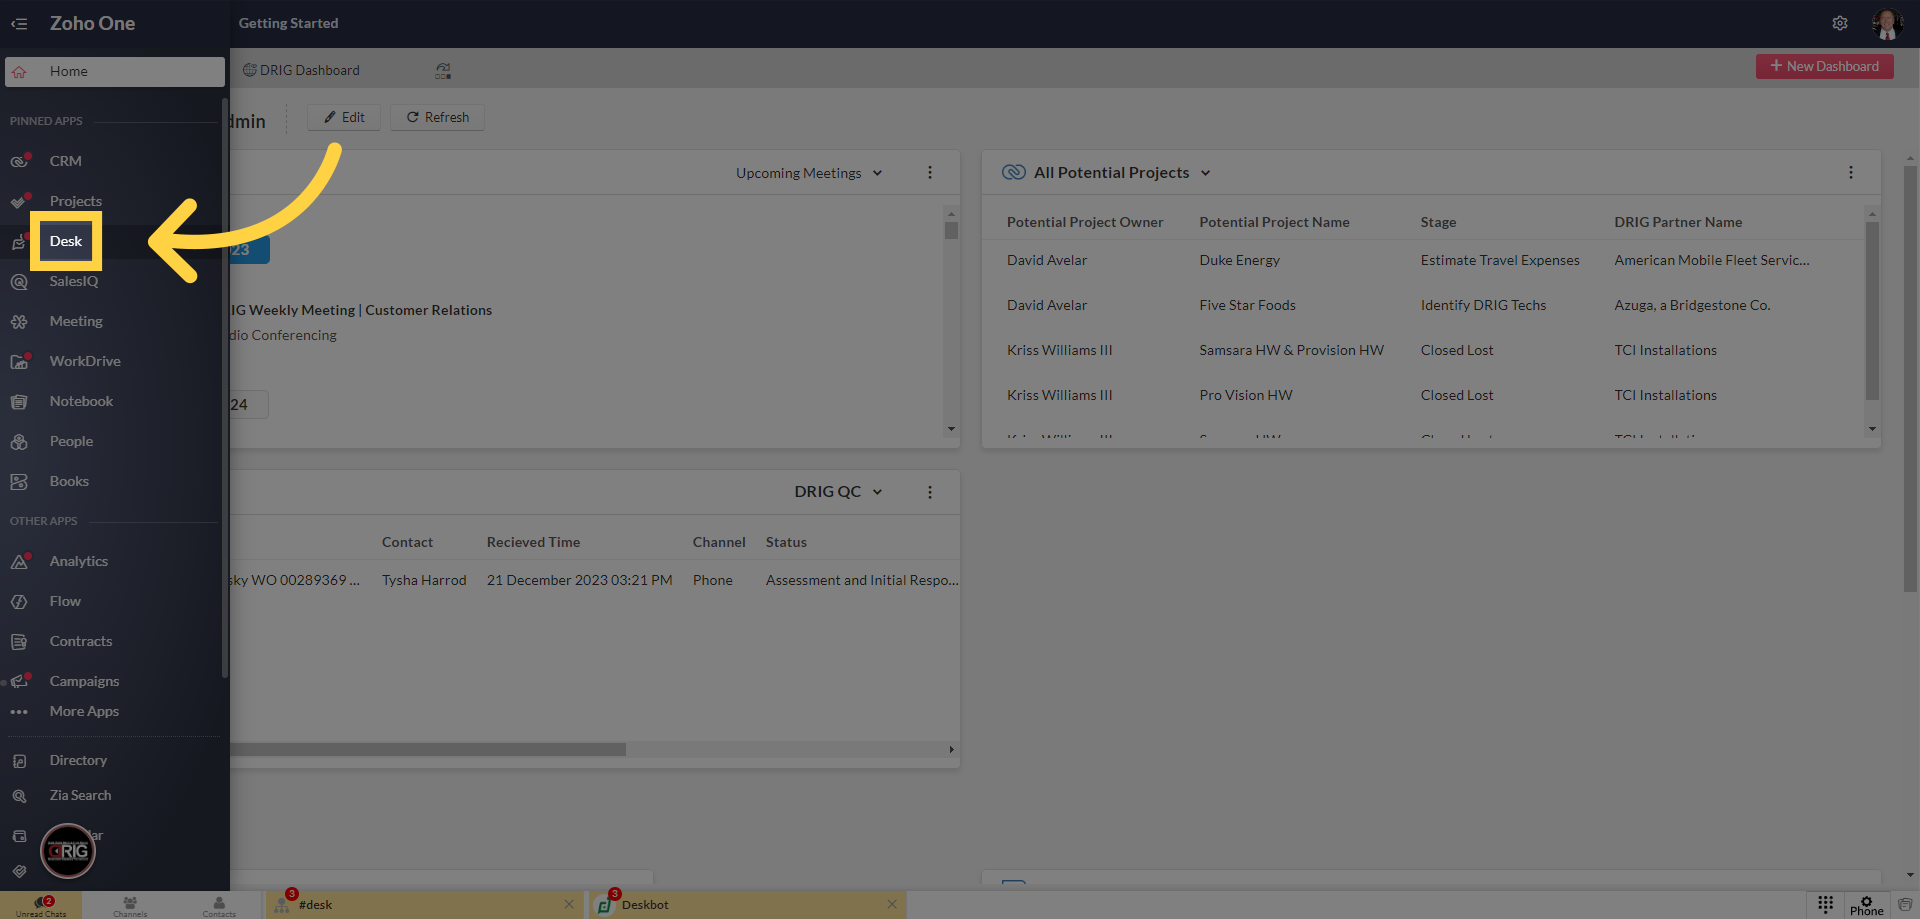
1. Hover to the left, a panel will appear. Click on "Desk"
Moving forward in our guide, let's access Zoho Desk from our integrated Zoho One suite. After you've logged into your Zoho One account, let's reveal the suite of applications. To do this, simply drag your mouse to the left side of your screen. This action will expand the panel, displaying the various applications at your disposal. Among these applications, you'll find the 'Desk' icon. This is your portal to an efficient customer service experience. With a single click on 'Desk', you'll enter the Zoho Desk environment, where a multitude of tools and features await to streamline your workflow.
2. Welcome to Drig's Ticket System
Welcome to Zoho Desk’s Tickets layout, your dashboard for superior support at Drig. On the left, find Headquarters for oversight on all tickets, Team Feeds for collaboration, and View for personalized ticket management. At the top, access Tickets to manage tickets, Knowledge Base for resources, Customers for client insights, Analytics for data-driven decisions, Activities for task tracking, and Social, Chat, and IM for dynamic communication.

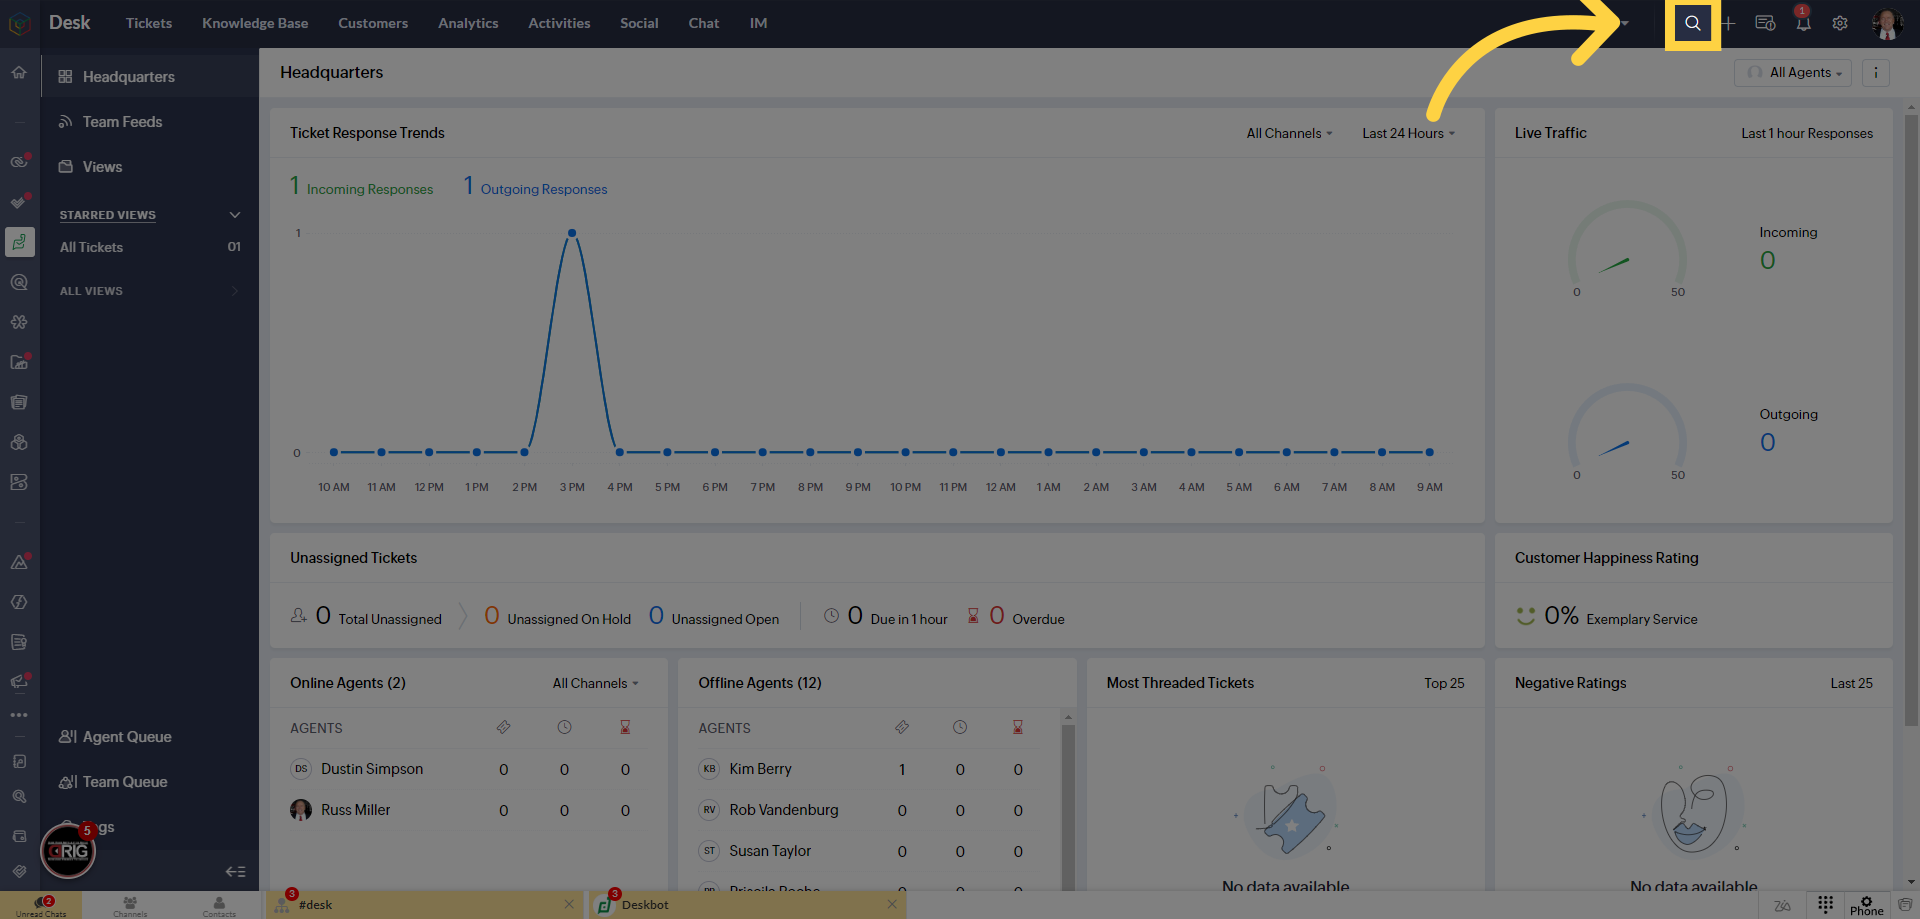
3. Click the search icon to find anything within Desk.
In Zoho Desk, the search feature is your powerful tool for efficiency. Located at the top right corner, the search icon is your gateway to quickly locate anything within the system. Whether it’s customer details, specific tickets, or articles in the Knowledge Base, this function simplifies finding the information you need with just a few keystrokes. Mastering this search tool ensures you can navigate Zoho Desk effectively, saving time and enhancing your productivity in managing interactions.
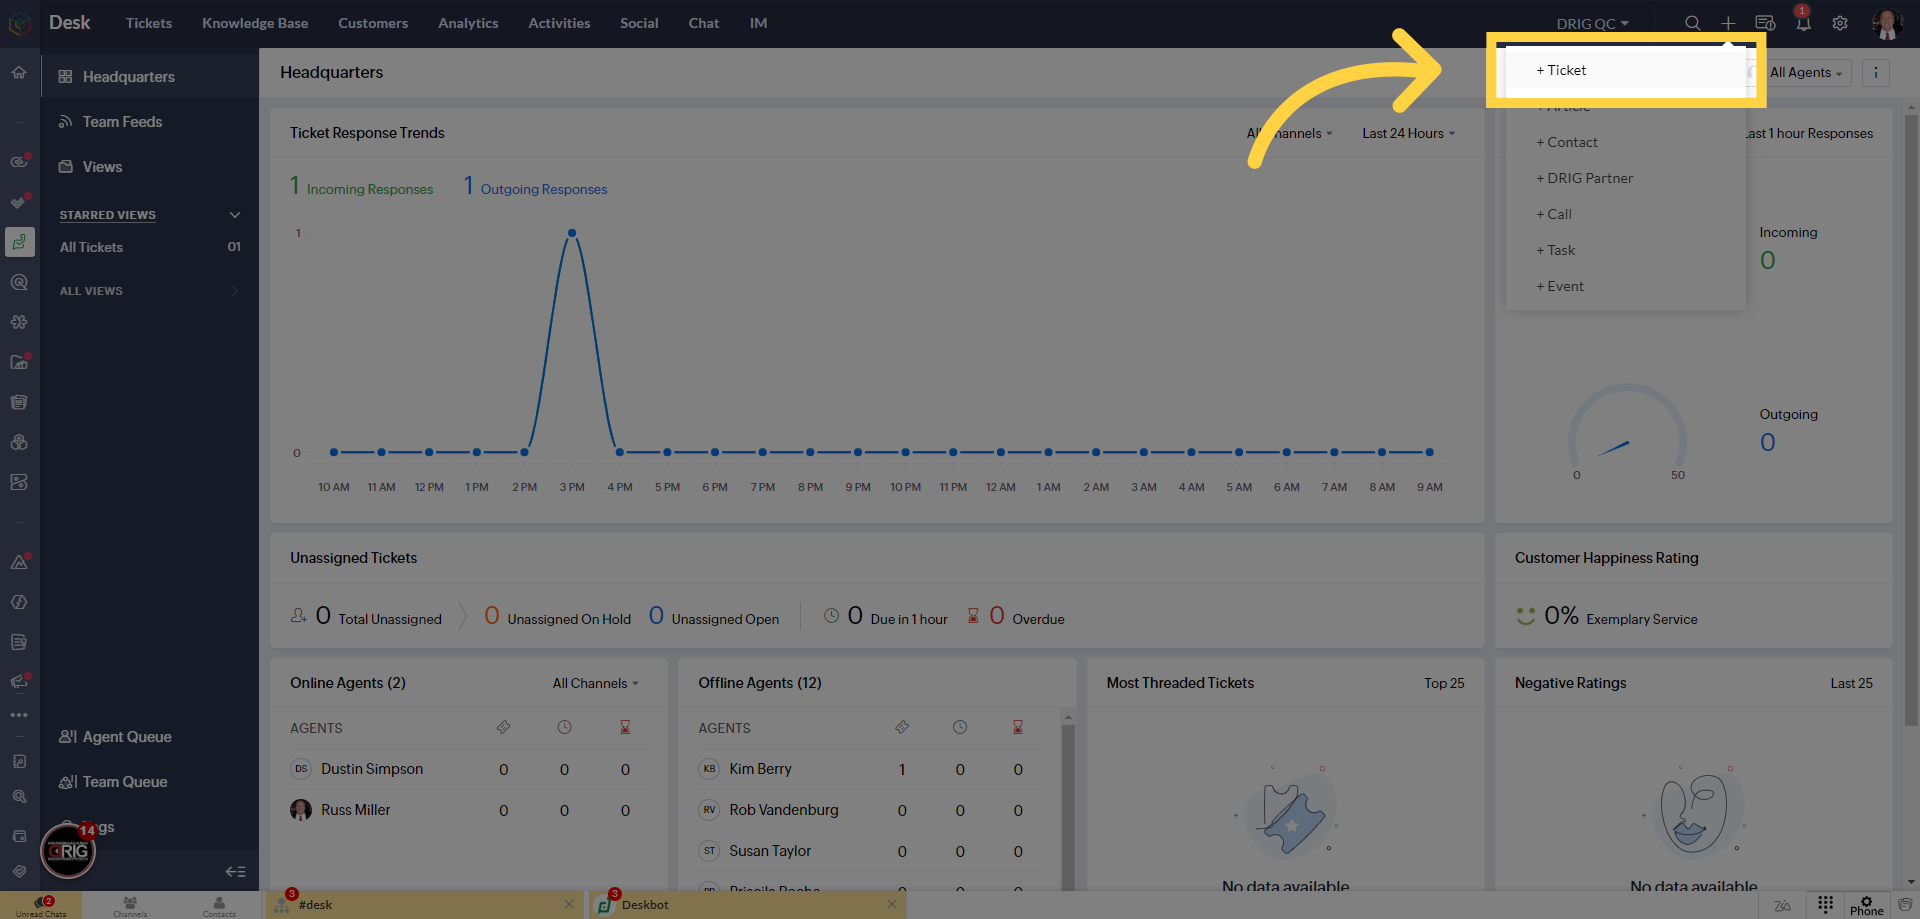
4. Click the plus button.
In Zoho Desk, the plus icon in the top right corner is your starting point for adding new elements to our system. By clicking this button, you can effortlessly create new tickets, articles, calls, tasks and events, among other items. This feature streamlines the process of expanding our database and managing customer interactions. Whether it's addressing a fresh customer query or adding valuable information to our Knowledge Base, the plus icon is your quick link to keeping our system comprehensive and up-to-date.

5. Click "+ Ticket" to create your ticket
Let's delve into the core of our ticketing system – creating and managing tickets. By clicking on 'Tickets' at the top, we enter the realm where internal and external queries transform into actionable tasks. This section is where you'll learn to create, track, and resolve tickets efficiently, ensuring we deliver top-notch service to our clients. In the upcoming slides, we'll walk through a high level view of the ticket management process, equipping you with the knowledge to handle customer needs effectively and professionally
6. Starting a ticket internally
Explore the ticket layout, where tickets are created and managed. This interface allows for internal submissions by our team. We also have an external interface at d e s k dot d r i g u s a dot com. Geared towards techs, customers and our partners at Drig. Whether it's a employee, customer, partner, or technician raising an issue, this system ensures every query is efficiently captured and resolved, maintaining our commitment to exceptional service.
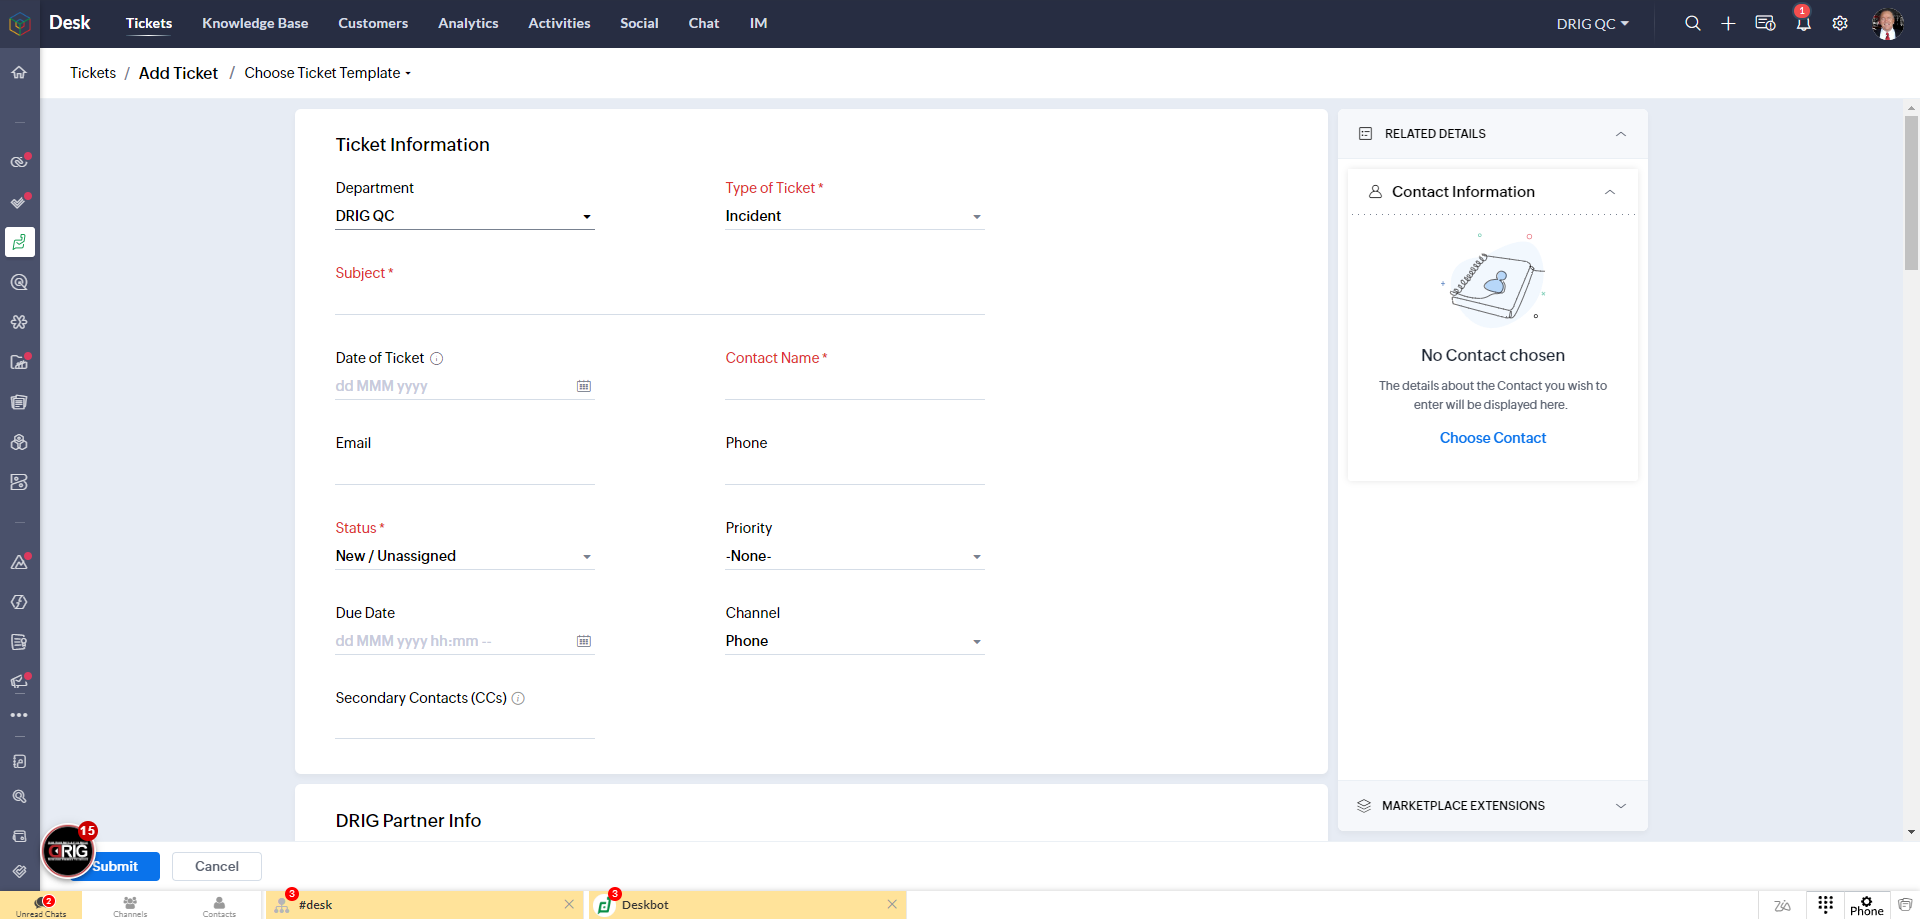
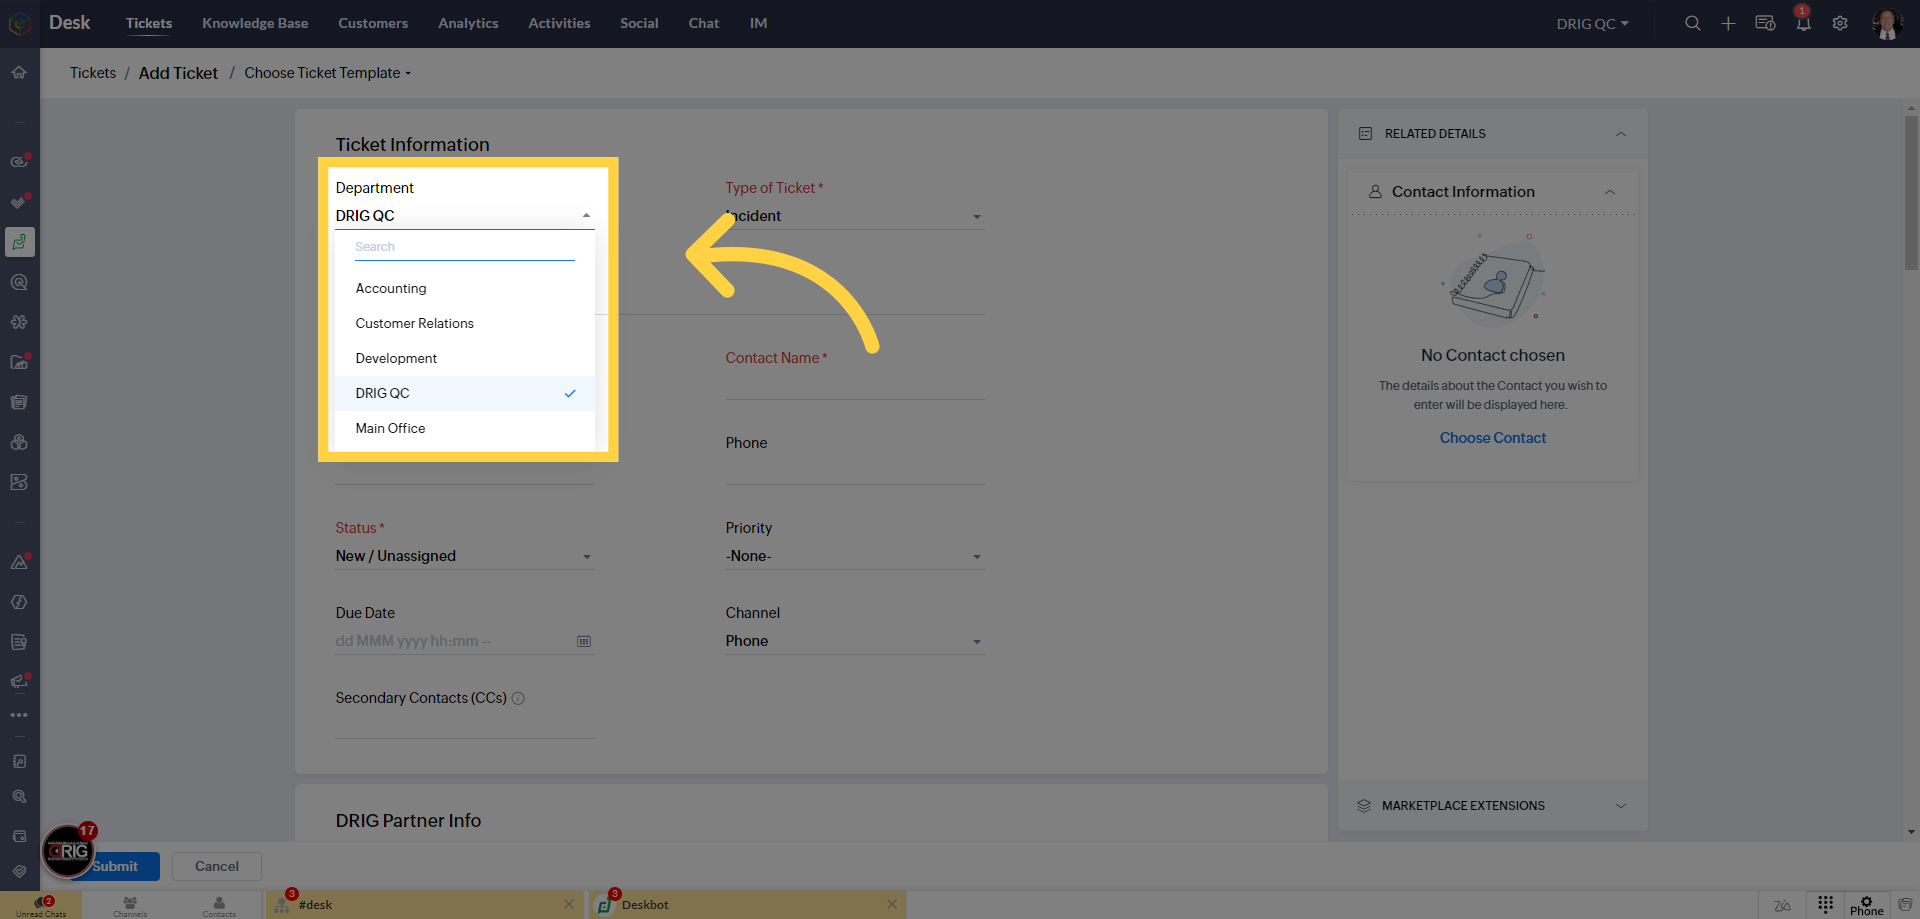
7. Start by selecting a department.
When creating a ticket, it's crucial to select the right department to ensure the query reaches the correct team at DRIG. Our departments include Main Office, DRIG QC, Accounting, Development, and Customer Relations. Choosing the appropriate department streamlines the response process, enhancing efficiency and ensuring that each query is handled by the experts best suited to resolve it. This step is key in maintaining our organized and effective customer service approach.
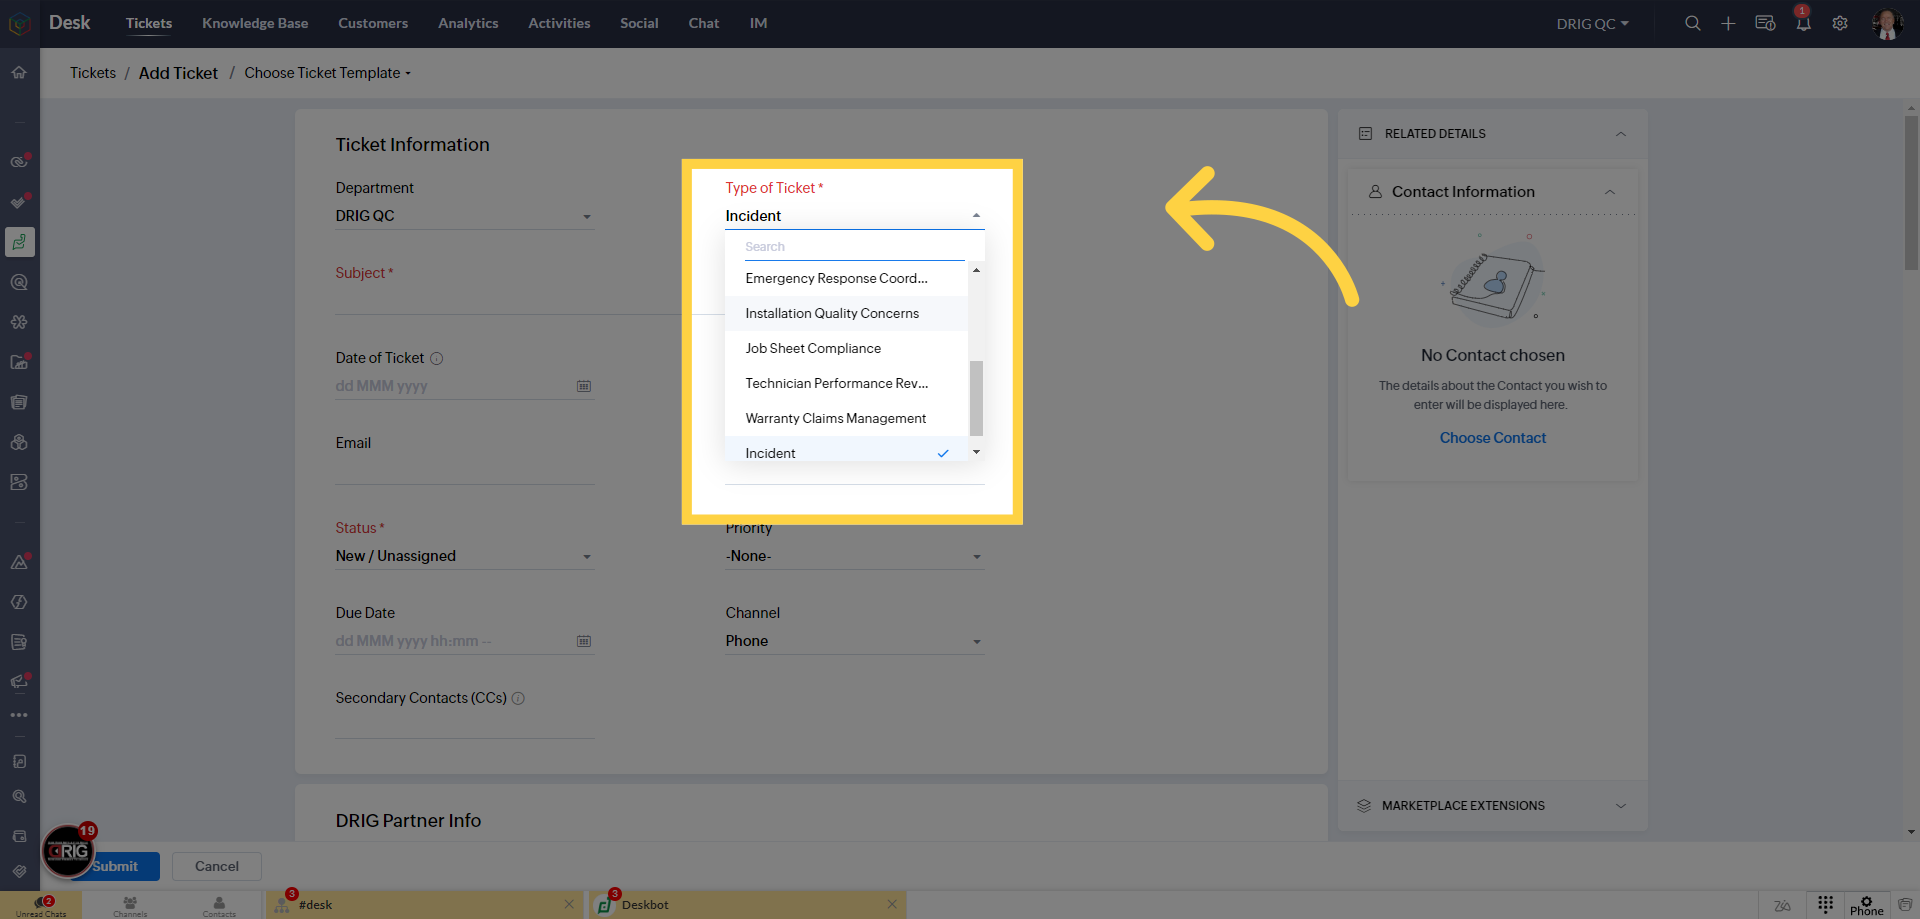
8. Select Type of Ticket
When creating a ticket, selecting the right ticket type is essential. Each DRIG department handles specific ticket types, reflecting the issues they manage. Some types overlap between departments, indicating joint involvement. Choose carefully based on the issue's nature for efficient resolution and effective departmental coordination. This ensures the ticket is addressed by the right team, enhancing our response effectiveness.
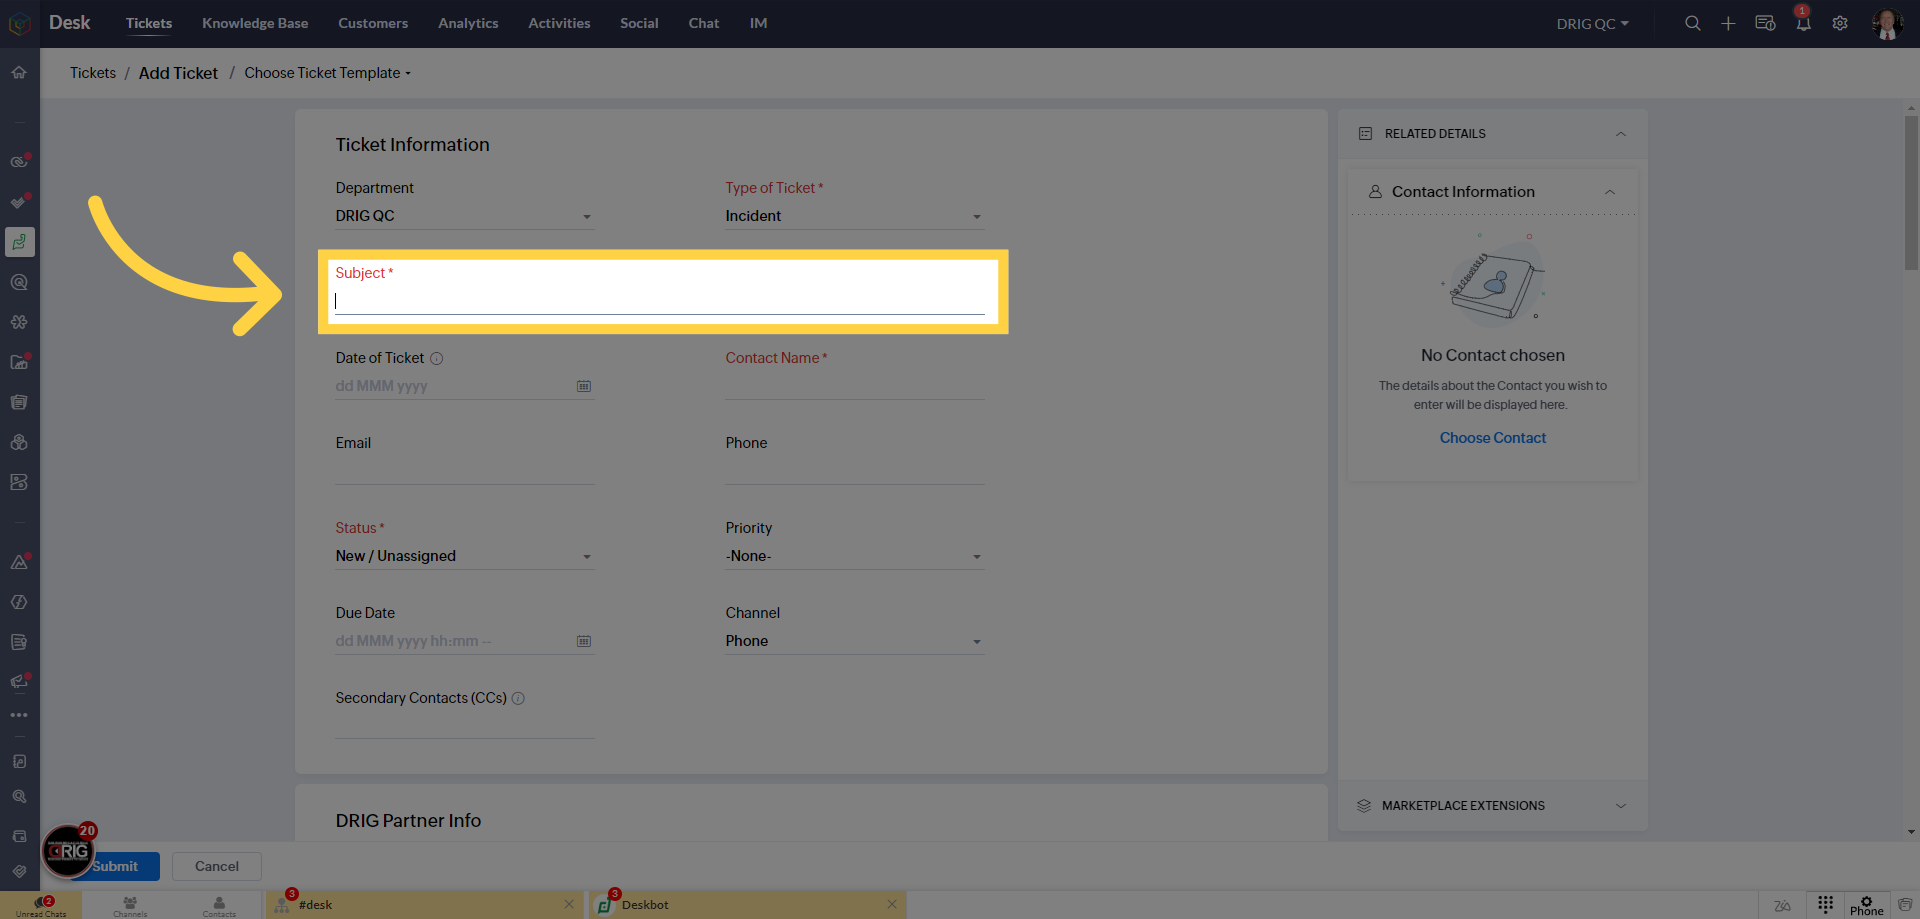
9. Add Your "Subject"
When creating a ticket or updating one submitted, it's mandatory to add a subject to every ticket. The subject acts as a concise headline, summarizing the issue. It's crucial for quickly informing the team about the ticket's nature, aiding in effective prioritization and categorization. For consistency, the subject should follow this format: 'Tech, Customer or Company it concerns, followed by work order PO or project ID, ending with the Partner involved.' This standardized approach ensures clarity and guides the initial response for swift and targeted resolution.
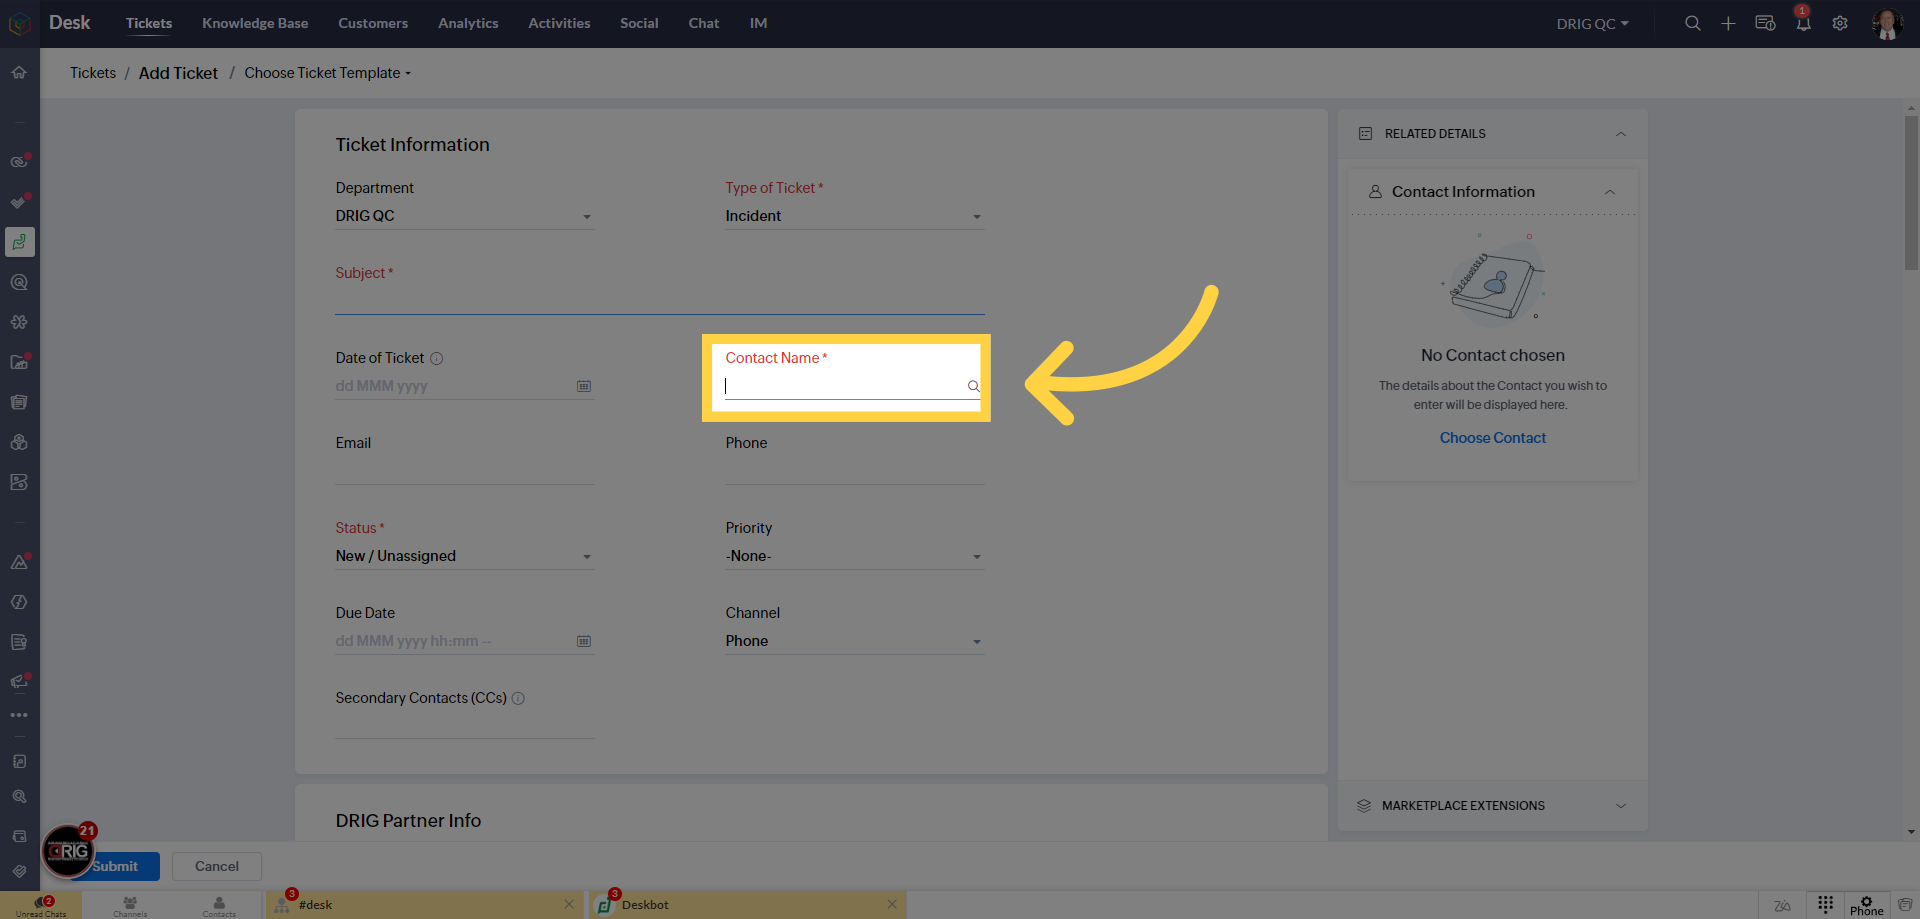
10. Add "Contact Name"
Initially, adding the primary contact, usually the concerned party, is mandatory for every ticket. But that’s just the beginning. Once the ticket is created, first step is to include all relevant stakeholders. This includes partners, other customers, and DRIG team members directly involved or affected by the issue. Adding everyone involved ensures effective collaboration and communication, providing regular updates and a coordinated approach to problem-solving. This comprehensive inclusion of contacts guarantees a more efficient resolution process and enhances overall service quality.
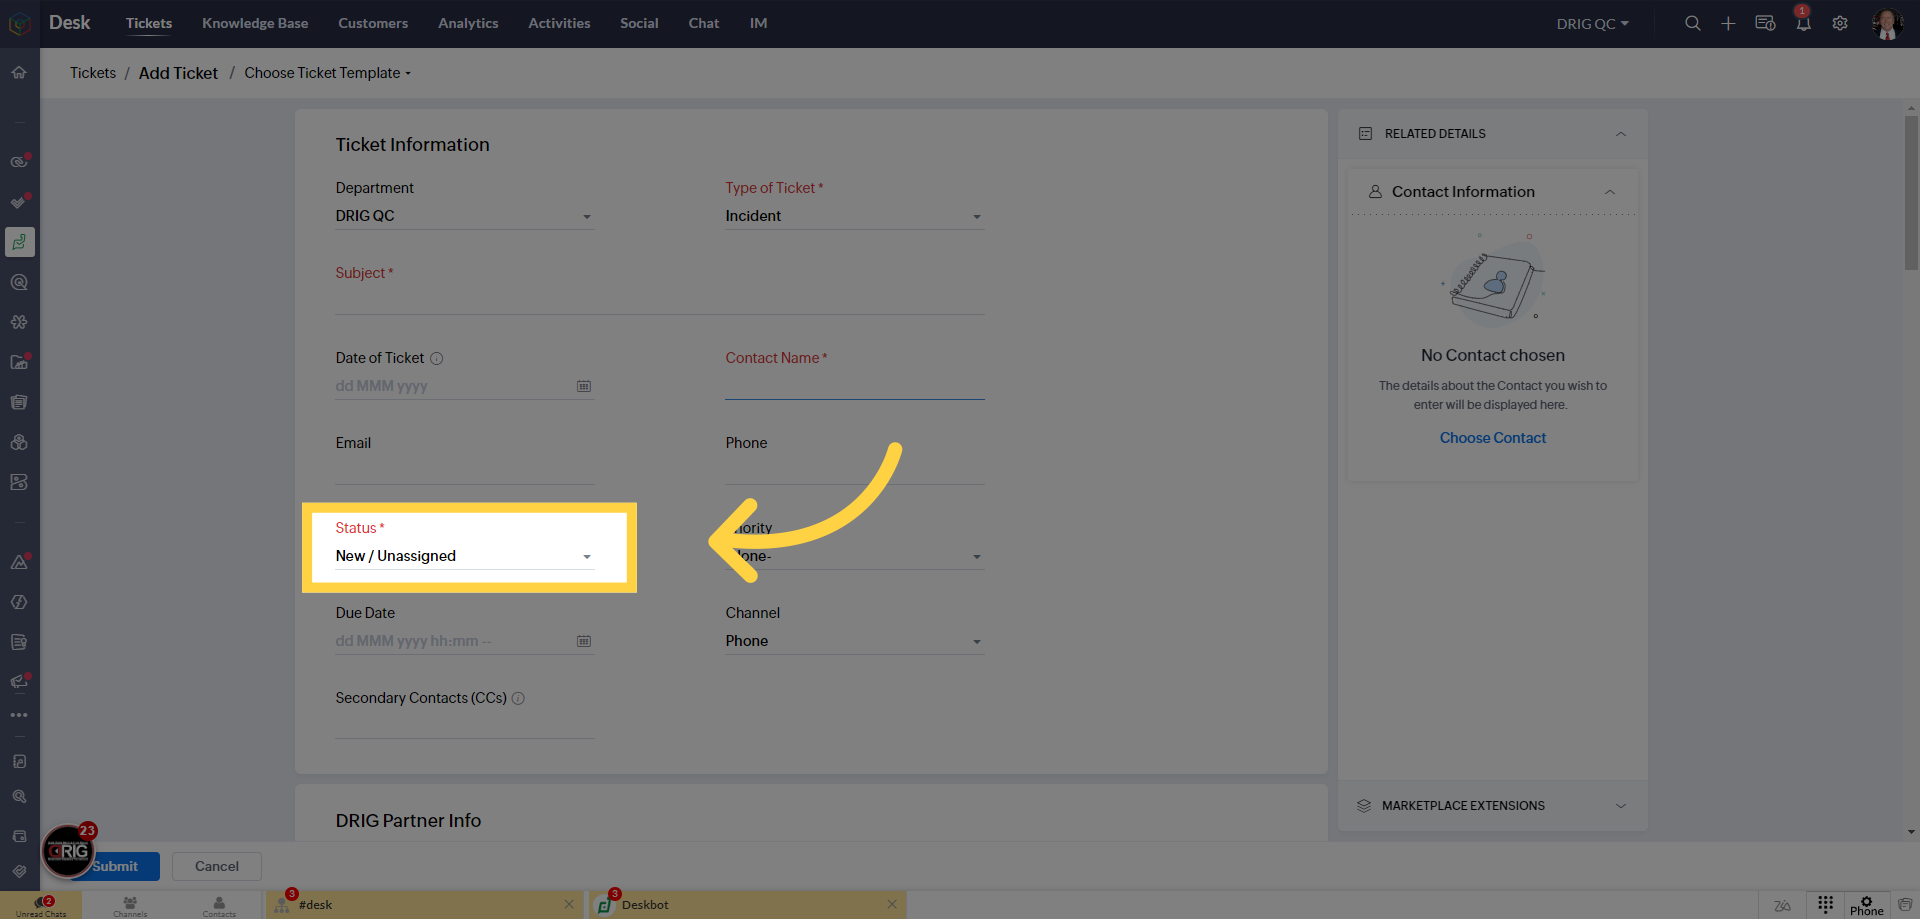
11. Do not update "Status"
The last mandatory field in creating a new ticket is the initial stage or status, which auto-populates based on our predefined workflow. This stage sets the ticket's path and should not be altered, as it aligns with the specific process each ticket type follows. Remember, when creating a ticket, you can focus on filling out just the essential information. All fields, including detailed descriptions and updates, can be added or modified throughout the ticket’s lifecycle. This flexibility allows for dynamic management during the lifecycle of each unique issue.
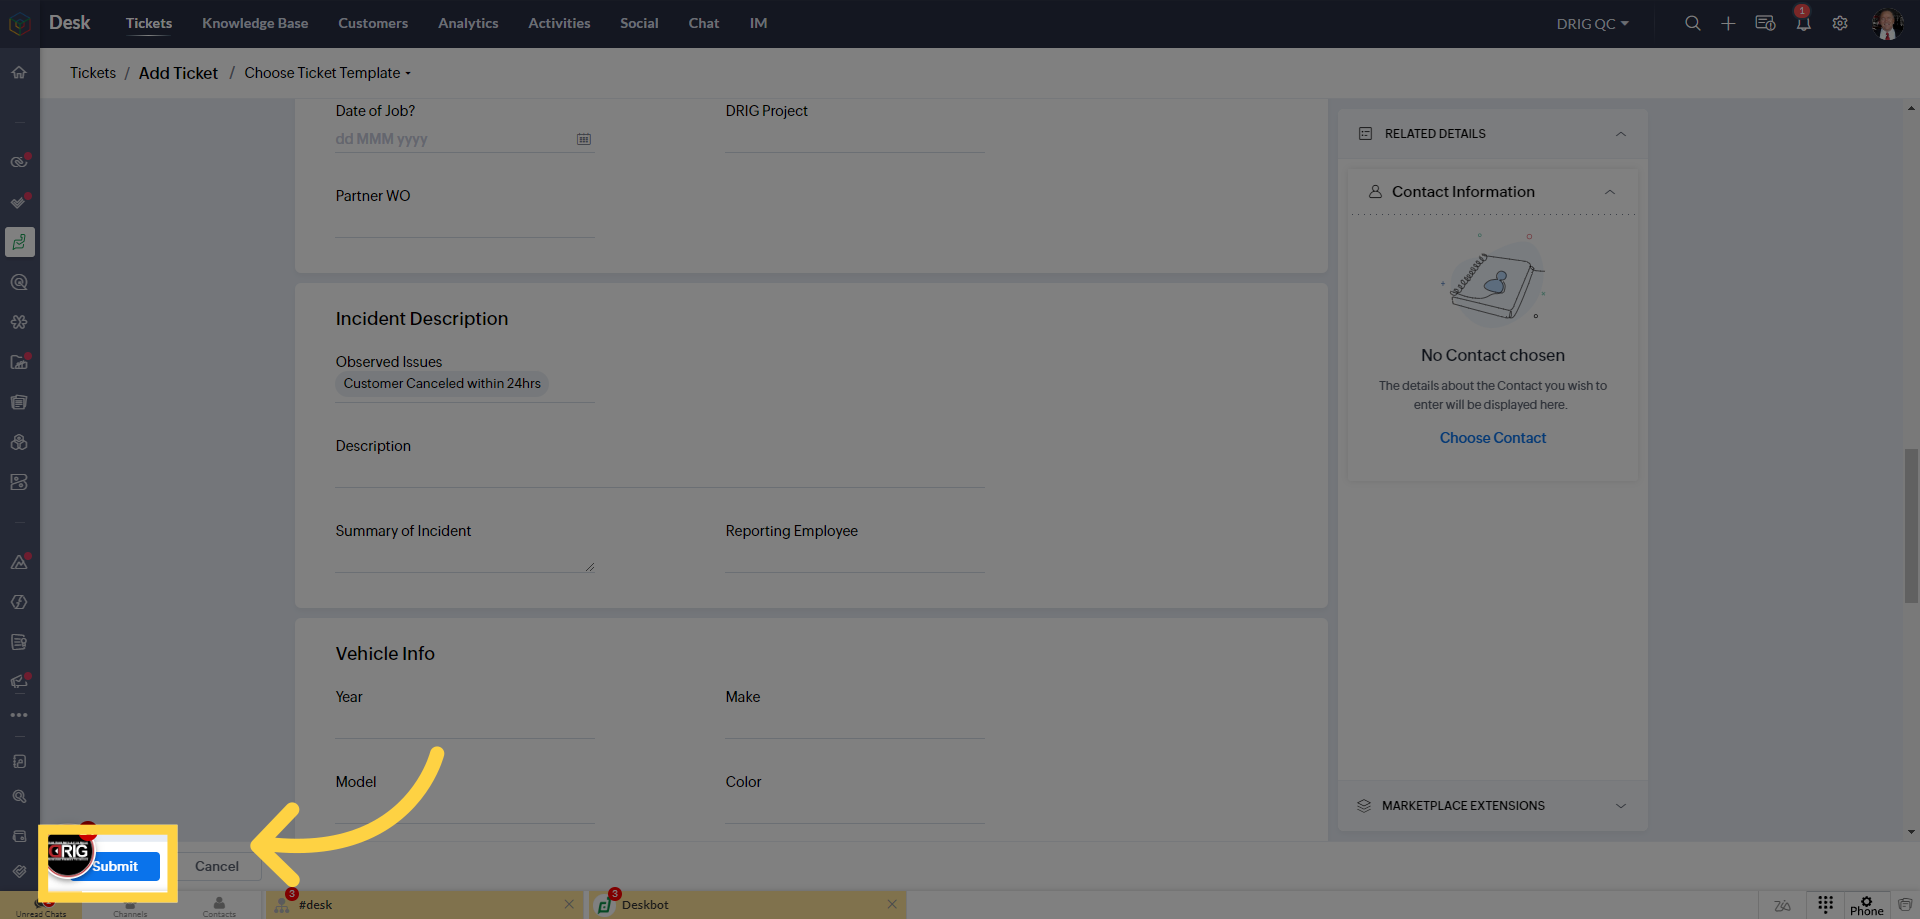
12. Click "Submit" to create your ticket
With all the necessary fields filled, you're now ready to submit your ticket into Desk. Simply click the 'Submit' button. This action finalizes the creation of your ticket and initiates its journey through our support workflow. Remember, submitting the ticket is just the beginning. You'll be able to update and modify it as needed, ensuring dynamic and responsive management of the issue. Each submitted ticket is a step towards resolving our customers' queries efficiently and maintaining the high standard of service at Drig.
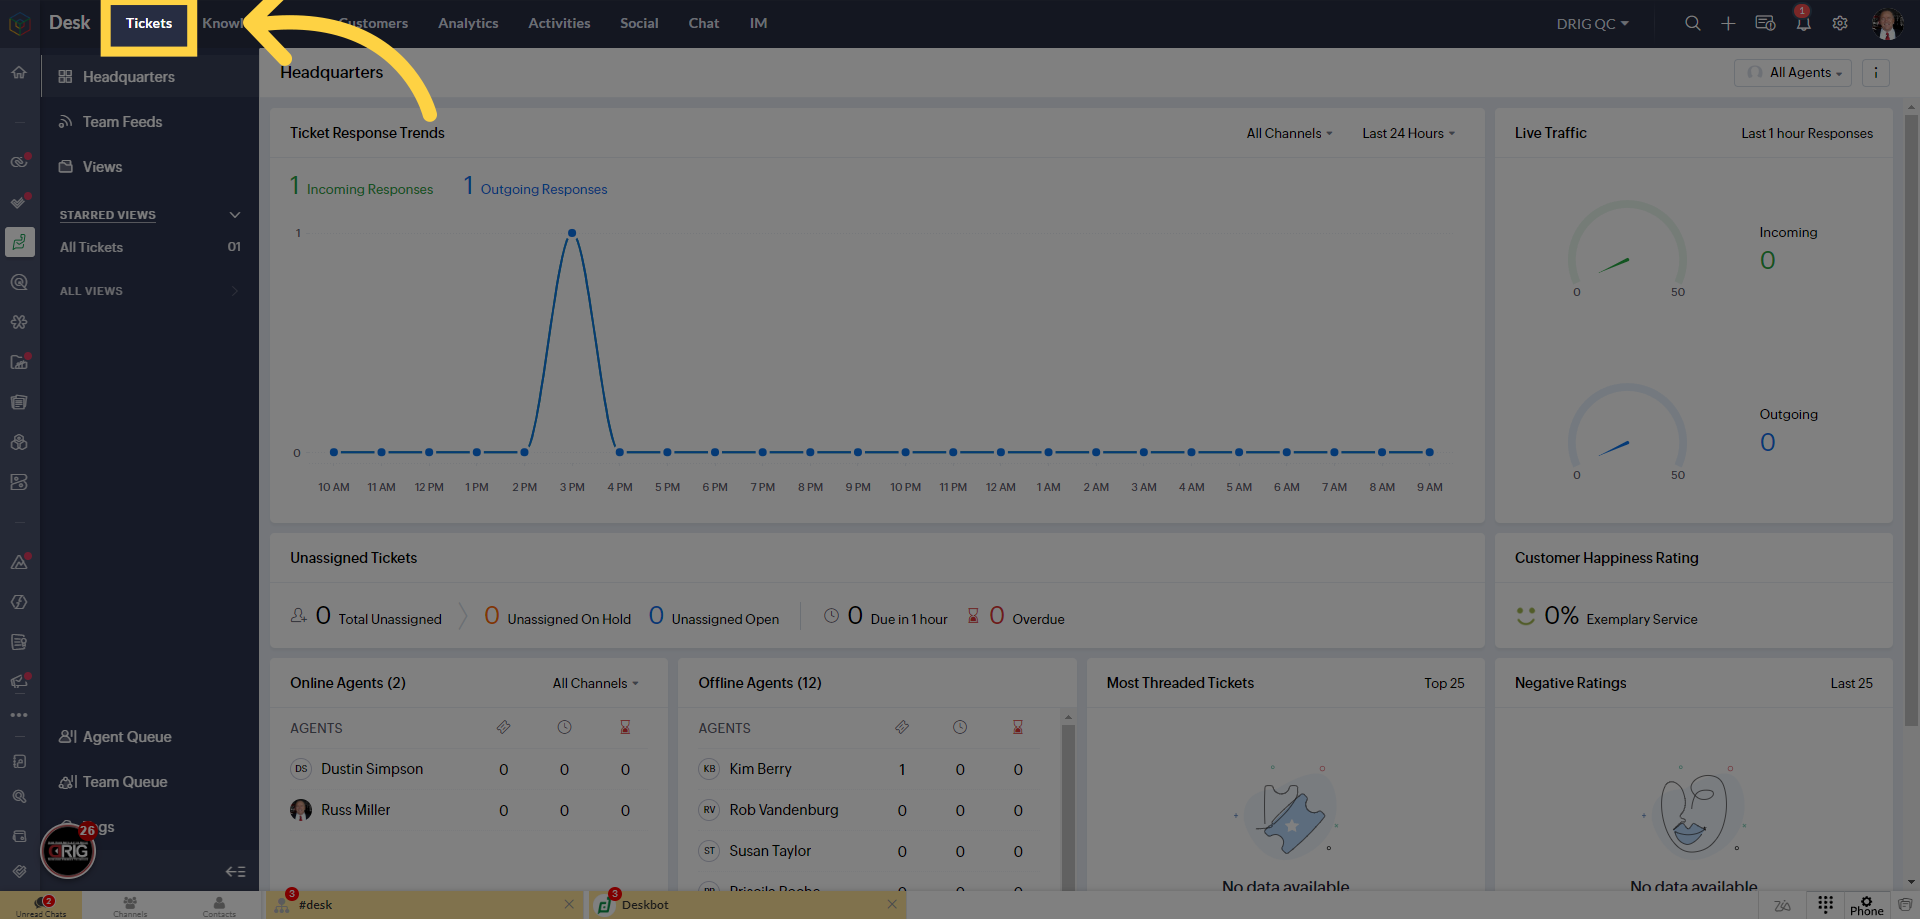
13. Click "Tickets"
To manage your tickets, start by clicking on the 'Tickets' option located at the top of the screen. This will give you access to the ticket management section where you can view, update, and track the progress of all your tickets. It's your central hub for effective ticket management, ensuring that you can stay organized and provide top-notch service to our valued customers.
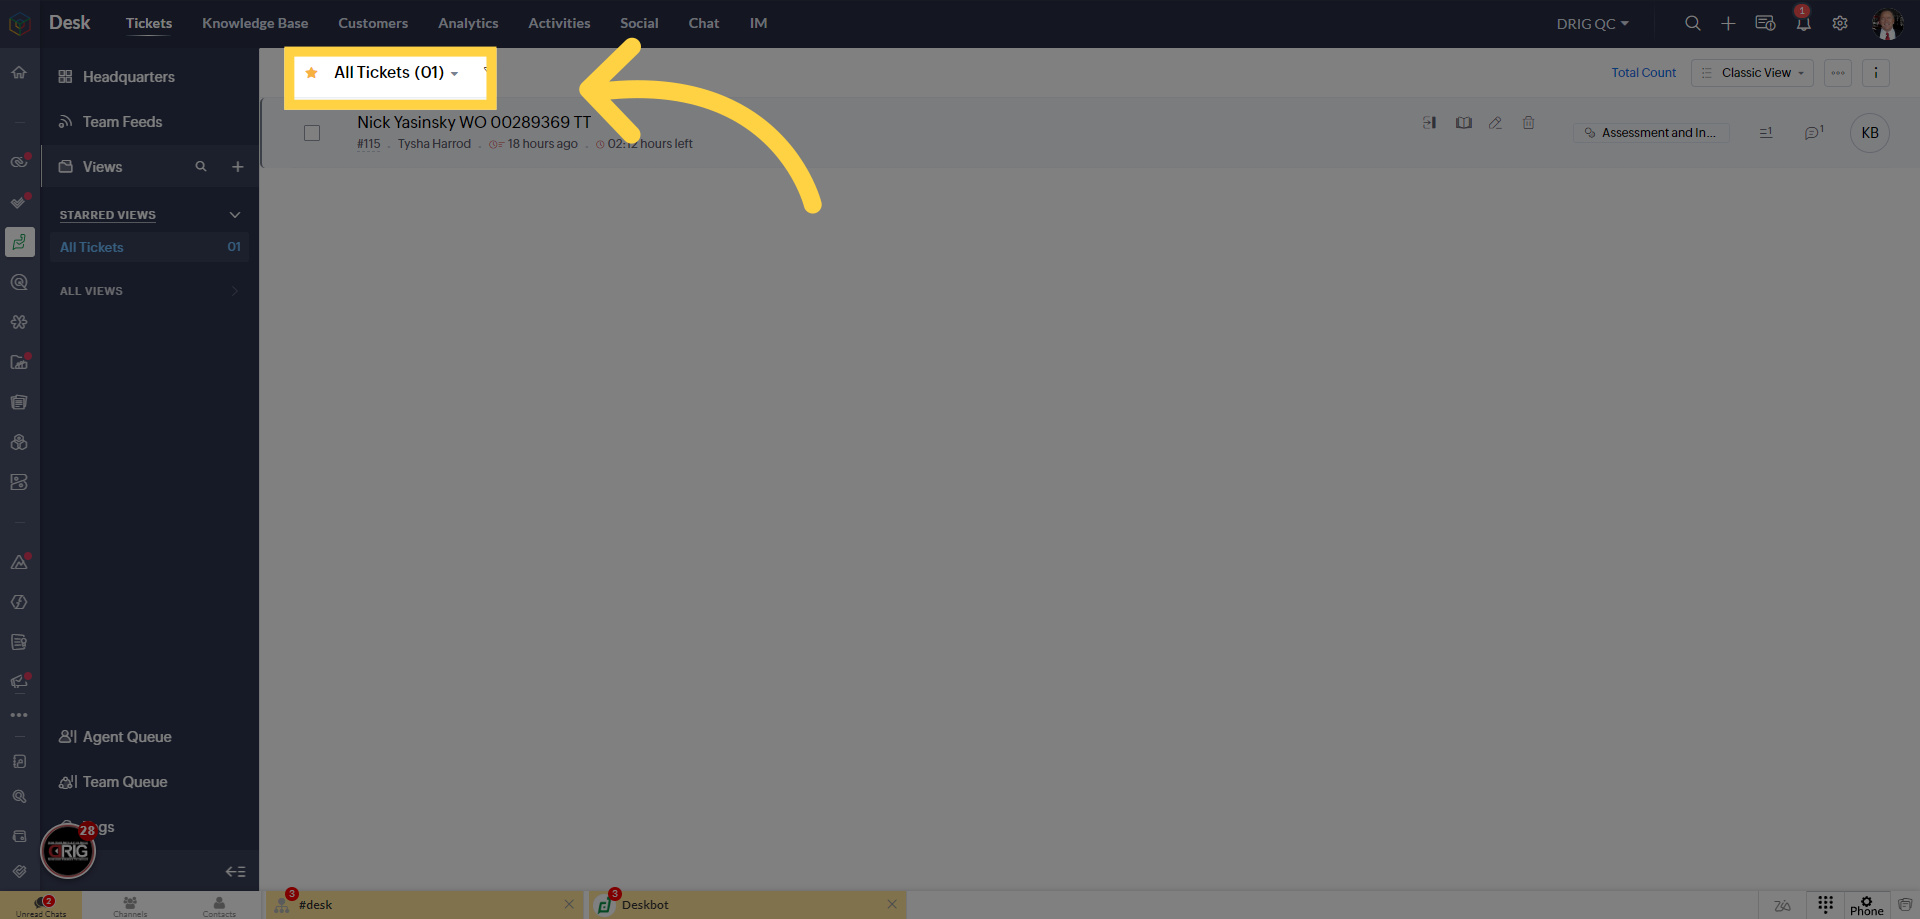
14. Organize ticket here
Here, you have the power to organize your tickets according to your needs. To do this, navigate to the ticket view management drop down. Once you click on it, you can create your own customized views, allowing you to filter and display only the tickets that matter most to you. Whether it's your own tickets, department-specific ones, or any other criteria. These customized views ensure you can work efficiently, focusing on what's essential for your role. Take advantage of this feature to streamline your ticket management process and stay organized.
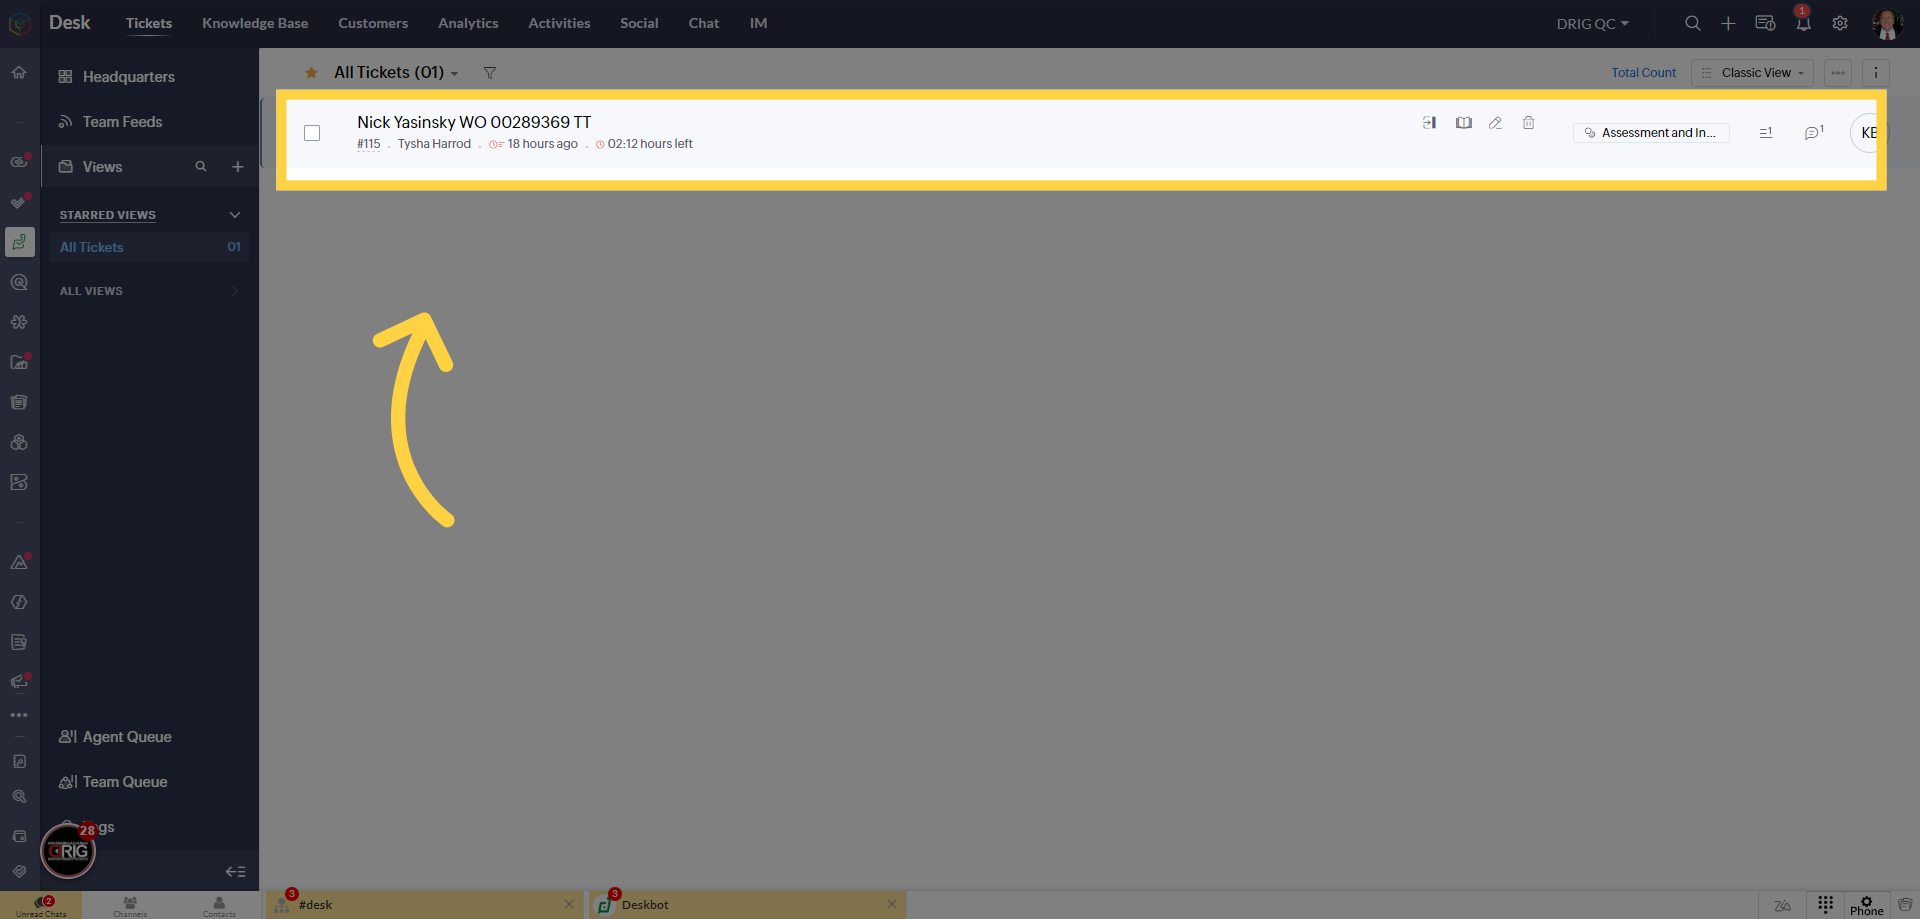
15. Click on any ticket to begin managing it.
Once you've organized your tickets, it's time to start managing them. To begin, simply click on the ticket you want to work on from your list of tickets. This action will open the ticket and give you access to all its details, allowing you to initiate the management process. Whether it's updating information, responding to the customer, or moving it through our workflow, clicking on a ticket is your gateway to providing top-notch support and resolving issues efficiently.
16. Intro to Ticket Management
Welcome to the ticket management screen. On the left, you have a comprehensive list of all your tickets, you can utilize the views you made to swiftly move between them. In the center, a set of powerful tools awaits your exploration. We'll delve into these tools in the upcoming slides, and each one opens a window for easy access. To the right, you'll find the dedicated space for managing conversations and tracking the lifecycle of each ticket. This well structured layout is designed to enhance your ticket management experience, ensuring efficiency and top-notch support delivery.
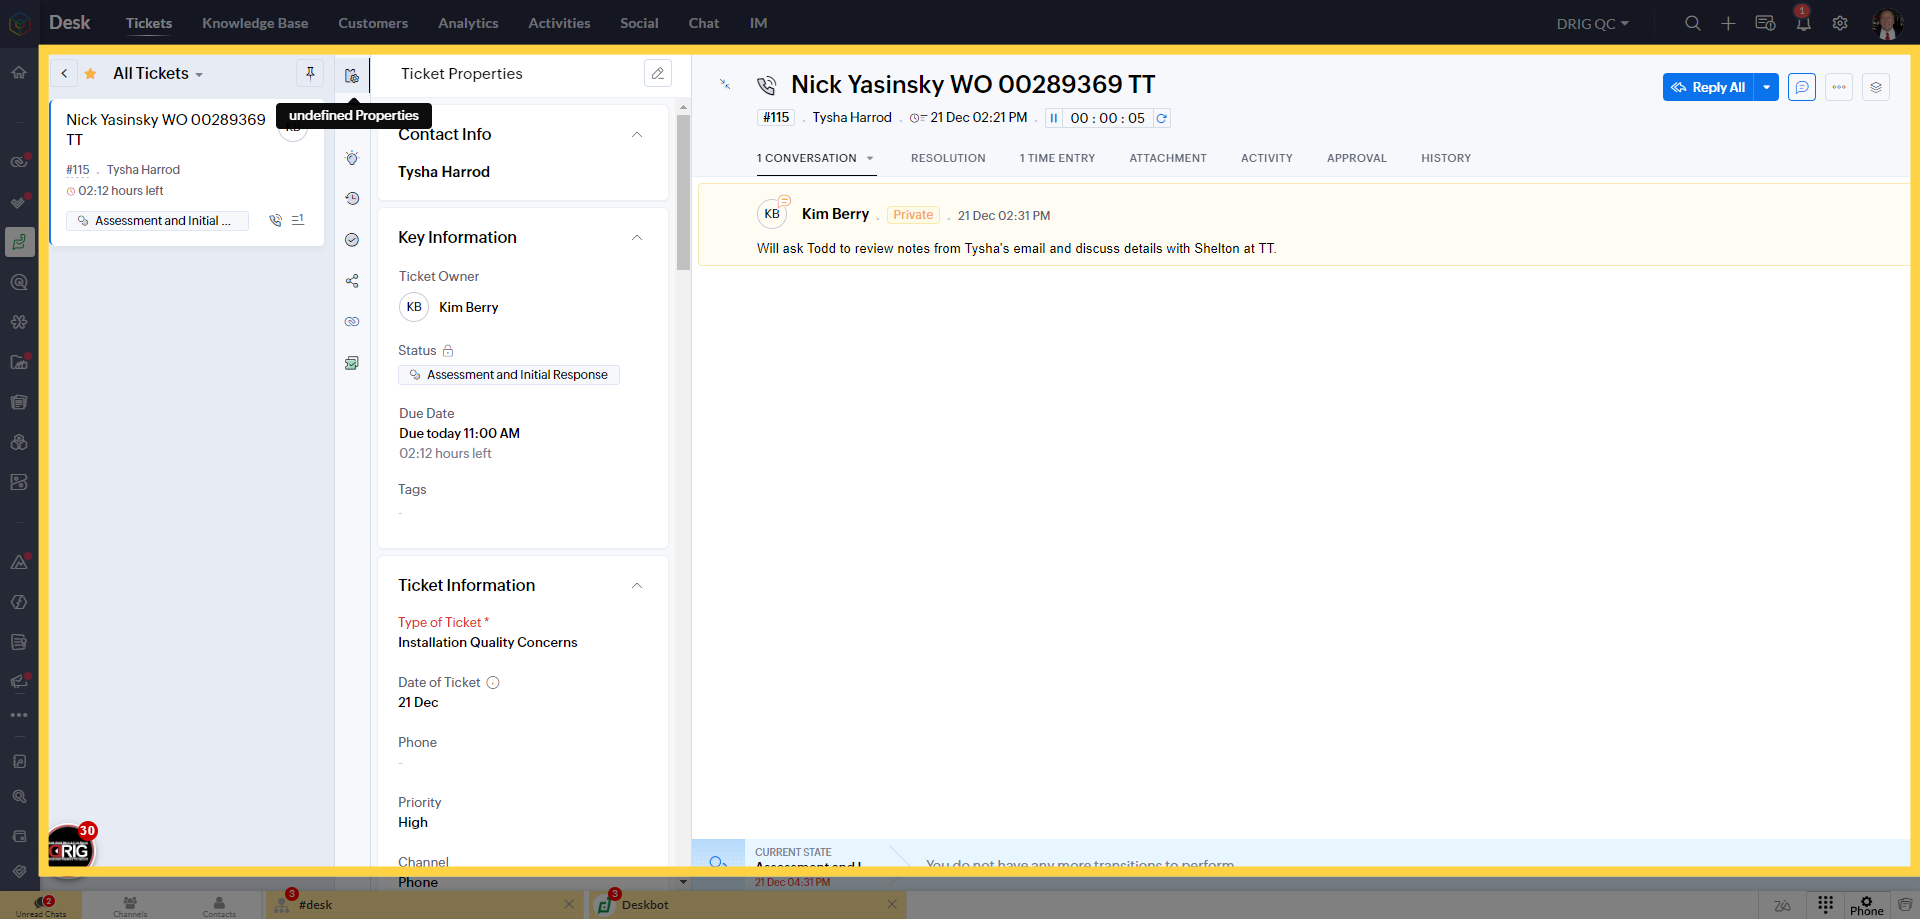
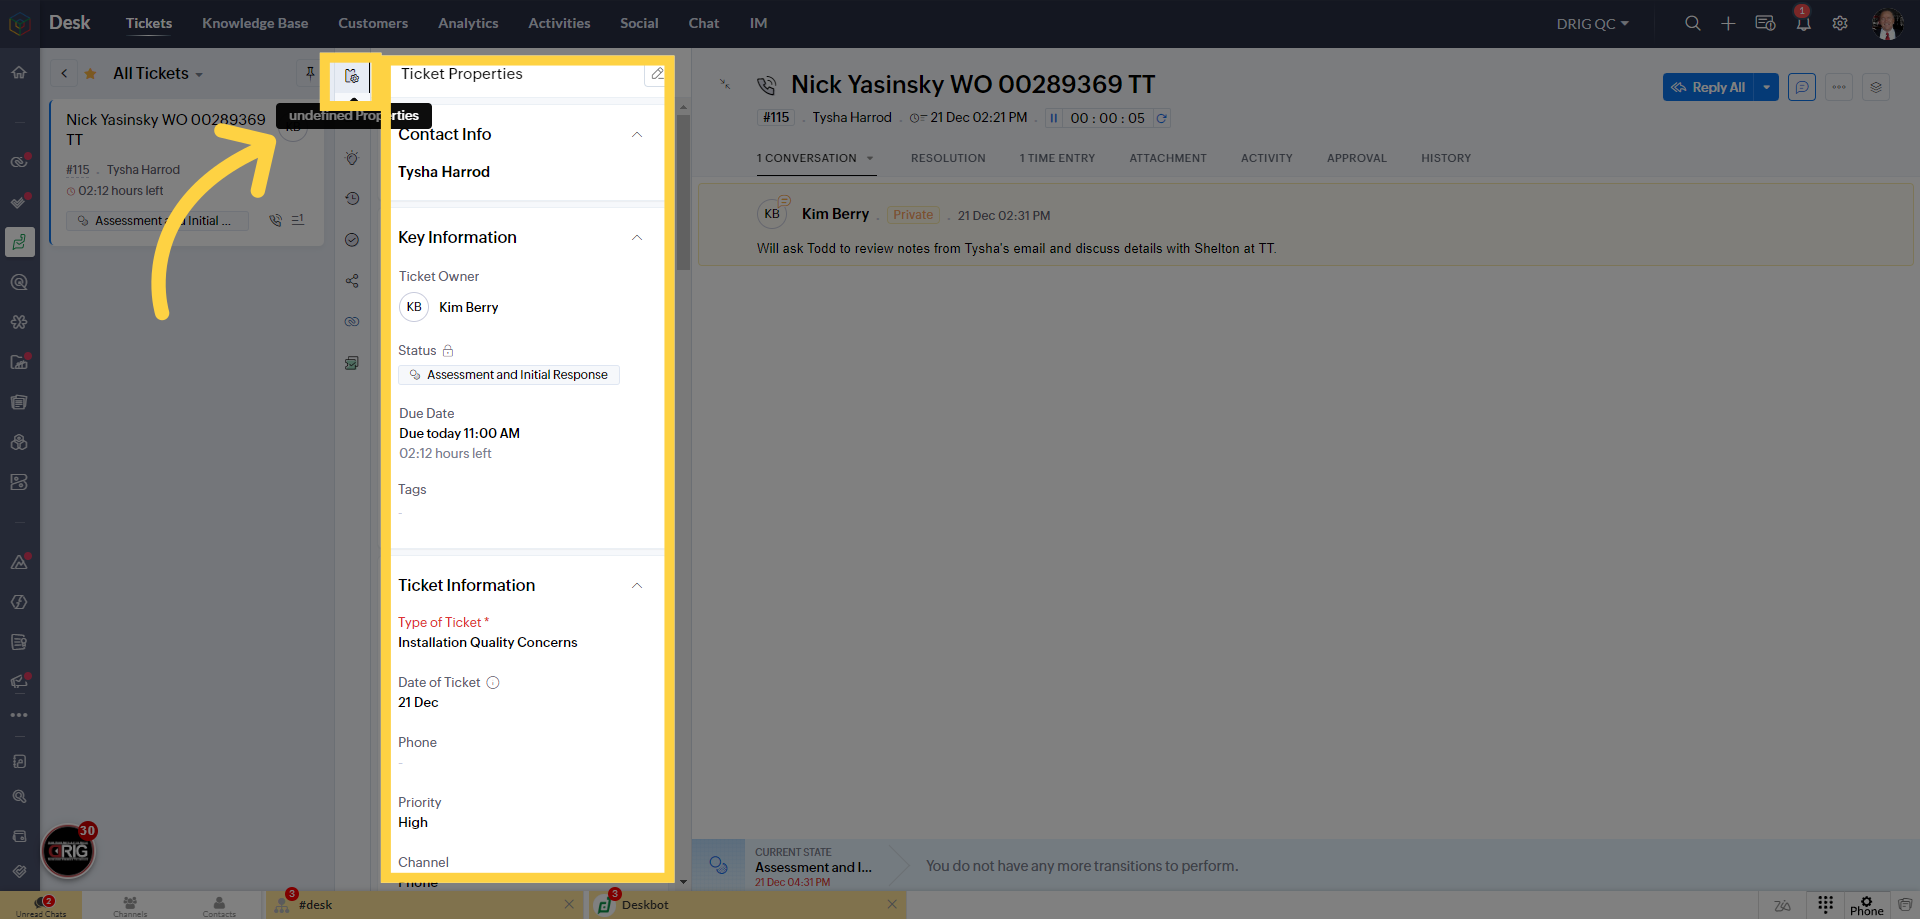
17. Click on "Ticket Properties"
To access and review all the details of a ticket, click on the Ticket Properties icon in the toolbar. This action opens a display window showcasing comprehensive information about the ticket. It's important to note that all fields in this section can be easily updated, and additional information can be added throughout the lifecycle of the ticket. This flexibility ensures that you can maintain accurate and up-to-date records, contributing to effective ticket management and responsive customer support.
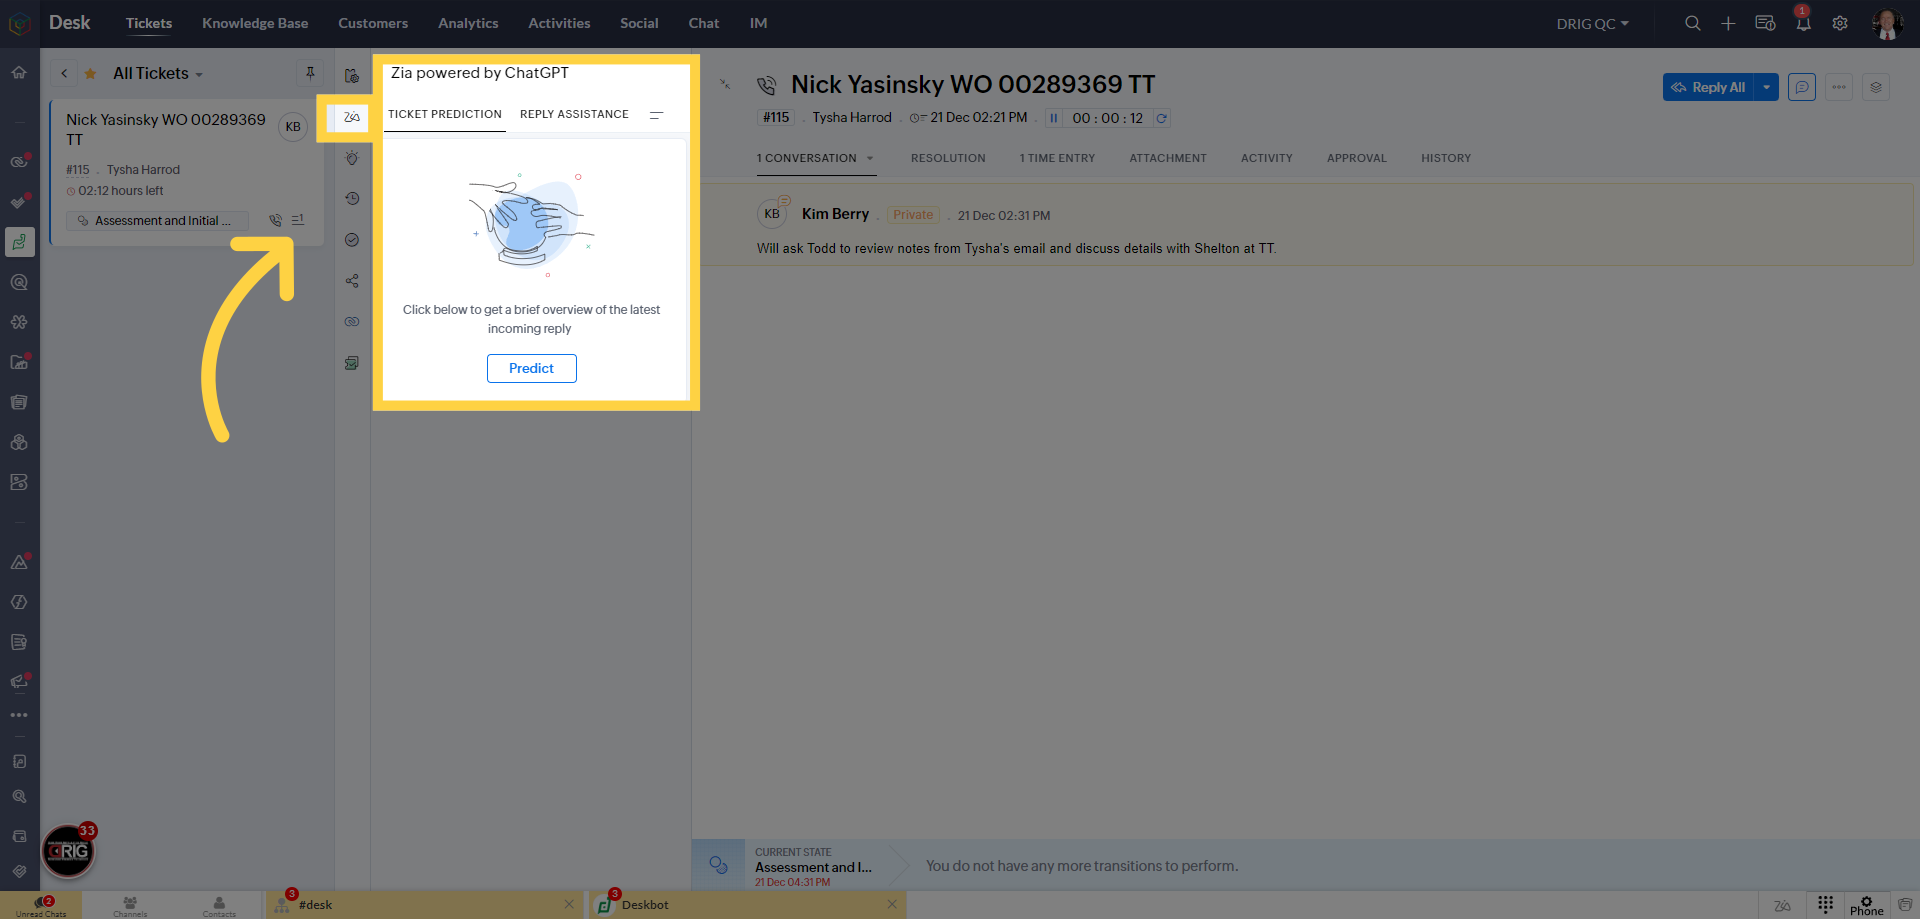
18. Click "Zia"
In Zoho, we have a powerful tool called Zia. When you click on 'Zia' in the toolbar, you unlock its capabilities. Zia, powered by Chat GPT, offers two essential features for our support staff. First, it can provide ticket predictions, a valuable resource that becomes even more useful as it accumulates data, helping streamline ticket management. Second, Zia offers 'Reply Assistance,' capable of determining tone and suggesting accurate responses. This feature ensures consistency and provides invaluable support during challenging circumstances, guaranteeing top-notch customer interactions.
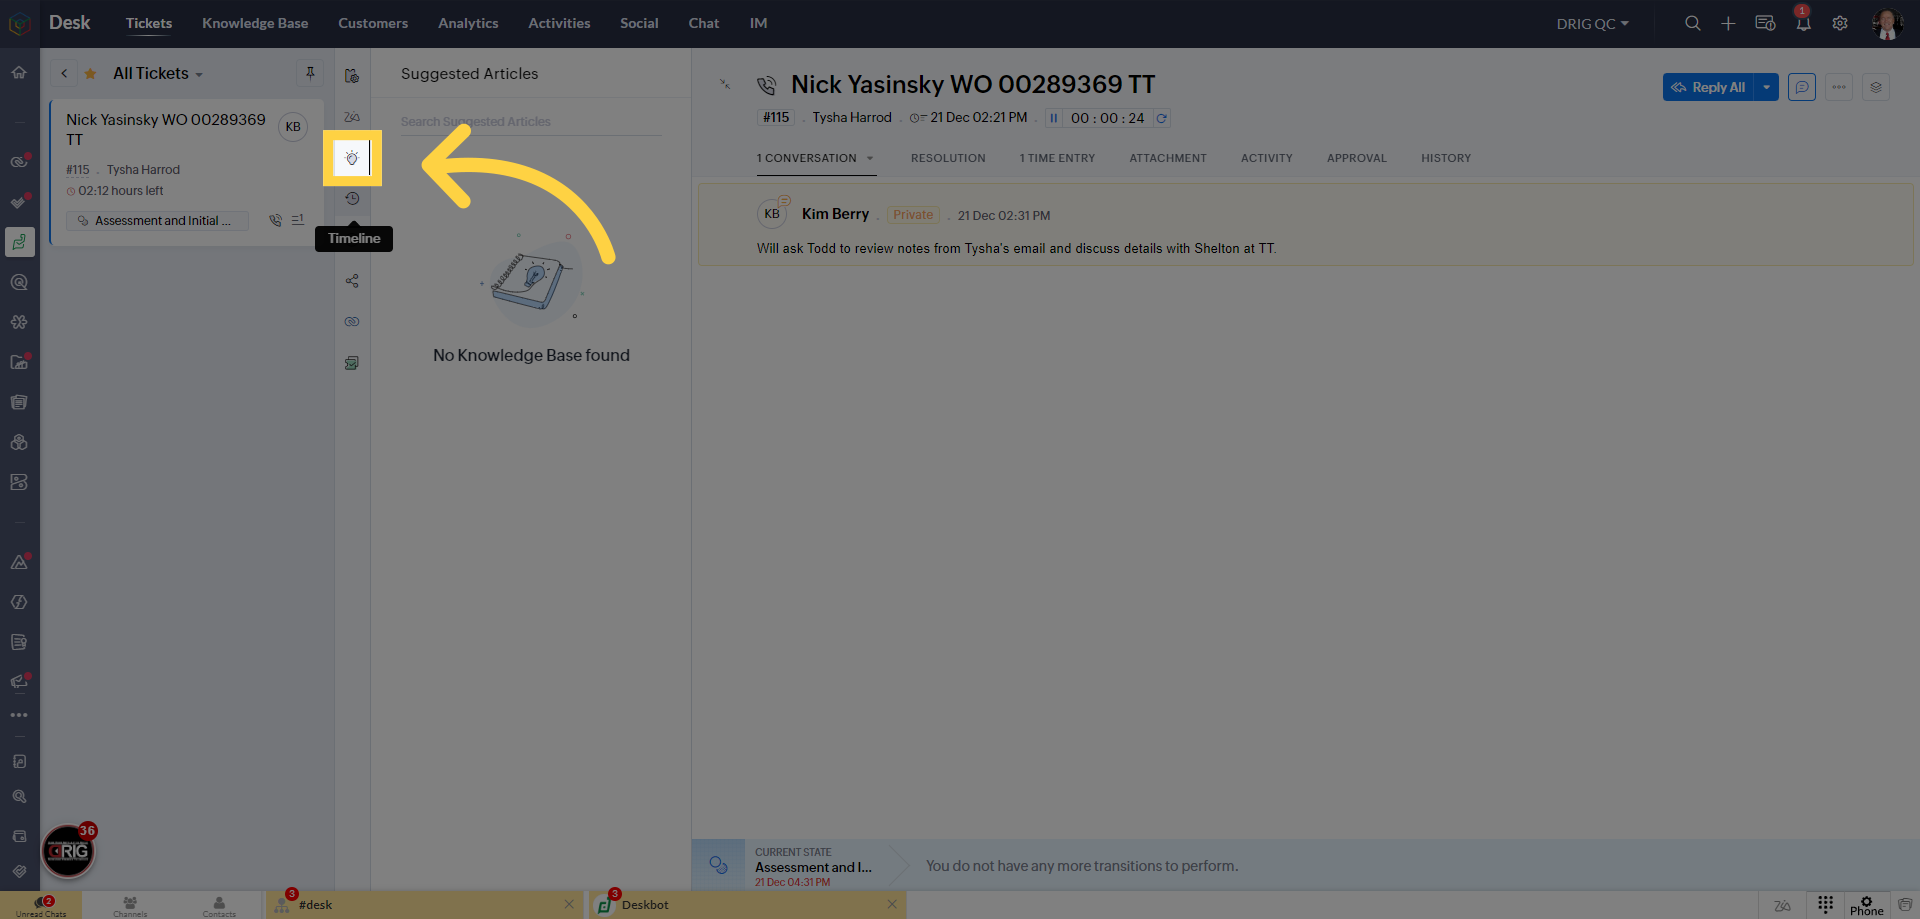
19. Click on Suggested Articles
By clicking on 'Suggested Articles,' you unlock a powerful tool in Desk. Its potential will grow as we continue to build out our Knowledgebase. This feature provides you with valuable suggestions from our expanding Knowledgebase. These articles can be a treasure trove of information to assist you in resolving customer queries and issues efficiently. As our Knowledgebase evolves, 'Suggested Articles' will become an even more indispensable resource for delivering top-notch support.
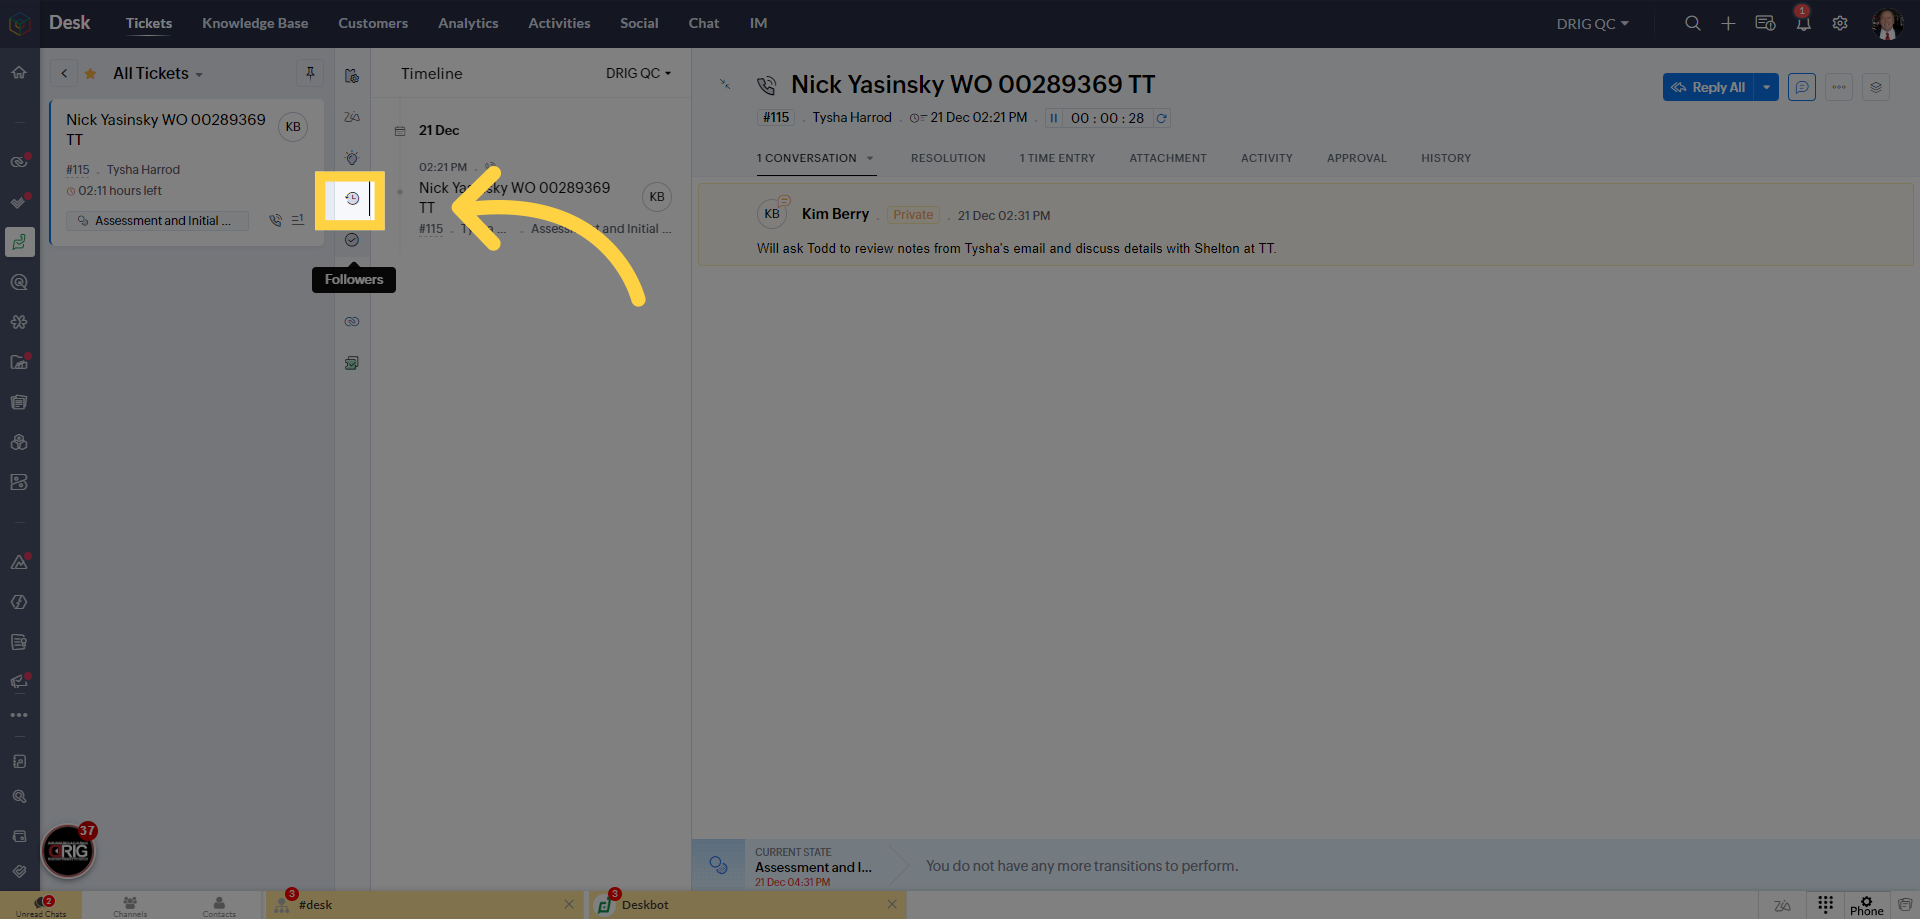
20. Click on "Timeline"
To access the timeline in Desk, click on the designated icon. The timeline is a crucial element for tracking the history and progress of each ticket. Here, you can review all the actions, updates, and communications related to the ticket, providing you with a comprehensive view of its lifecycle. This feature ensures transparency and accountability in our support process, helping us deliver consistent and informed customer service.
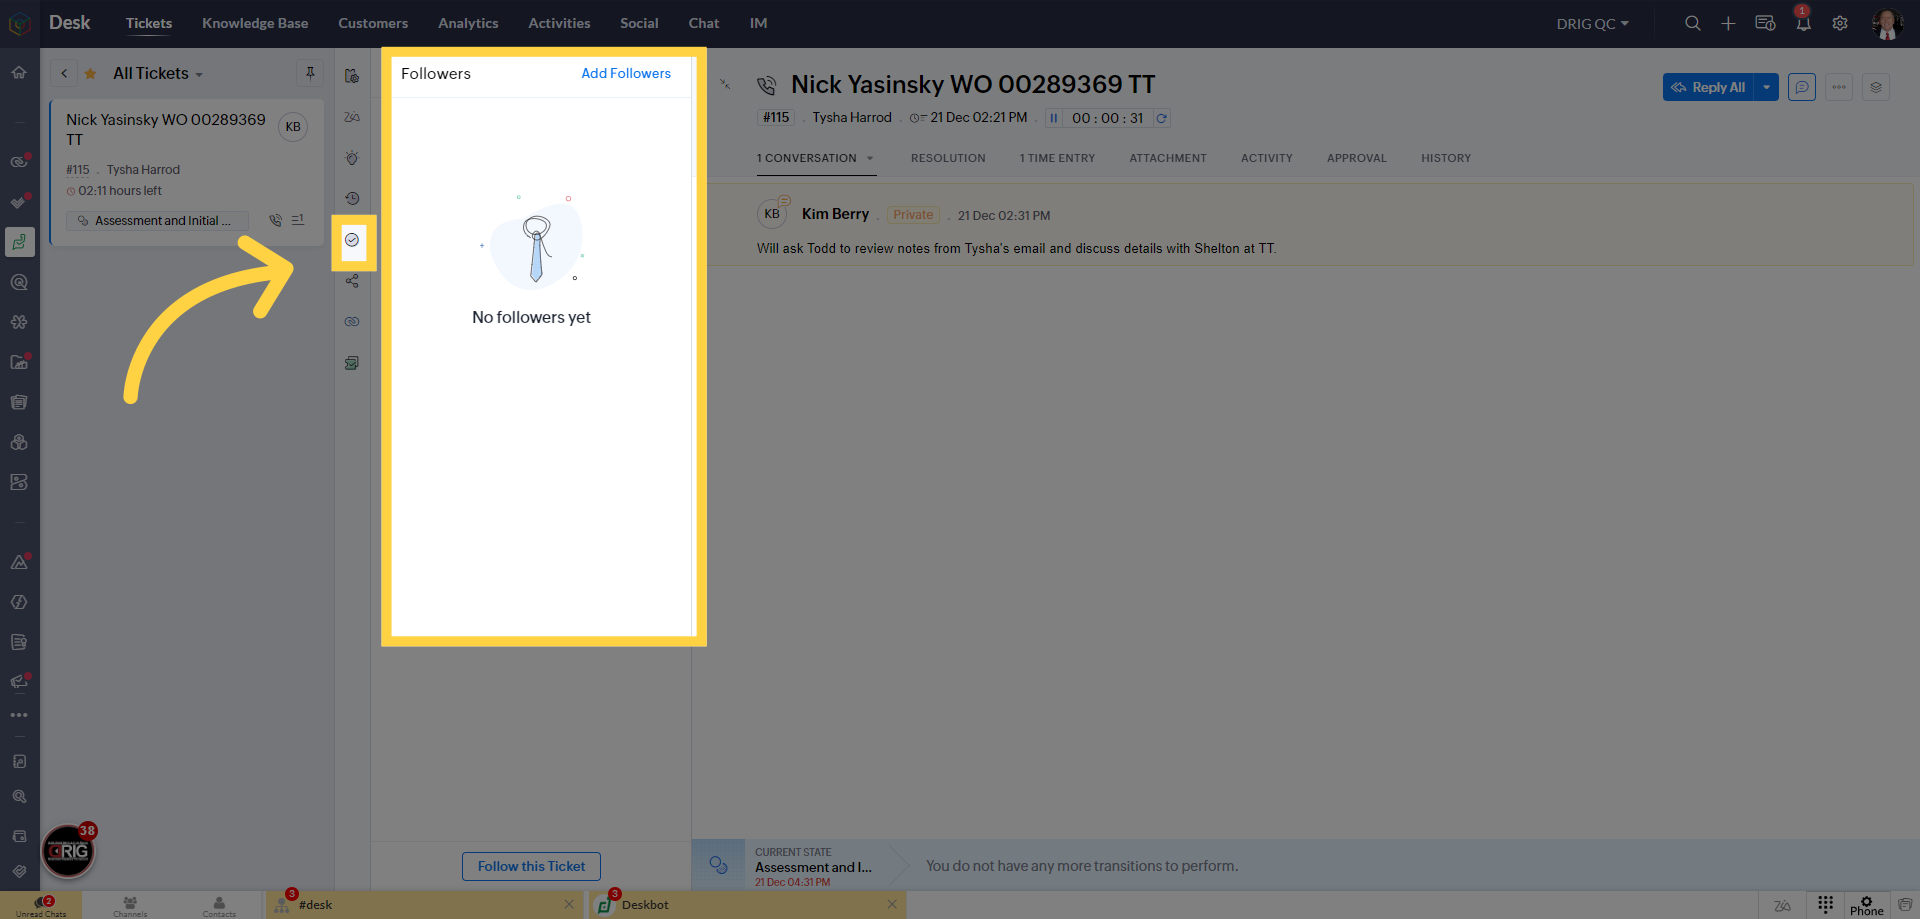
21. Click "Followers"
When you click on the 'Followers' icon in the toolbar, you engage with an important aspect of Drig's ticketing system. Followers are individuals within our support team or organization who have a vested interest in a particular ticket. By following a ticket, they receive updates and notifications related to it. This ensures that everyone involved or concerned about a ticket stays informed about its progress. Followers play a crucial role in facilitating teamwork, collaboration, and knowledge sharing within our support ecosystem.
22. Click the "Share" Icon
When you click on the 'Share' icon in the toolbar, you gain the ability to share tickets with entire departments at DRIG. This feature promotes collaboration and ensures that relevant teams are well-informed about specific tickets. By sharing, you extend visibility and streamline communication, enhancing our collective effort in delivering outstanding support. It's a powerful tool for fostering teamwork and ensuring that the right people are involved in addressing customer inquiries and issues effectively.

23. Ticket Management Work Flow
At the bottom of the screen, you'll notice the ticket flow, offering a visual snapshot of the ticket's current stage. Adjacent to it are transition buttons, each clickable, which outline the requirements for progressing to the next stage. These clear guidelines empower our support staff to make informed decisions, ensuring that each ticket moves through our support process smoothly. Understanding the ticket flow and transition requirements is essential for delivering consistent and exceptional support to our valued customers.

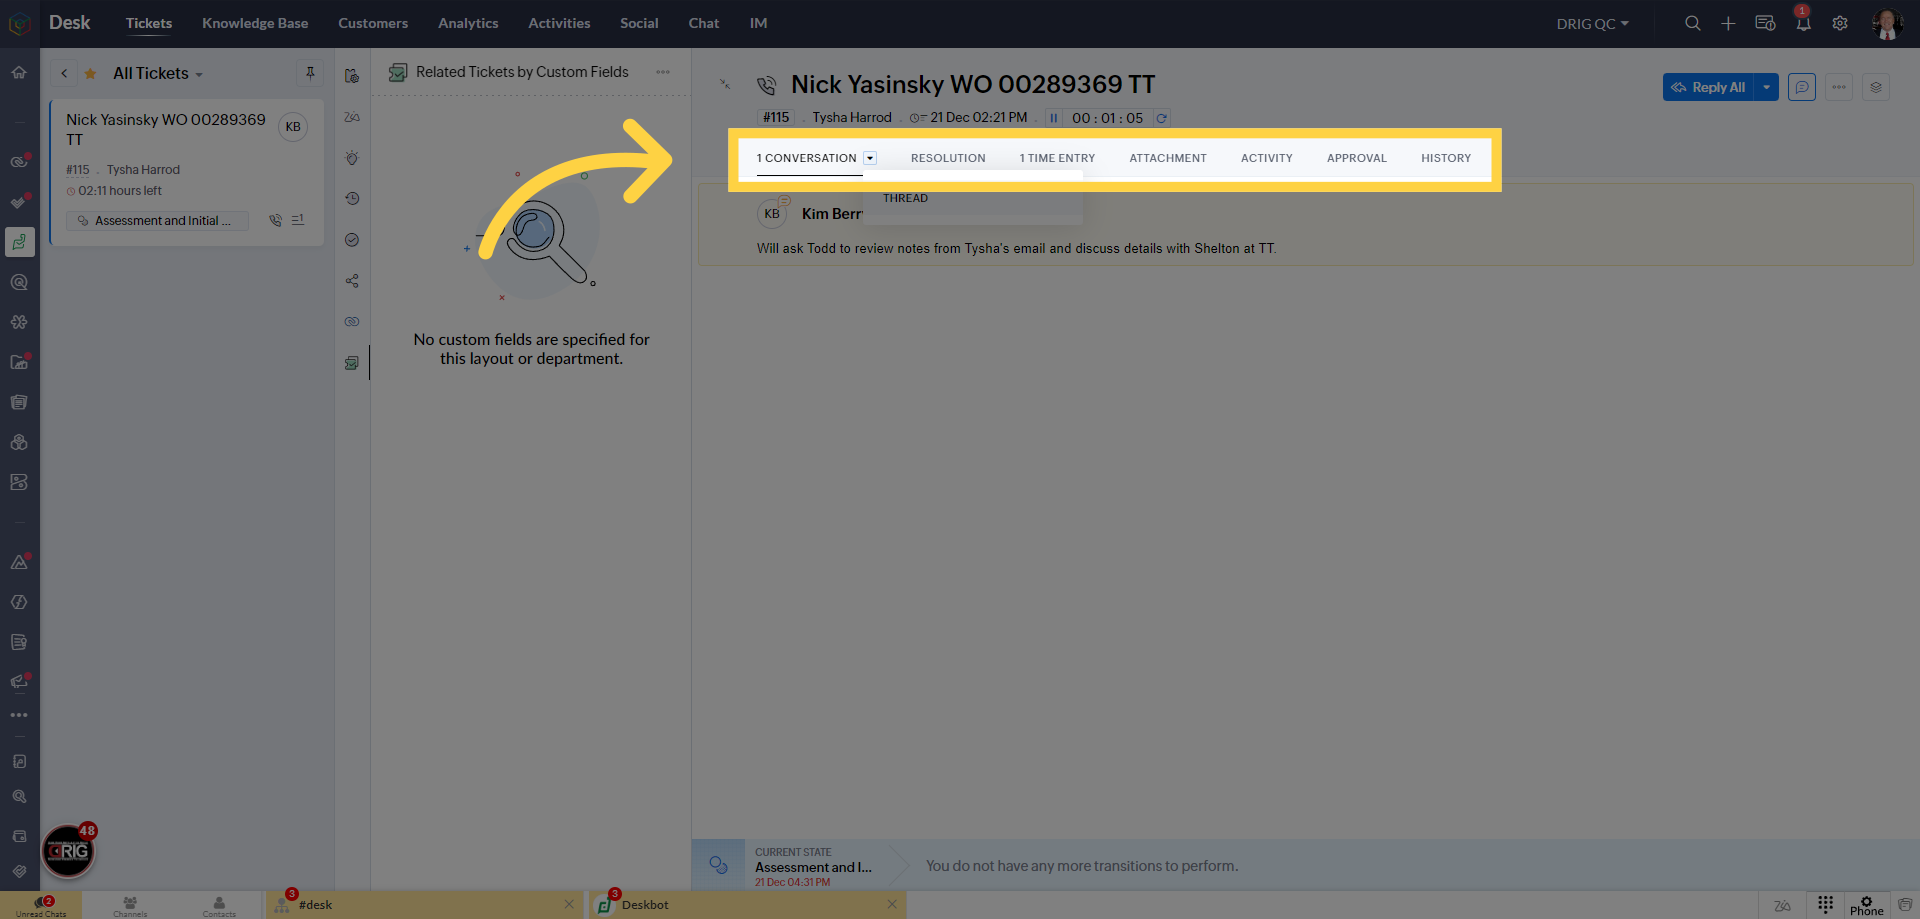
24. Managing the Ticket Lifecycle
In the ticket interface, you'll discover essential options: Conversations: For ticket-related communication. Resolution: Track and update ticket resolution. 1 Time Entry: Log billable time or activities. Attachment: Attach files for context. Activity: Record actions on the ticket. Approval: Initiate approval workflows. History: View detailed action log. These options streamline ticket management effectively.
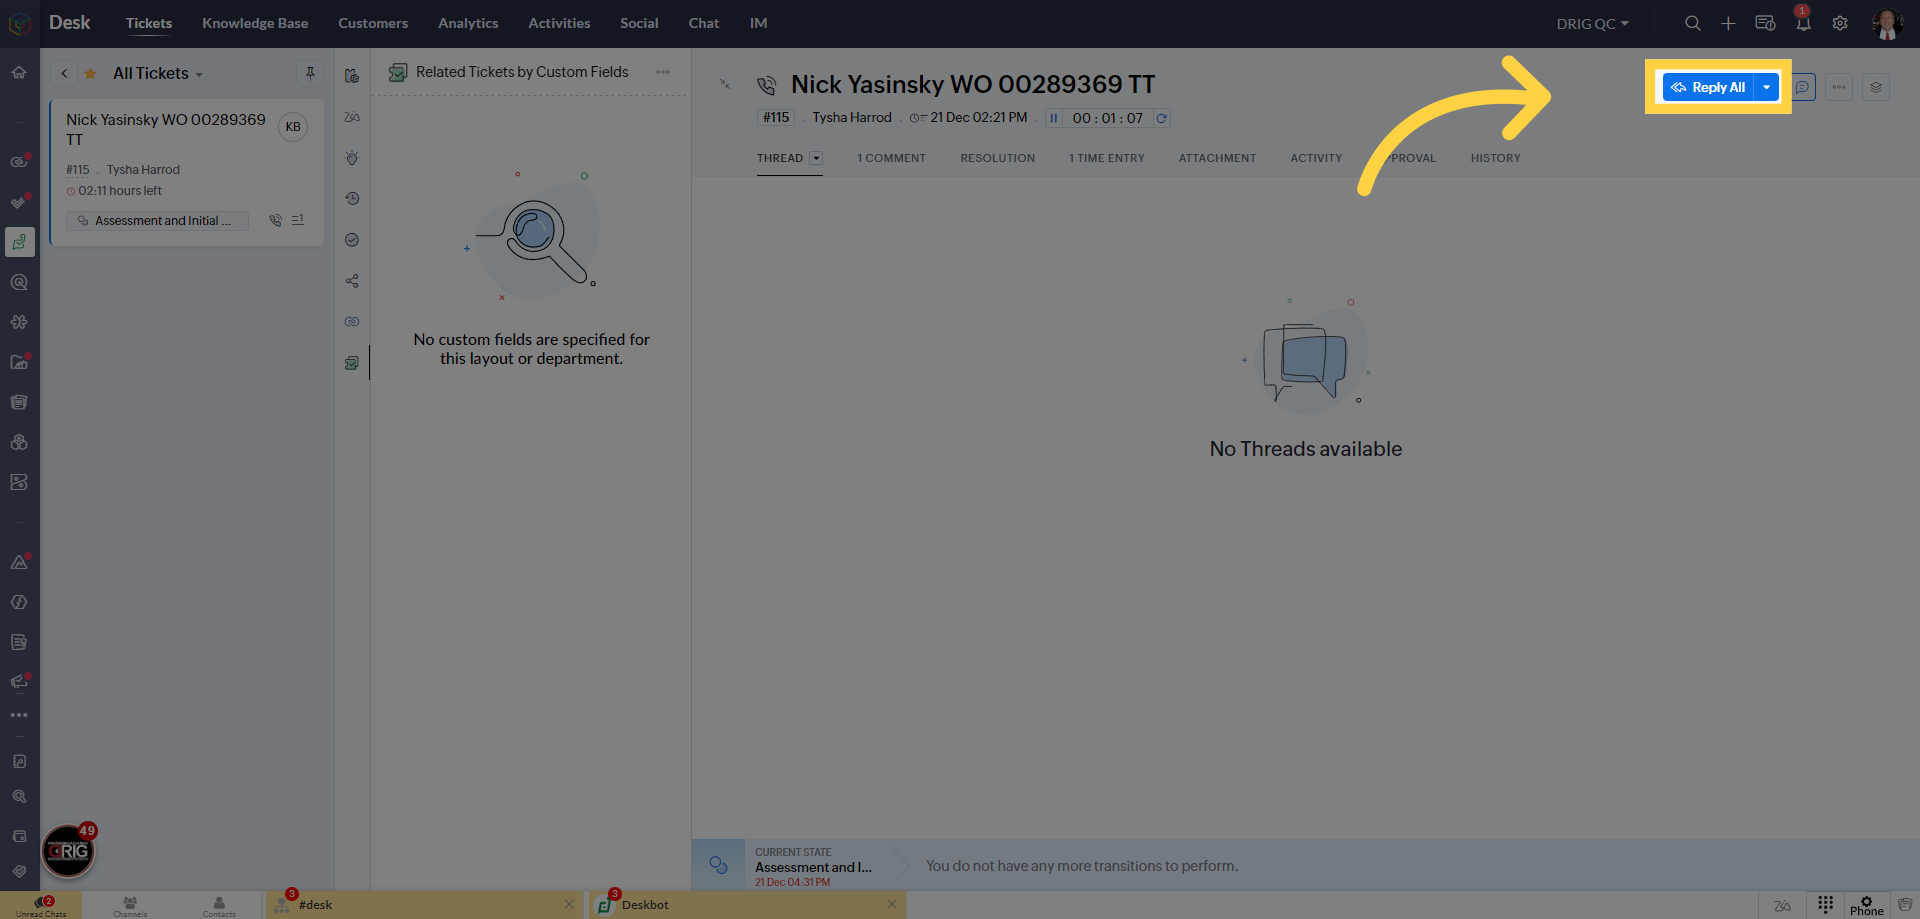
25. Use this to reply to everyone involved in the ticket or to CC individuals that need to be involved but are not using the portal.
Within Desk, you'll notice the 'Reply All' button with a dropdown menu offering 'Reply' and 'Forward' options. This is where you can efficiently CC external individuals who are not using the portal. It's a handy feature for keeping them in the loop regarding ticket updates. Additionally, we have email templates readily available, making it easy to compose and send messages. Our development department can create custom templates as needed, ensuring seamless communication tailored to specific requirements.
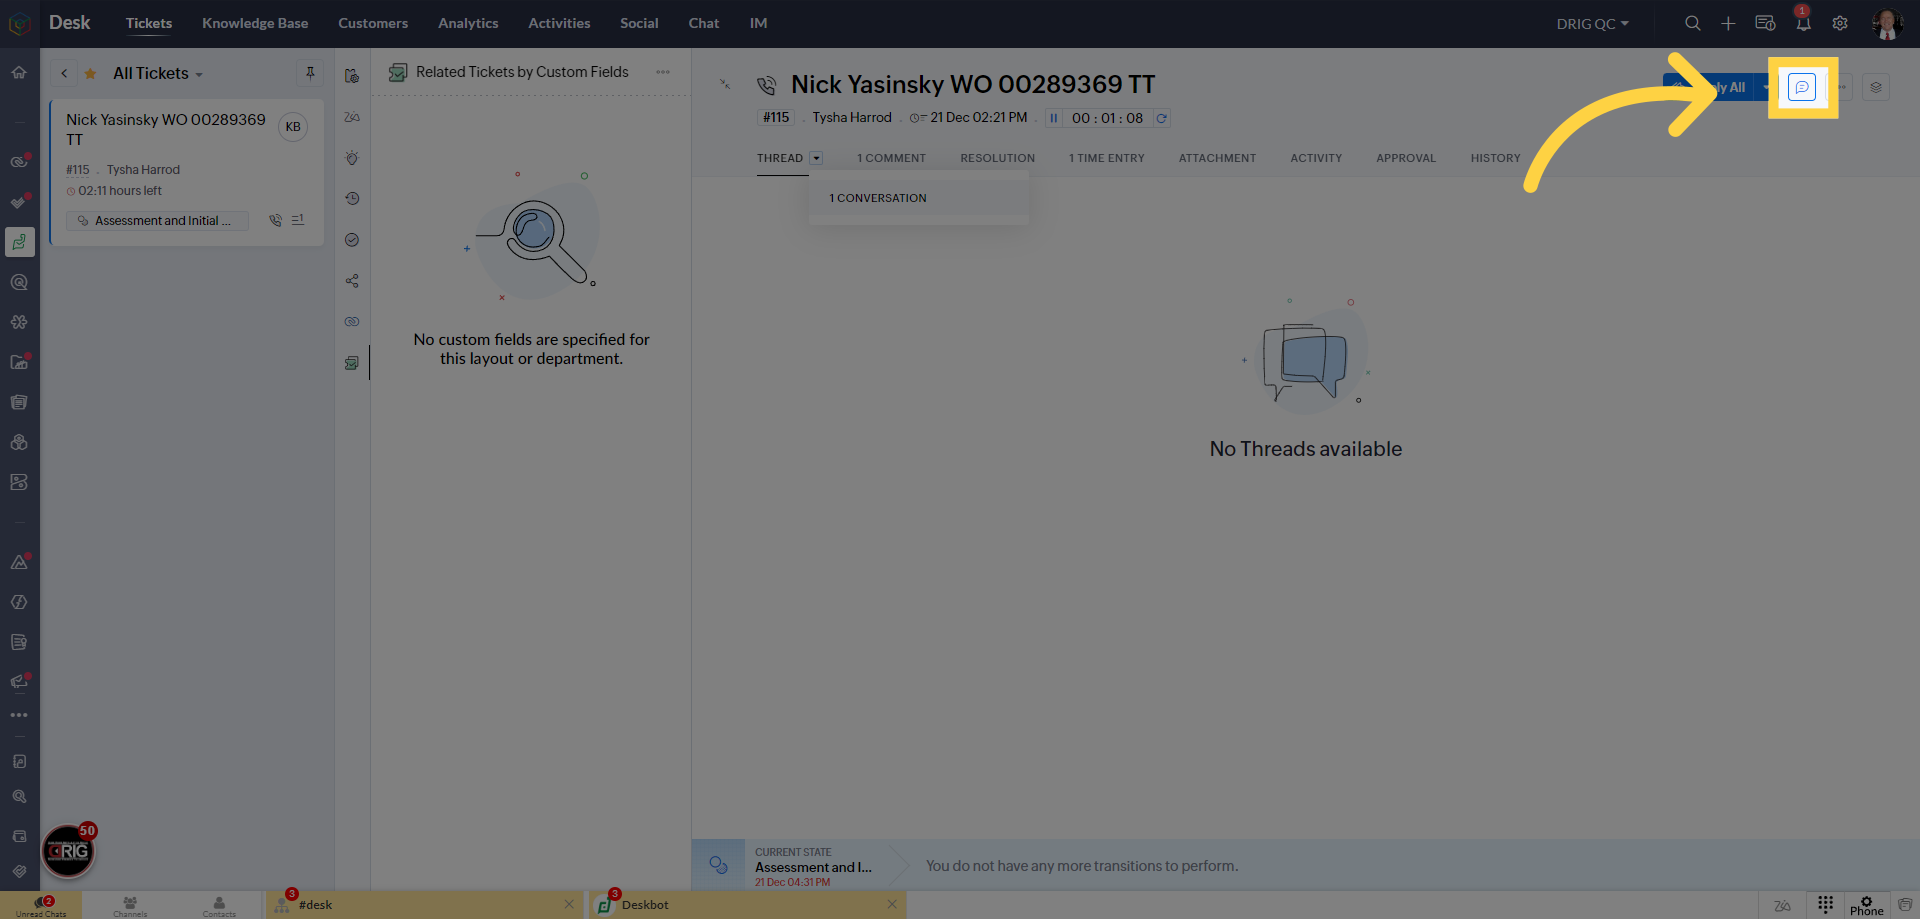
26. Click on the "Comment" icon to leave a comment. Almost every stage requires it
In Desk, the "Comment" button holds significant importance throughout the ticket's lifecycle. It serves as a fundamental tool for managing and documenting the ticket's progress. Whenever there's an update, change, or additional information needed, using the "Comment" function is essential. It allows support staff to add context, share insights, and collaborate effectively, ensuring a comprehensive record of the ticket's history. The "Comment" function is a cornerstone in delivering top-notch support, facilitating clear communication, and maintaining organized ticket management.
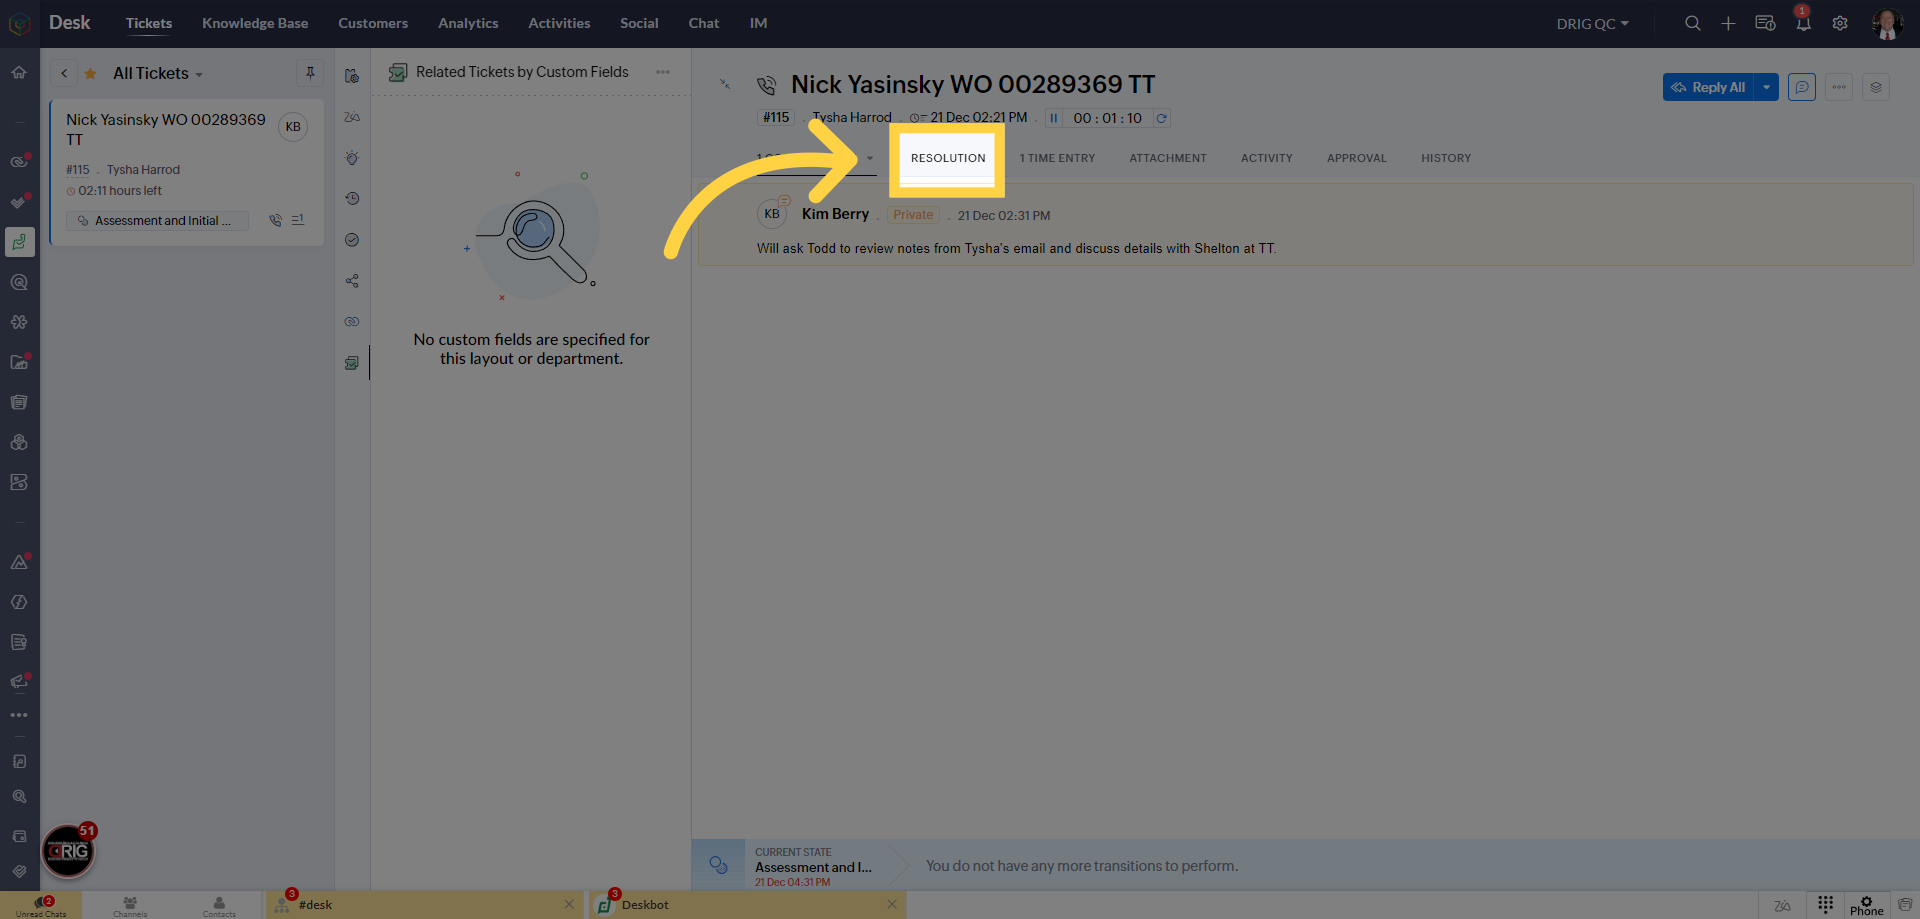
27. Every ticket requires a resolution.
The "Resolution" tab in Desk carries significant importance in our ticket management process. It serves as the final chapter in a ticket's lifecycle. Every ticket, without exception, requires a resolution at the end of its journey. This step ensures that we have a clear and documented outcome for each customer inquiry or issue. The "Resolution" tab is where we define how we've successfully addressed the customer's needs, providing closure to the ticket and offering a comprehensive view of our support efforts. It's an essential component of our commitment to delivering exceptional customer
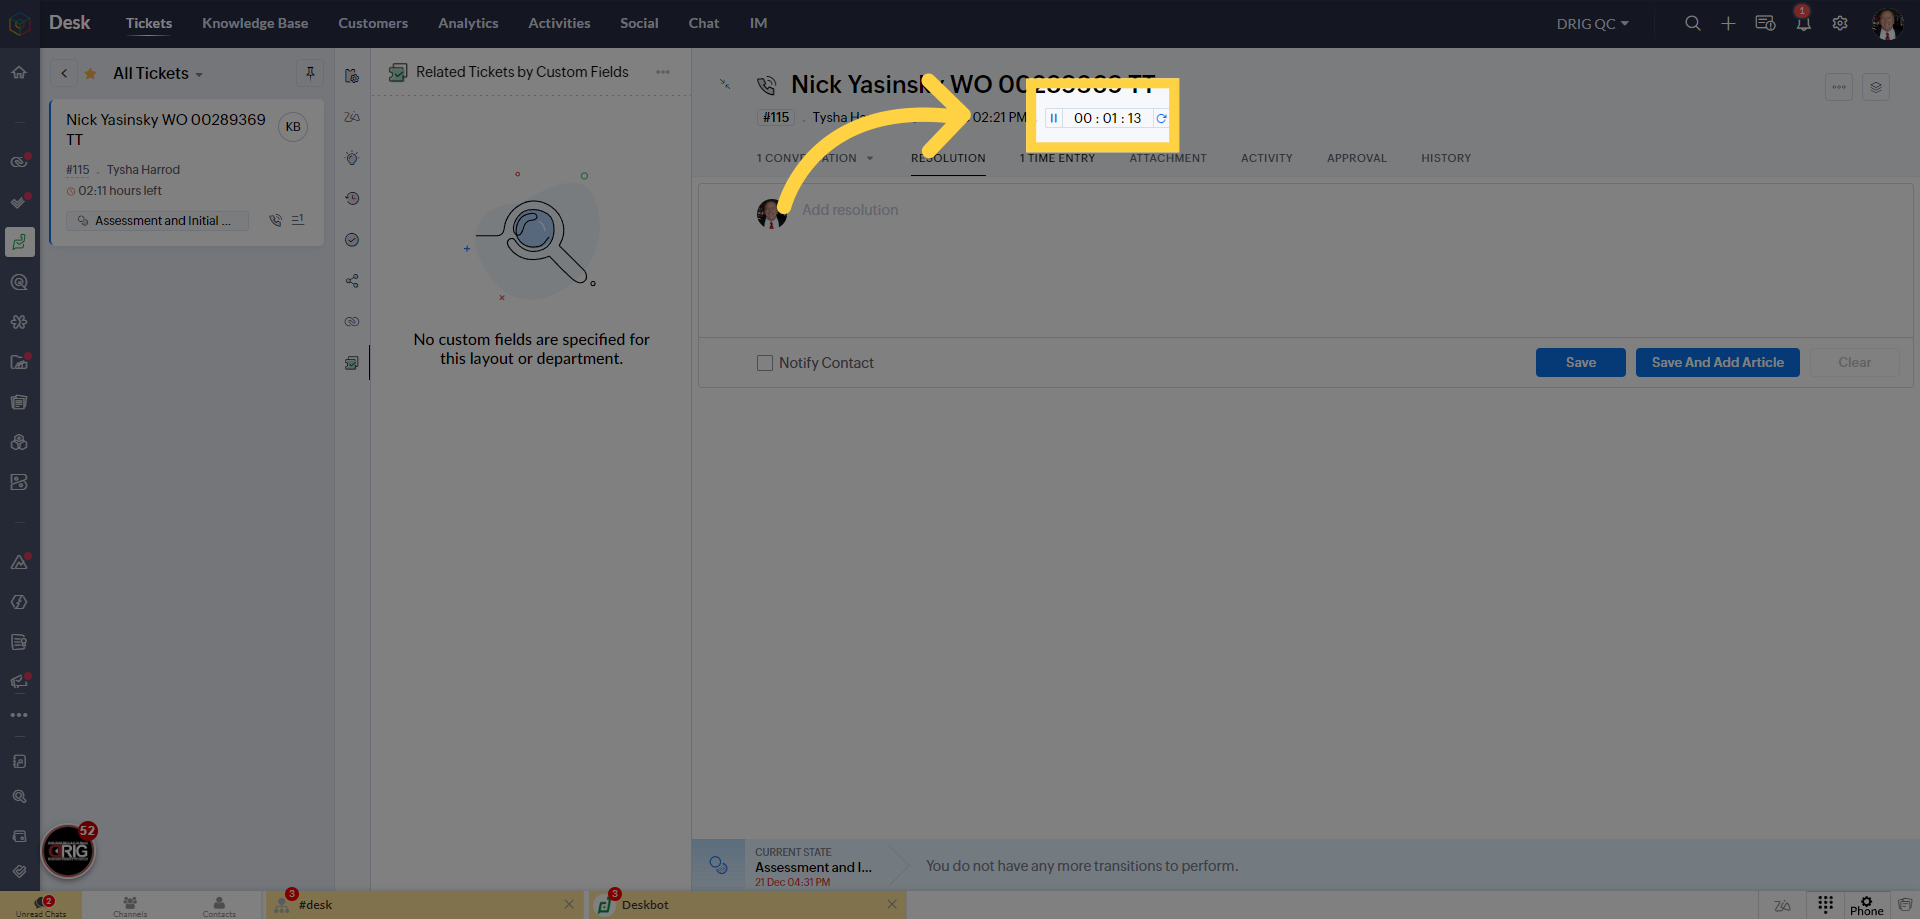
28. It's important to record the time it takes to resolve any issue.
The ability to start and stop time within Desk is a crucial feature for efficient ticket management. It allows our support staff to accurately track the time spent on each ticket. This not only helps in understanding the effort invested in resolving customer inquiries but also enables us to log billable hours for customers when necessary. Time tracking ensures transparency, accountability, and accurate record-keeping, all of which contribute to our commitment to delivering exceptional support and maintaining a high standard of service.
We sincerely thank you for taking the time to watch DRIG's high-level guide on introducing Zoho Desk and mastering the art of ticket management. Your commitment to delivering exceptional support is greatly appreciated. If you have any questions or need further assistance, please don't hesitate to reach out. We look forward to our continued success in serving our customers with excellence. I look forward to seeing you in the next training. Take care.
Related Articles
Zoho Mail - Q&A
Have a question and need some answers? Submit a ticket here - Click Here Questions From Kim Berry - Fix Blocked Emails First, the most important issue is that Verizon emails are not forwarding, which I think you already know about. I've tried playing ...How to Manage Otodata Data with the new Job Sheet App
How to Manage Otodata Data with the new Job Sheet App This guide provides detailed instructions on managing Otodata "Data" within the Job Sheet App. Make sure you are logged into Zoho, then navigate to "Creator". Here is where all the data comes ...Chain of Command for Resolutions or Concerns
Key Principle: Upward Flow Only: Concerns or complaints should always be escalated upward through the proper channels. Avoid addressing them "sideways" to peers or associates who cannot resolve the issue, as this risks creating division or ...How to Log Hours for Employees
Log Hours for Employees & Contractors This guide will navigate you through the process of logging hours for employees and contractors using Zoho People. Go to people.zoho.com 1. Introduction From selecting users to confirming timesheets, follow the ...Clock-In & Clock-Out
This guide will walk you through the process of clocking in and out using DRIGs mandatory Clock-In and Clock-Out feature. We utilize Zoho Cliq, which is also used for chatting through-out our organization. Go to one.zoho.com 1. Hover to the left to ...